It’s a VTiger extension that enables users to create advanced custom fields. It currently supports 3 types of fields:
“HTML Description” – that is a rich text description field with ability to format text, upload images, add bullet points.
“Assigned To” – which is a picklist with user list, identical to standard “Assigned To”. It also supports workflow emails to groups (assigned to).
“Upload” – where you can upload images/files and attach them to records.
Creating Advanced Custom Fields
New Advanced Custom Fields can be added from Field Layout Editor in VTiger CRM.
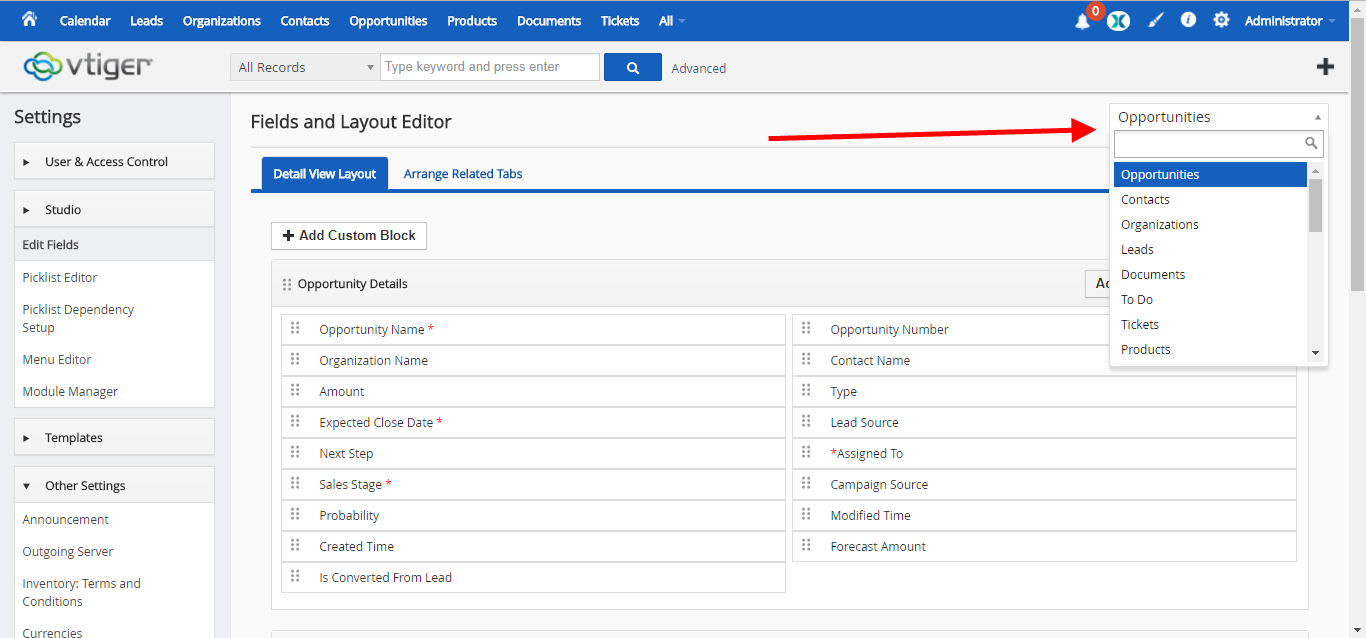
For VTiger 6, in any module, click the Ranch icon at top right and click “Edit Fields”, or go to CRM Settings > Other Settings > Advanced Custom Fields

For VTiger 7, go to the Main Menu > CRM Settings > Module Management > Module Layouts & Fields. Or by going to CRM Settings > VTiger Premium > Advanced Custom Fields
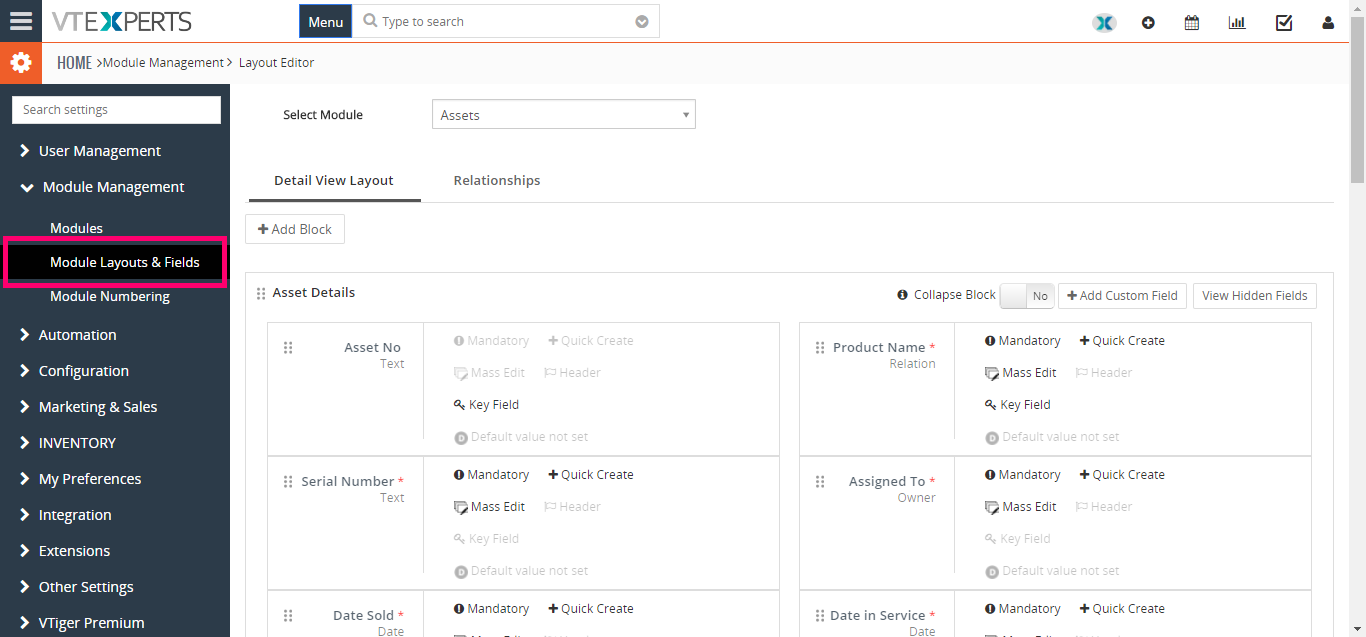
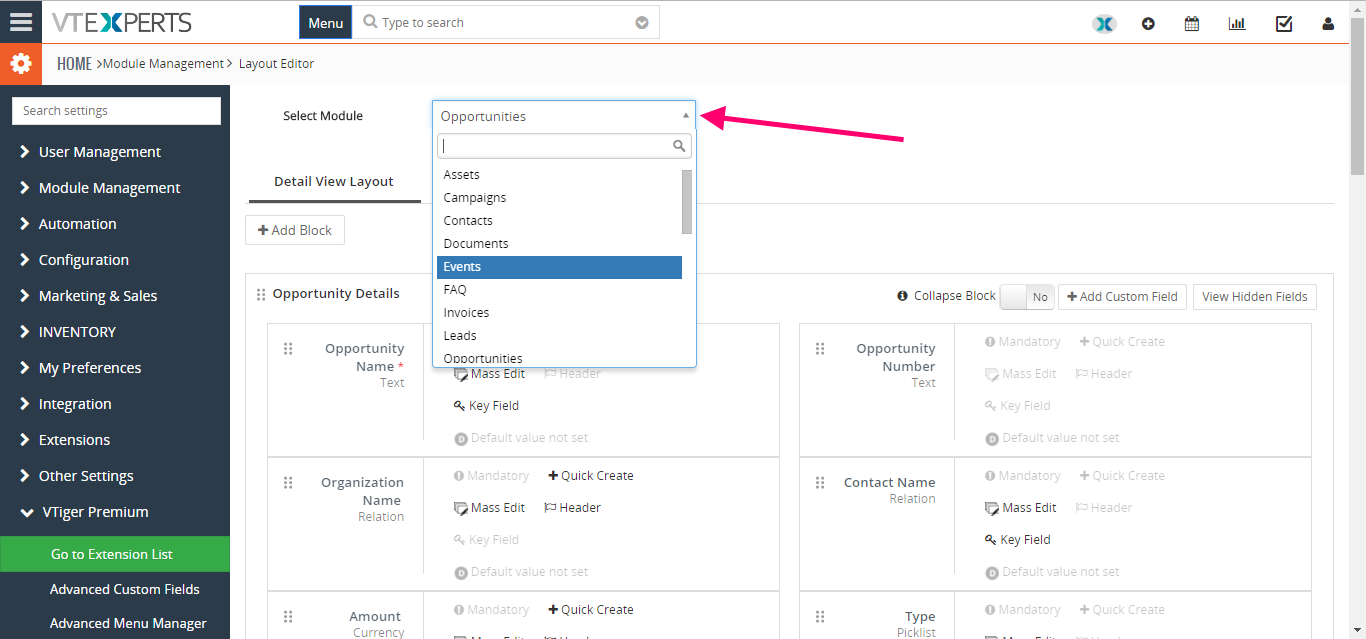
Select the module you want to add the advanced custom fields to
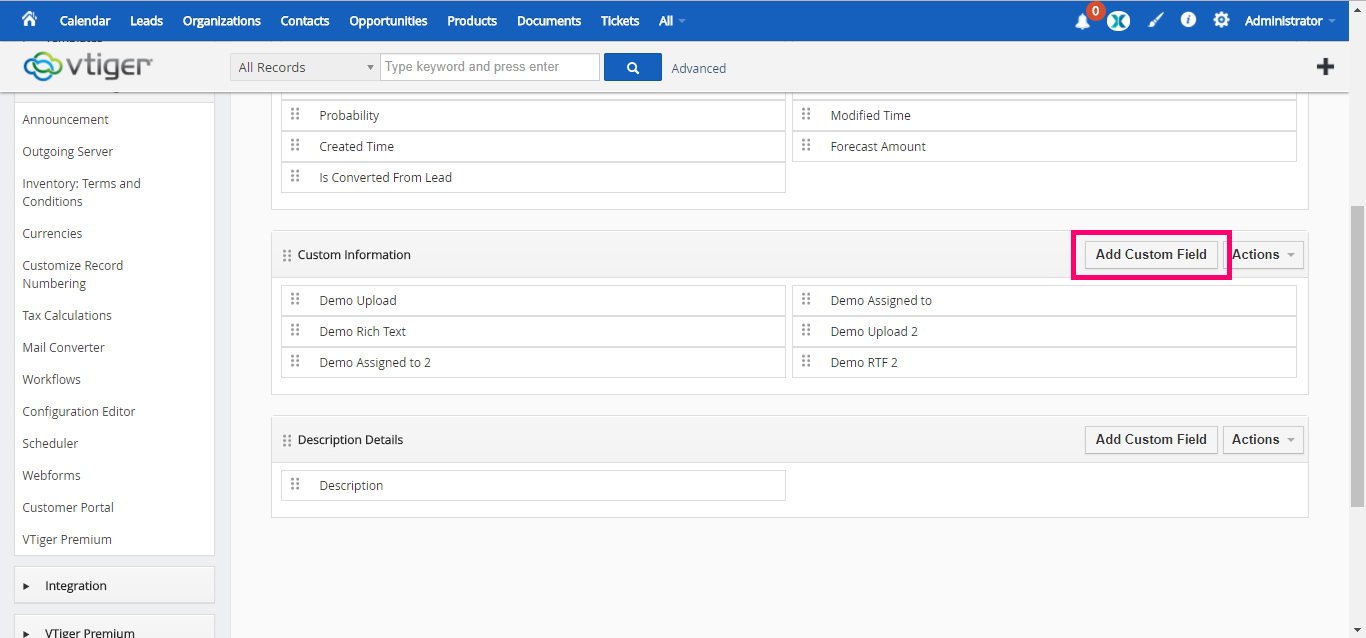
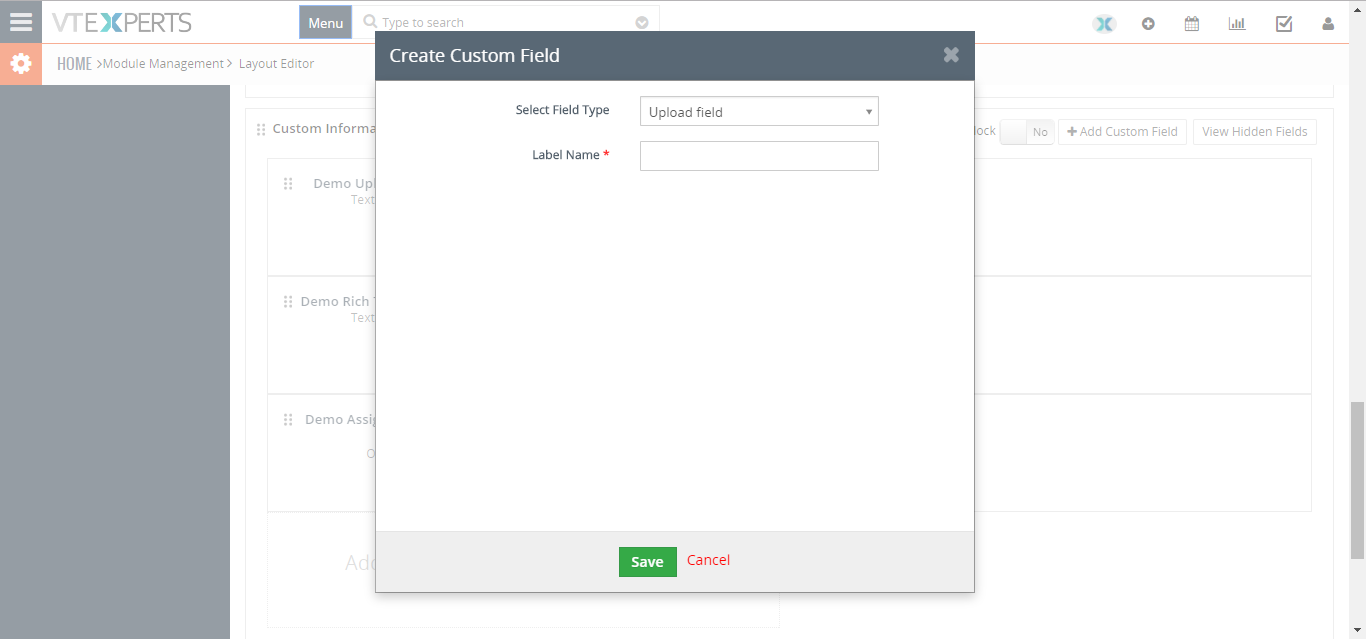
In the block of your choice, click the “Add Custom Field” button

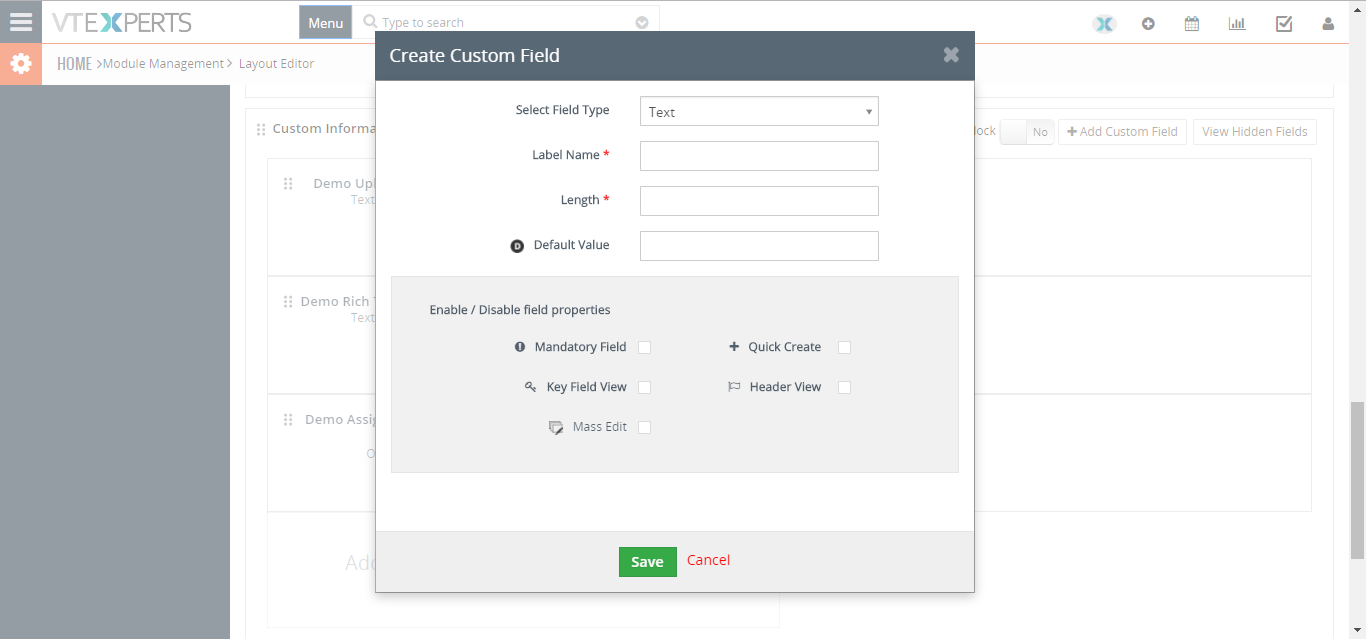
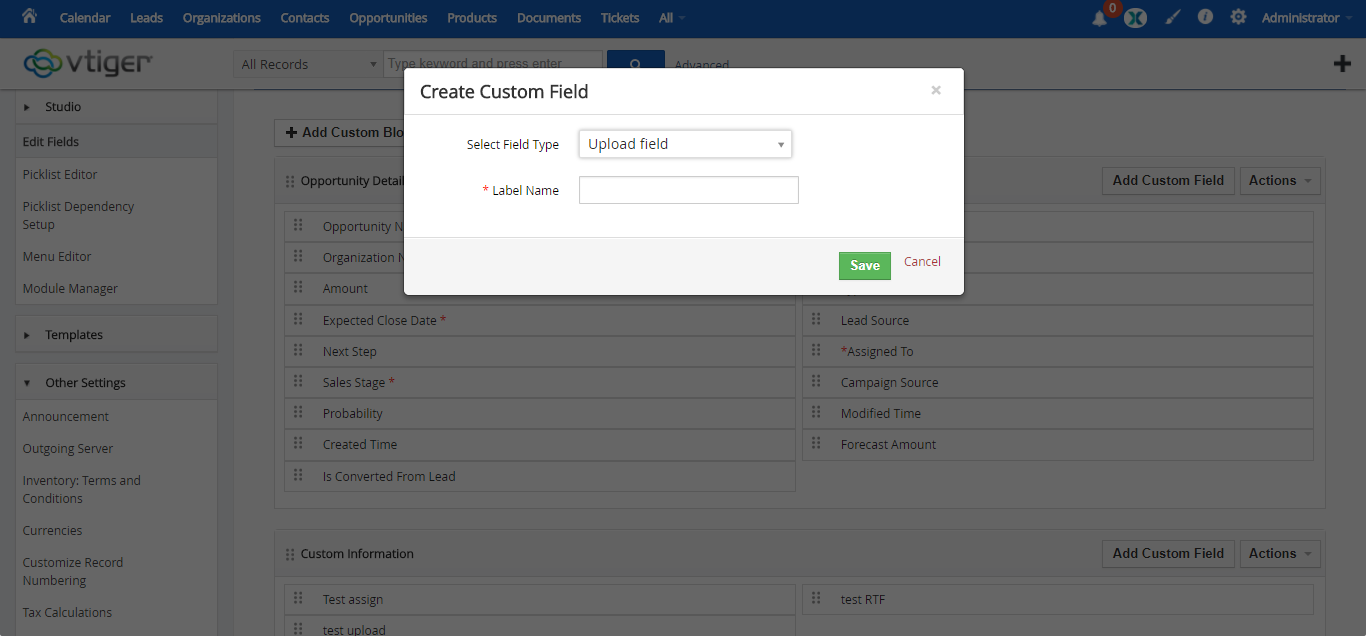
A popup will appear with the default settings of adding new fields

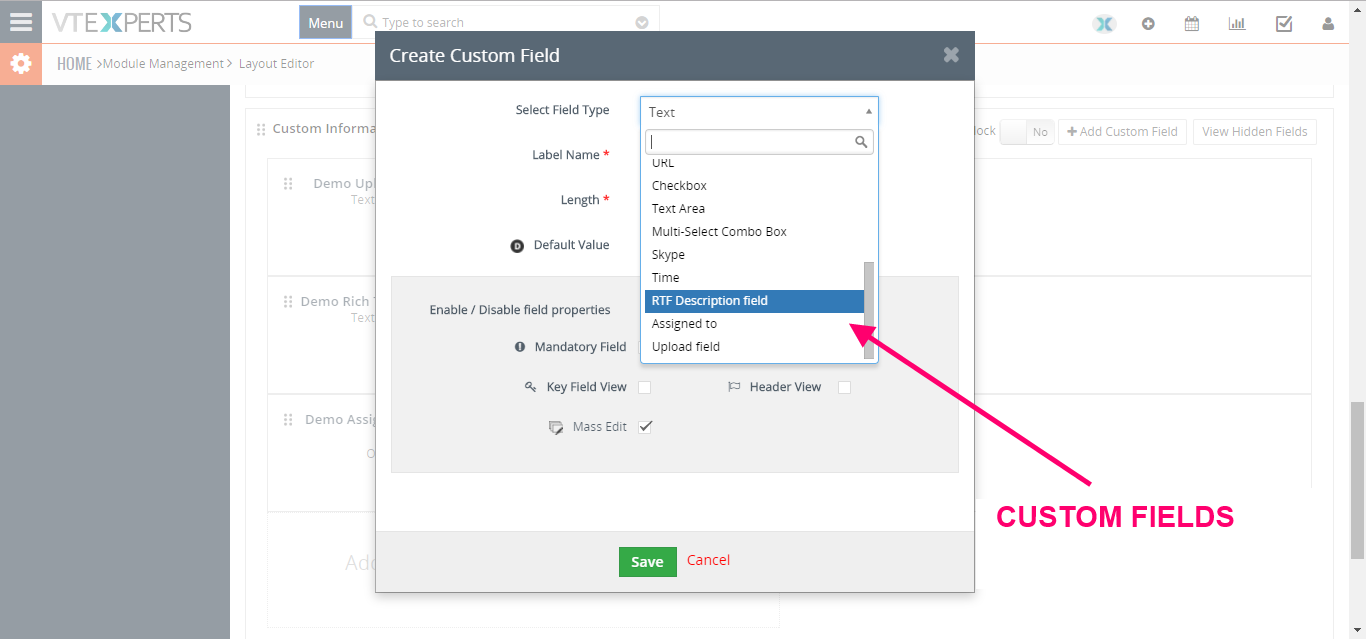
Select Field Type: for advanced custom field options, you need to click the picklist and scroll all the way down to bottom of list. You’ll see the 3 custom field options i.e. “RTF Description field”, “Assigned to”, and “Upload”. Select the custom field type you want to create
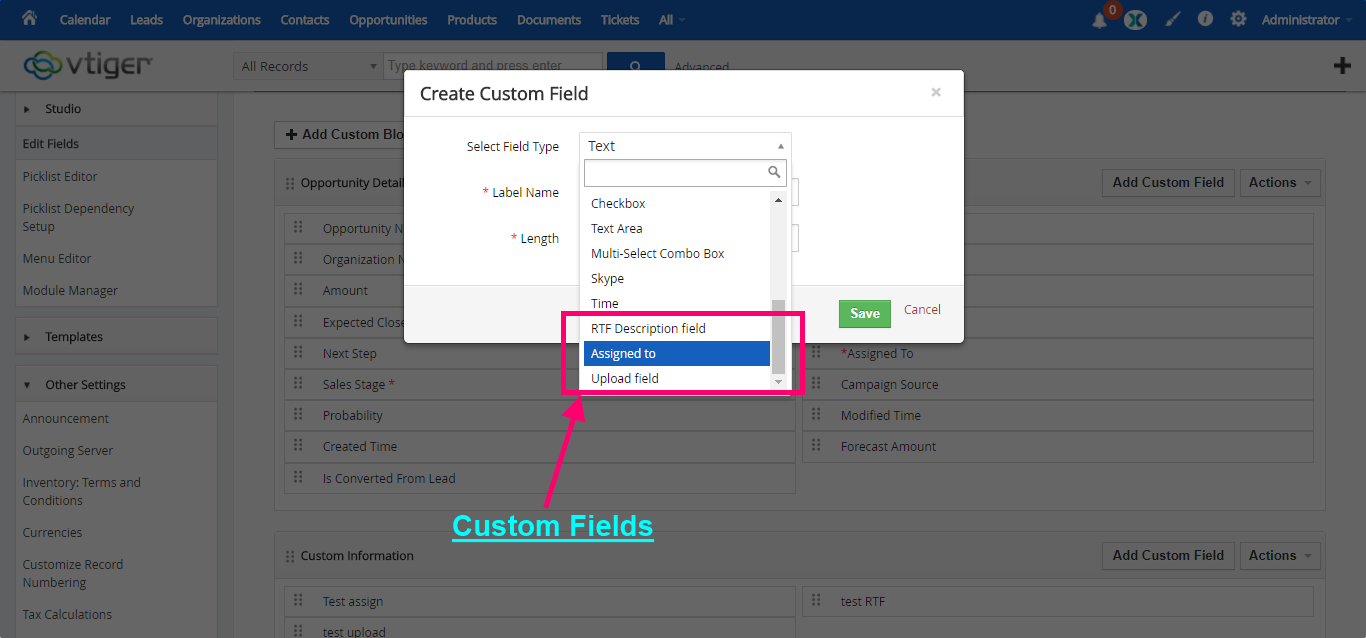
Label Name: once you select a custom field type, the remaining settings will change and you’ll only see “Label Name” field. Assign a name to the new custom field
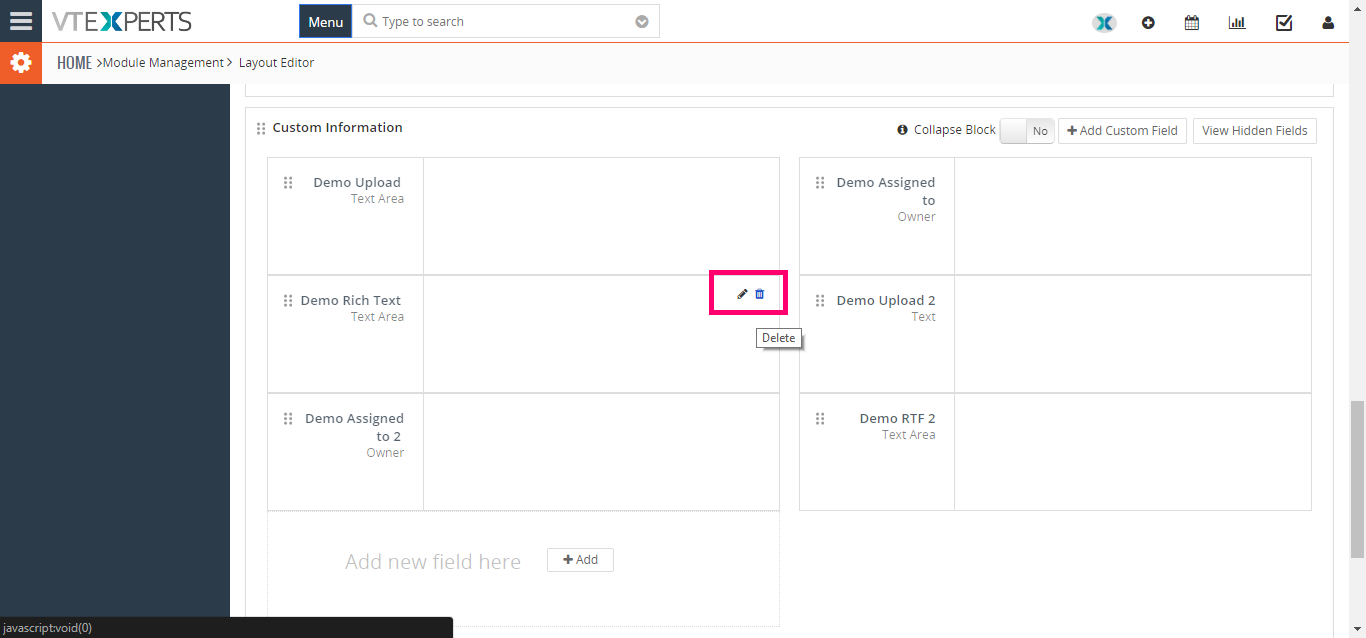
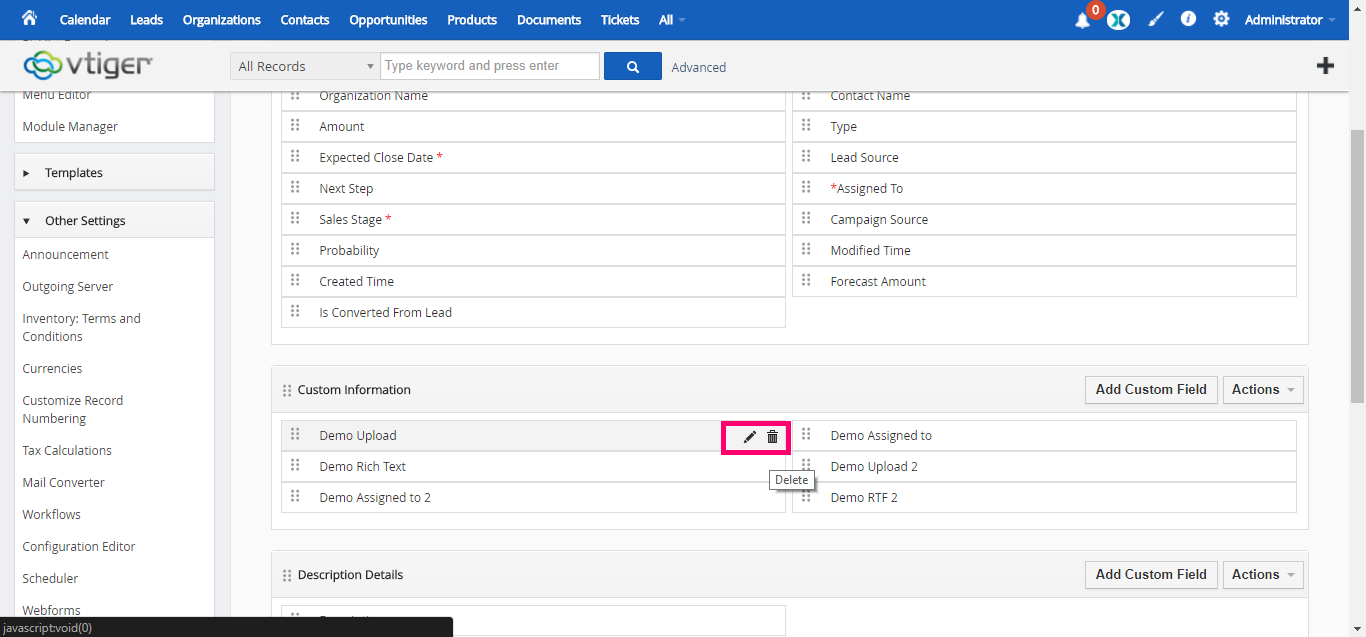
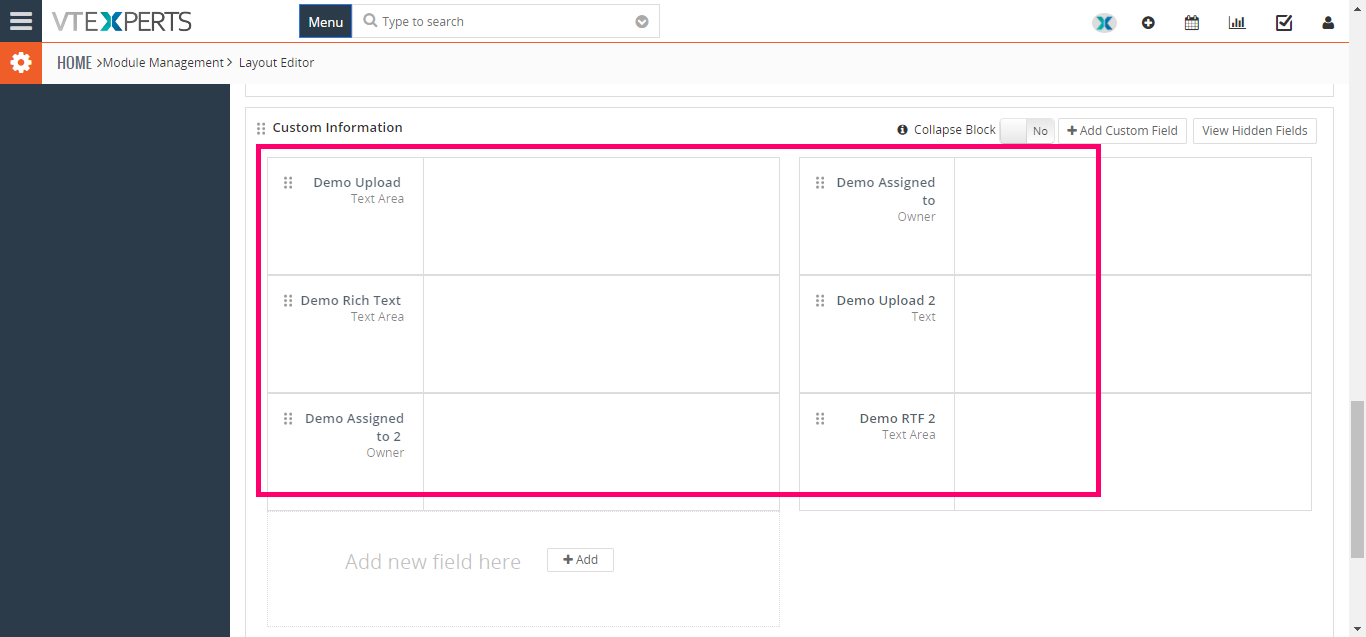
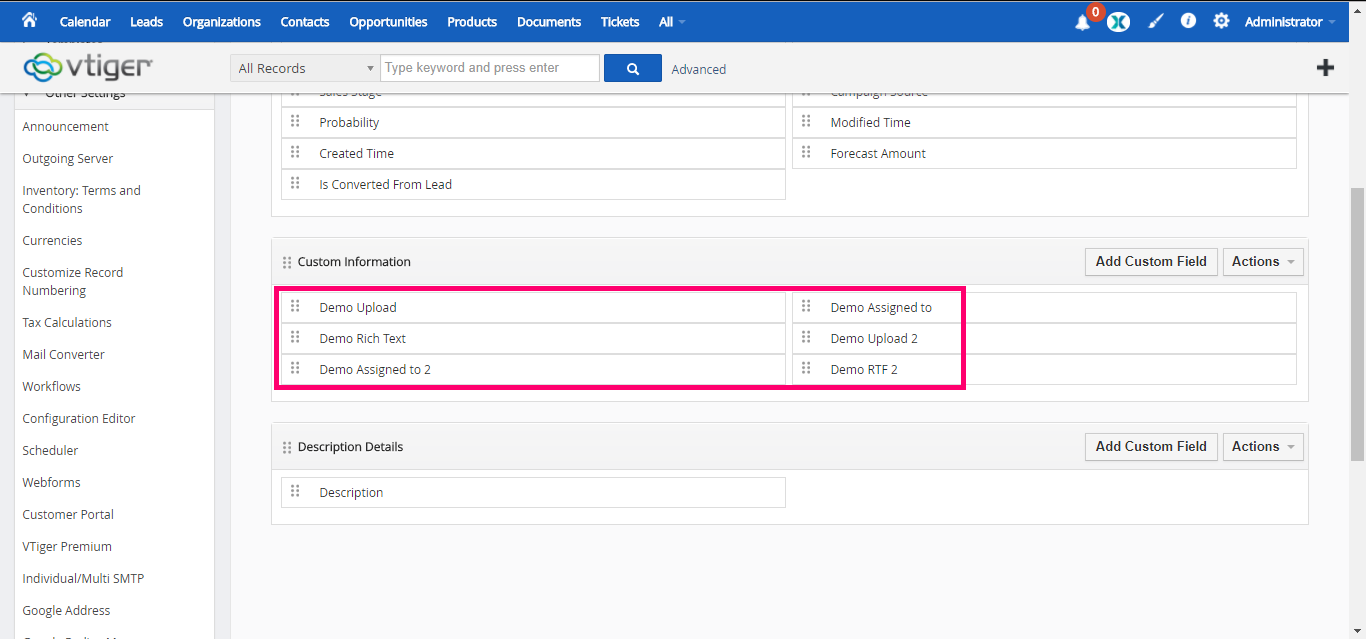
Now the Advanced Custom Field has been created and can be configured as any other field in Field Editor. Here are 6 demo fields (two of each type).
How do the Custom Fields Work?
I created 6 custom fields (see screenshot above) in the Layout Editor of VTiger CRM. Let’s see how they work in the module. Note that the module I selected was “Opportunities”.
Now when we open the module “Opportunities”, and add a new record, all the newly created custom fields are available. They are arranged in the way how we arranged them in the Field editor.
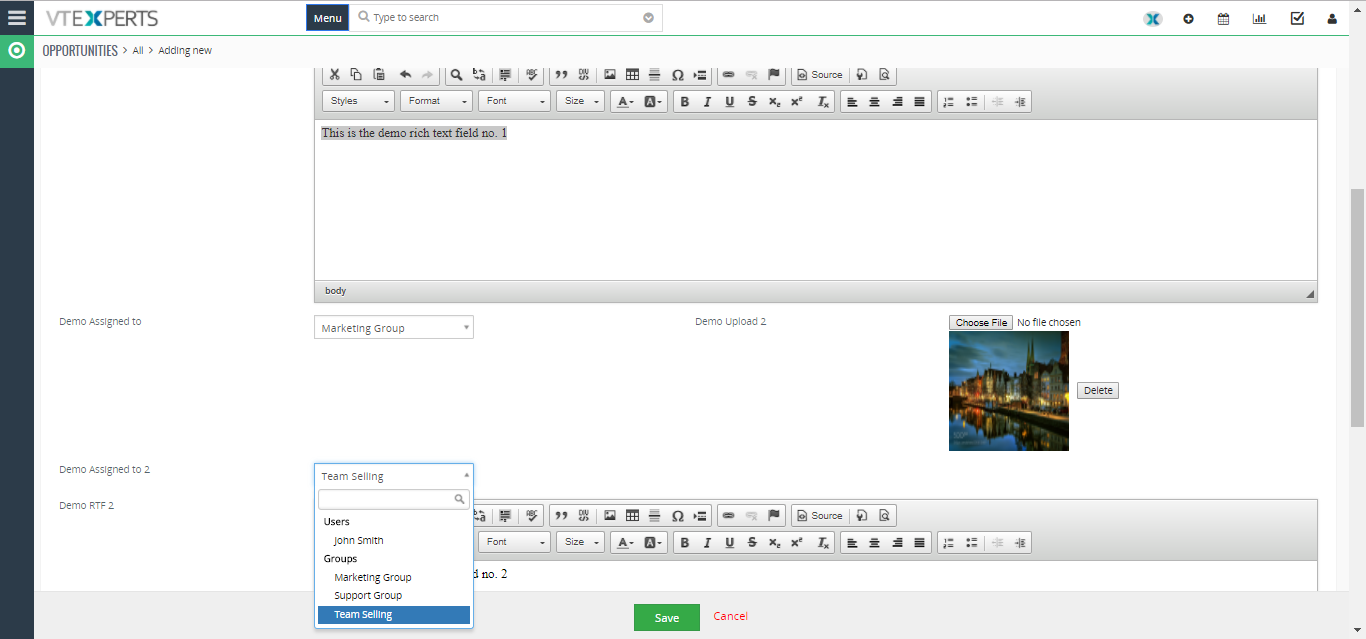
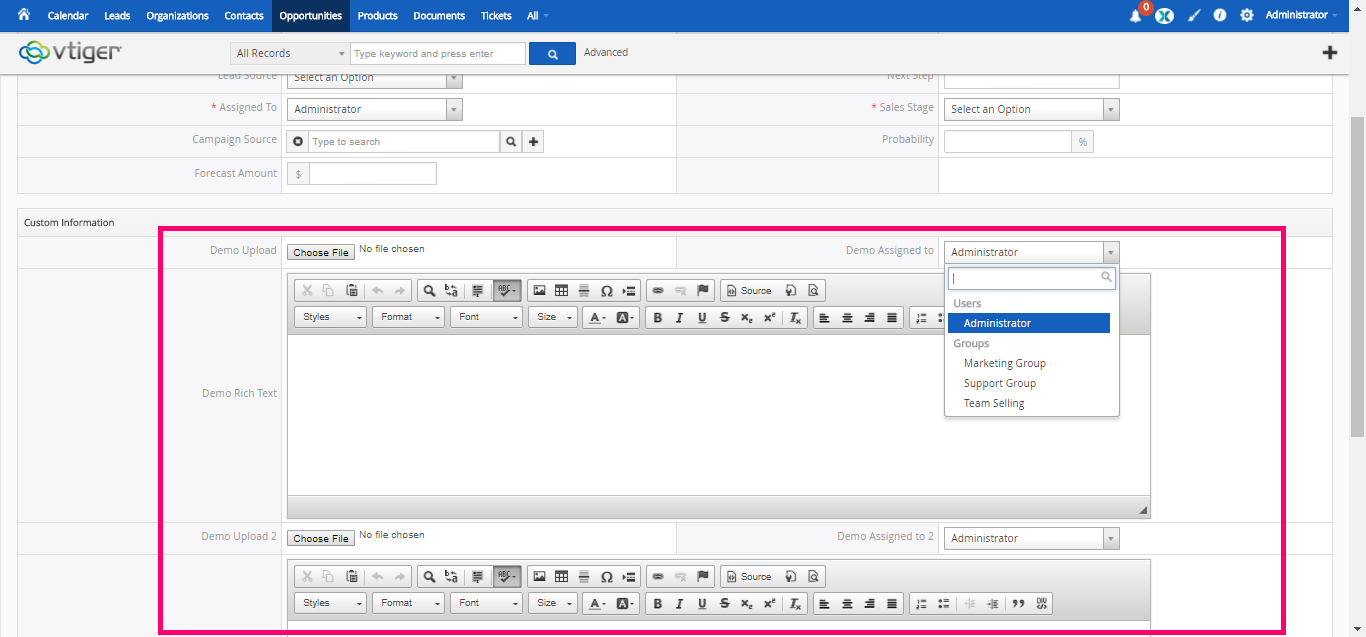
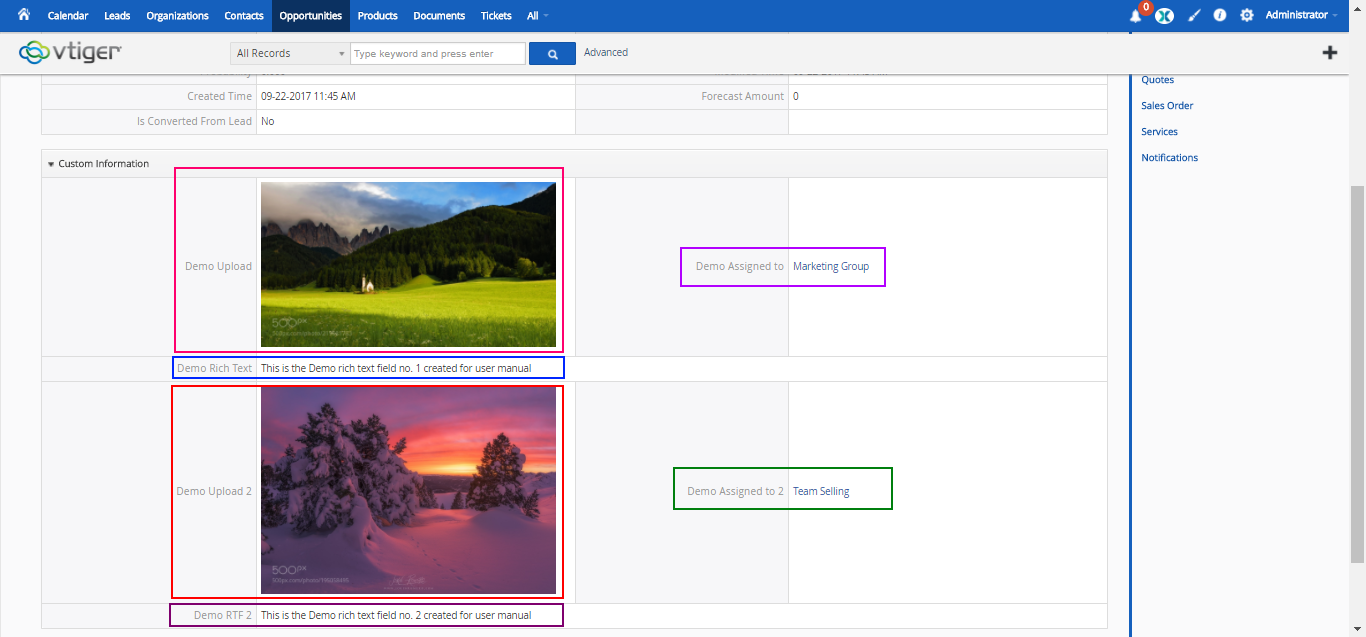
Demo Upload/Upload 2: click the “Choose File” button and select the file to upload
Demo Assigned to/Assigned to 2: select users from picklists to add additional “Assigned to”
Demo Rich Text/Rich Text 2: you can add rich text in the text field using all the editing tools provided along
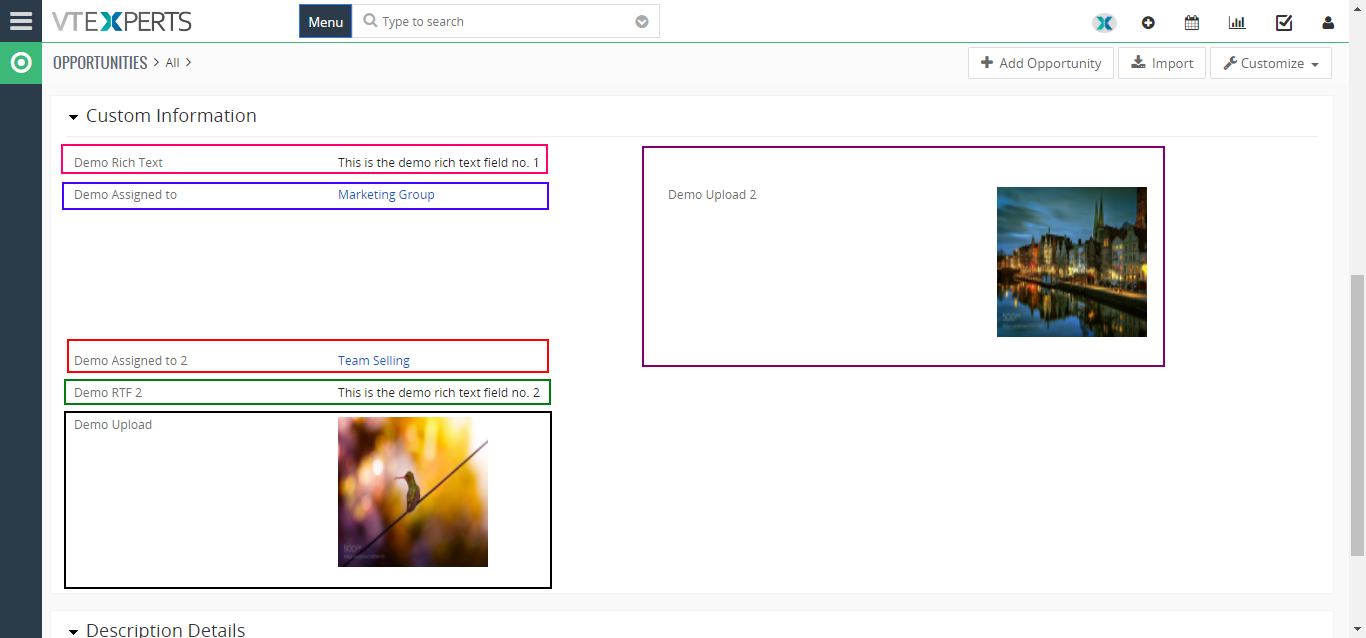
After saving the record, we can see that all the advanced custom fields appear in the opportunity record with our desired input.
Edit/Delete Advanced Custom Fields
To edit or delete an advanced custom field from the configuration:
1. Go to the Field Editor
2. Hover your mouse over a custom field
3. You’ll see Edit and Delete buttons appearing
4. Click the desired button