

VTiger Record Timeline/Summary extension was designed to provide complete record visibility. On the timeline, the user can see any communication (emails, calls, comments) as well as record updates. It rolls up the information from 3 relationship level deep. For example, if you want to view an organizations timeline then
- You will see any information related to organization (emails, updates, comments)
- You will also see information related to organization’s tickets/opportunities (or any other modules)
- You would see any comments added to the ticket/organization while looking at the organization timeline.
In most cases, if you are trying to find out more details about a contact/organization/lead – you would have to click through all the related lists, review any tickets/opportunities one by one, however with the VTiger Timeline extension – you can see it all from one screen.
Configuration
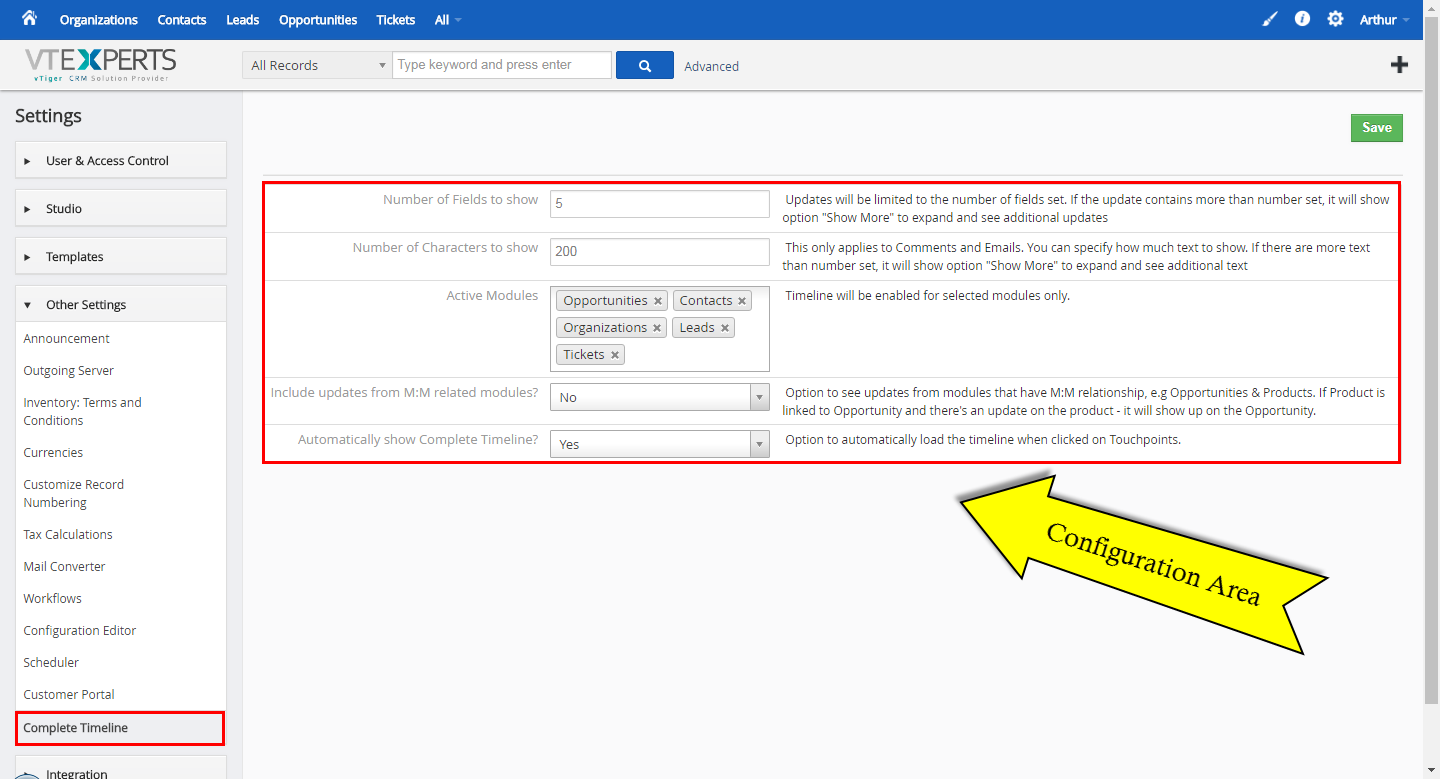
The extension can be configured by going to CRM Settings > Other Settings > Complete Timeline.
Number of Fields to show: you can set the limit of fields to see. Updates will be limited to the number of fields set. If the update contains more than number set, it will show option “Show More” to expand and see additional updates
Number of Characters to show: the description field limited to 200 characters. This only applies to Comments and Emails. You can specify how much text to show. If there are more text than number set, it will show option “Show More” to expand and see additional text
Active Modules: select the modules you want to activate the timeline view for. Timeline will be enabled for selected modules only
Include updates from M:M related modules? you can include or exclude updates from related modules with many to many relationships. e.g. Opportunities & Products. If Product is linked to Opportunity and there’s an update on the product – it will show up on the Opportunity
Automatically show Complete Timeline? this feature allows you to show or hide the Complete Timeline by default. It decides the default behavior of the timeline when “Touchpoints” tab is opened

- Number of Fields to show: you can set the limit of fields to see. Updates will be limited to the number of fields set. If the update contains more than number set, it will show option “Show More” to expand and see additional updates
- Number of Characters to show: the description field limited to 200 characters. This only applies to Comments and Emails. You can specify how much text to show. If there are more text than number set, it will show option “Show More” to expand and see additional text
- Active Modules: select the modules you want to activate the timeline view for. Timeline will be enabled for selected modules only
- Include updates from M:M related modules? you can include or exclude updates from related modules with many to many relationships. e.g. Opportunities & Products. If Product is linked to Opportunity and there’s an update on the product – it will show up on the Opportunity
- Automatically show Complete Timeline? this feature allows you to show or hide the Complete Timeline by default. It decides the default behavior of the timeline when “Touchpoints” tab is opened
Accessing and Understanding the Timeline
You can view a record’s timeline by visiting the record in the specific module and clicking “Updates”. For VTiger 6, that will be accessible from the “Updates” section.
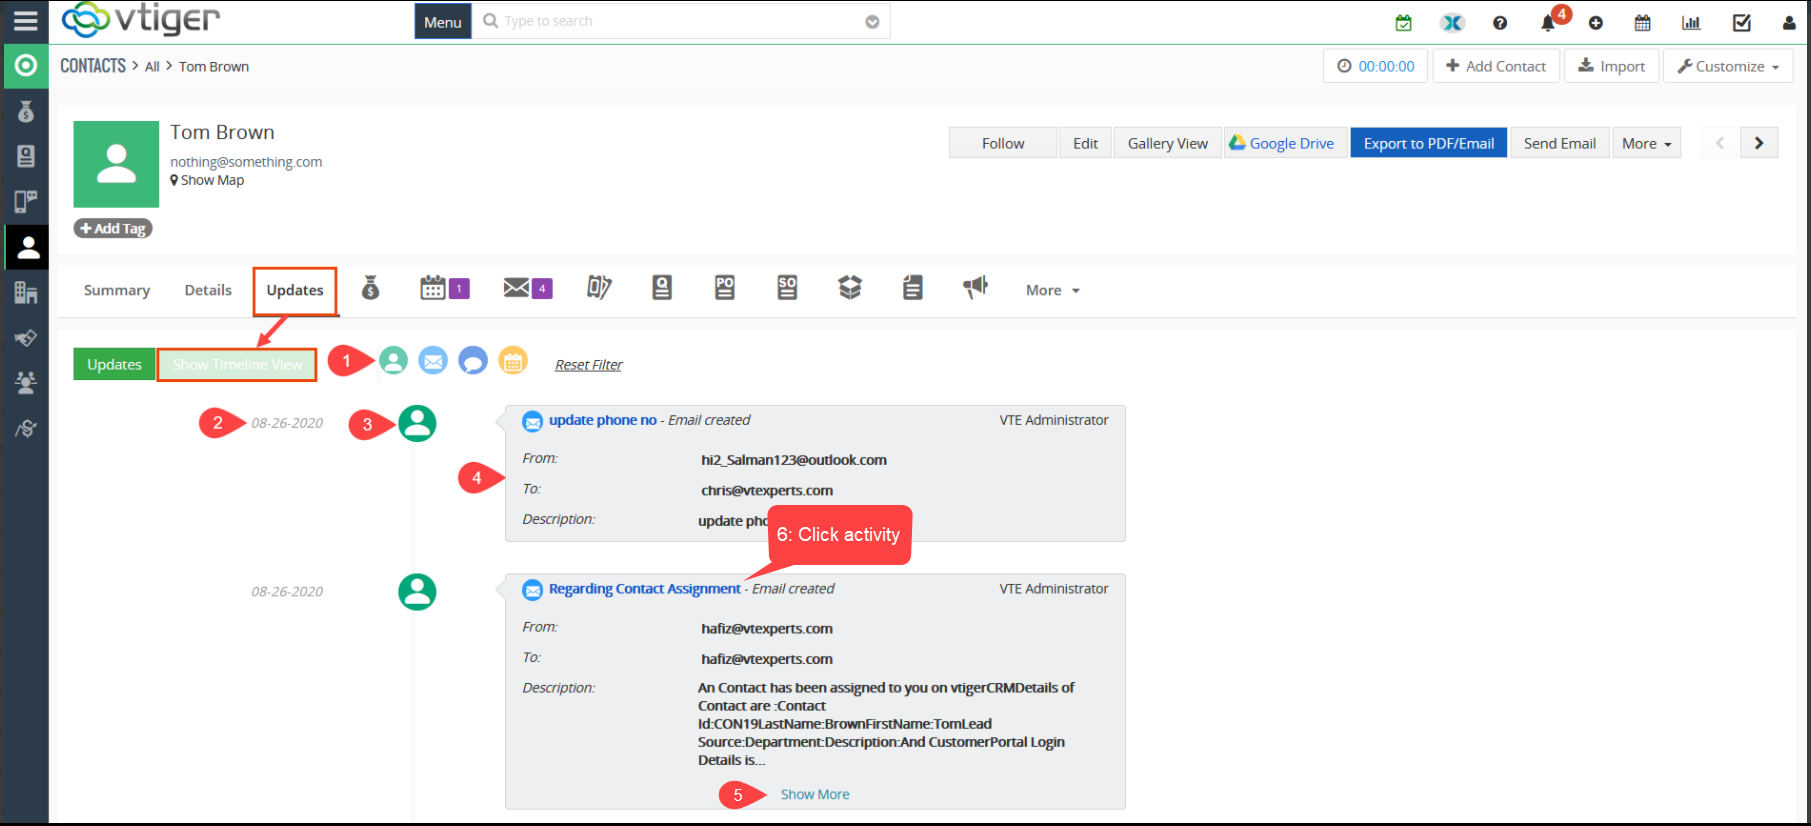
1: Filter: Using Filters, user’s can precise their activity search. e.g. by selecting events filter, it will only show activities related to the events
2: Date & Time: On the extreme left of each update in a timeline, the date of the update is shown. If you hover your mouse over the date, it will show you the time of the update as well
3: Icon: beside the Date & Time, the icon of the module is shown on which the update was performed. If you hover your mouse over the icon, you can also see the name of the module
4: Activity: the horizontal blue boxes on the timeline containing all the info on the updates. That includes the module on which the activity was performed, the title of the activity, the details of the activity, and the user who performed the activity. If you click an activity, it only opens a preview of that activity e.g. if a contact was created, clicking the contact will not override the current page, but it will only show a preview of the contact with all the details. You can close the preview and come back to the exact same point of the timeline
5: Show More: if you go to the bottom of the page, you will see the “Show More” button. Click the button and will show the previous updates/activities on the timeline
6: Clicking an Activity: if you click an activity, it only opens a preview of that activity e.g. if a contact was created, clicking the contact will not override the current page, but it will only show a preview of the contact with all the details. You can close the preview and come back to the exact same point of the timeline
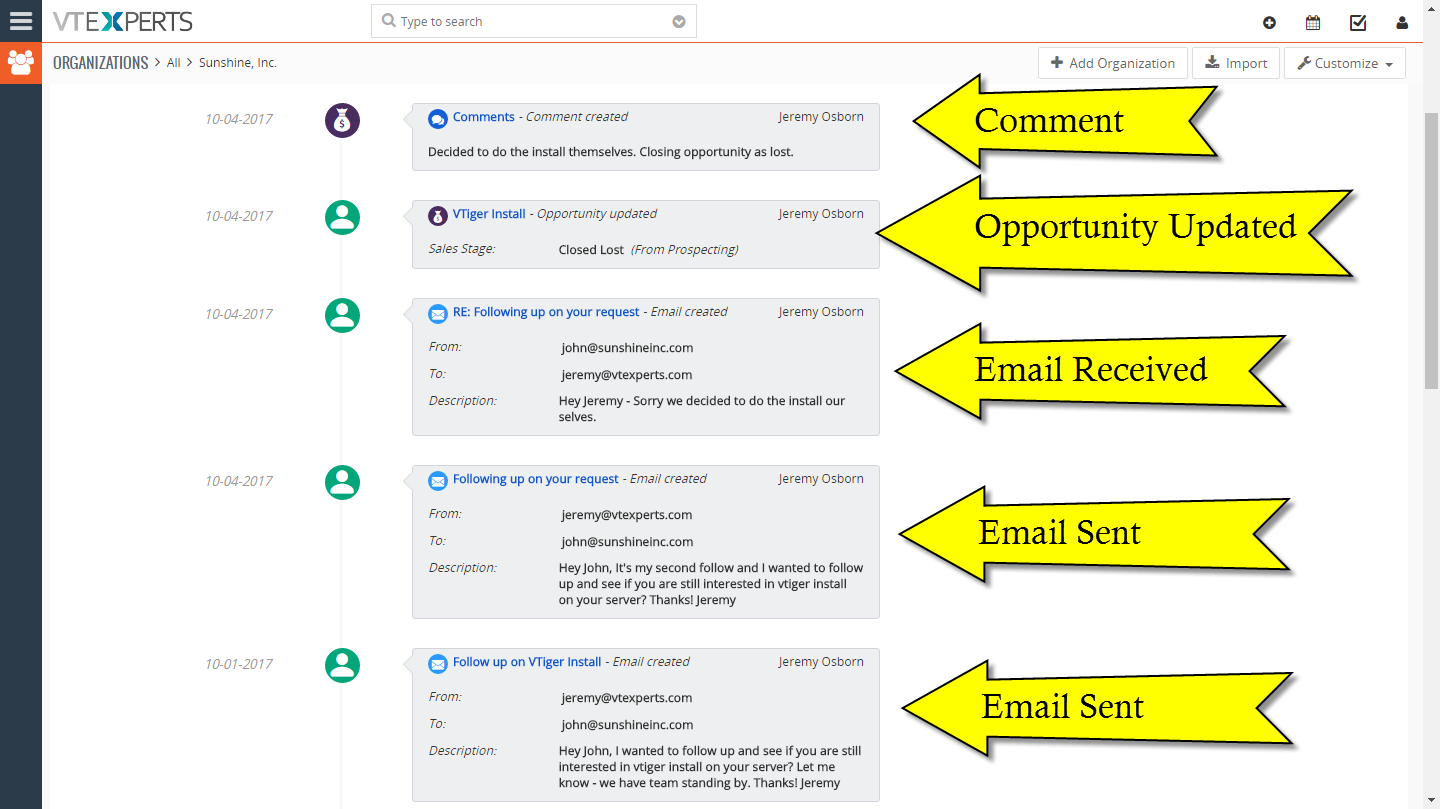
Below image shows, once a user clicks on the show more the results appear as following
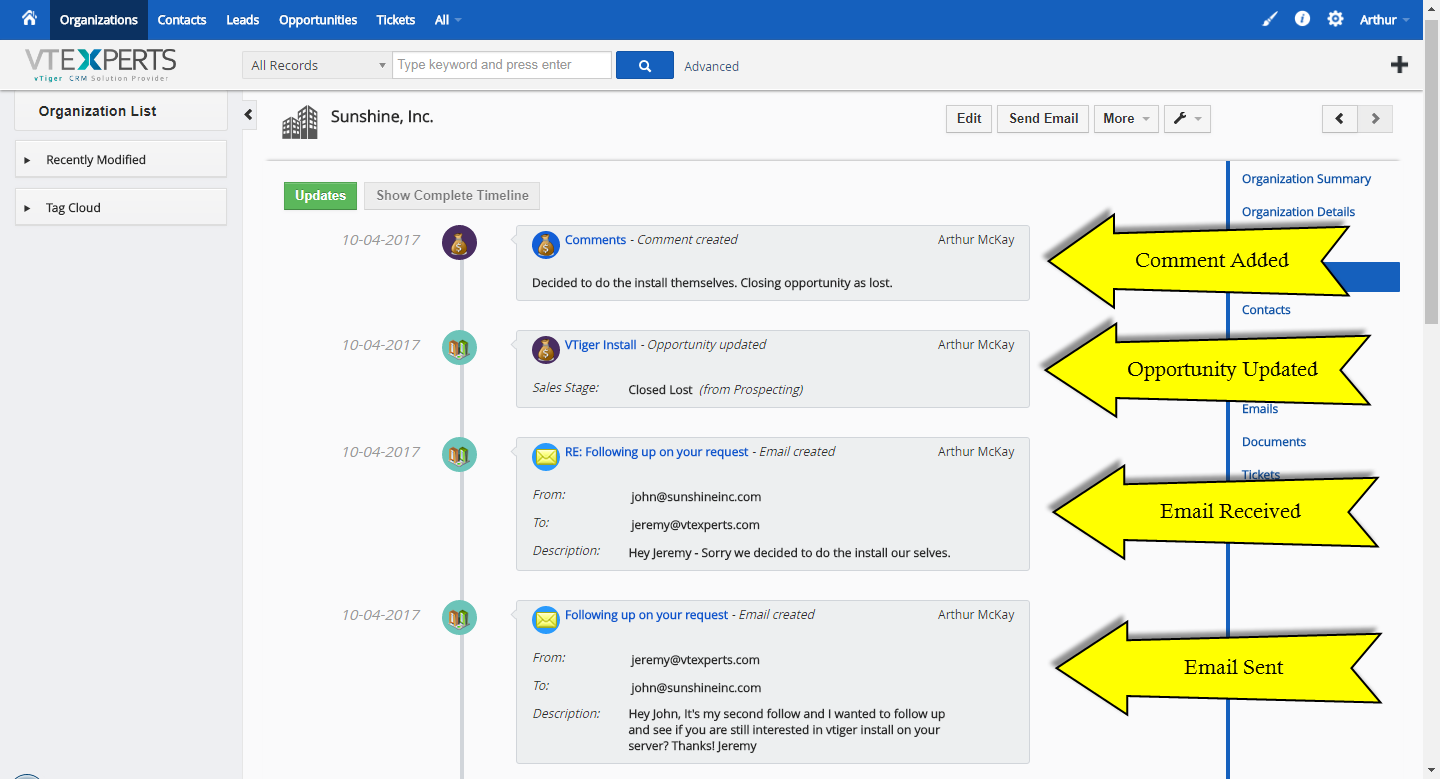
Common Timeline for Multiple Relationships between Modules
When you open a module > record > touchpoint, you will see a general timeline for that record. It means if the module is related to other modules, the updates made to the record in that module will also show up in the timeline. It helps to keep a better view of the activities performed related to that record.
For example, if you open an Organization and see a contact related to that Organization in the same timeline. Then, if you go to that contact > Touchpoints, you will also be able to see the timeline right there.