

VTiger Calendar Popup/Preview is a highly customized extension with several useful features. It allows you to quickly preview the Event information without leaving the Calendar. Easy to use tabbed popup will display linked record such as Contact, Organization, Lead & Ticket information and lets you update, delete, create, or link the existing records to Calendar Events.
It replaces the unnecessary standard Event window with more enhanced modal popup with a lot more useful information.
Configuration
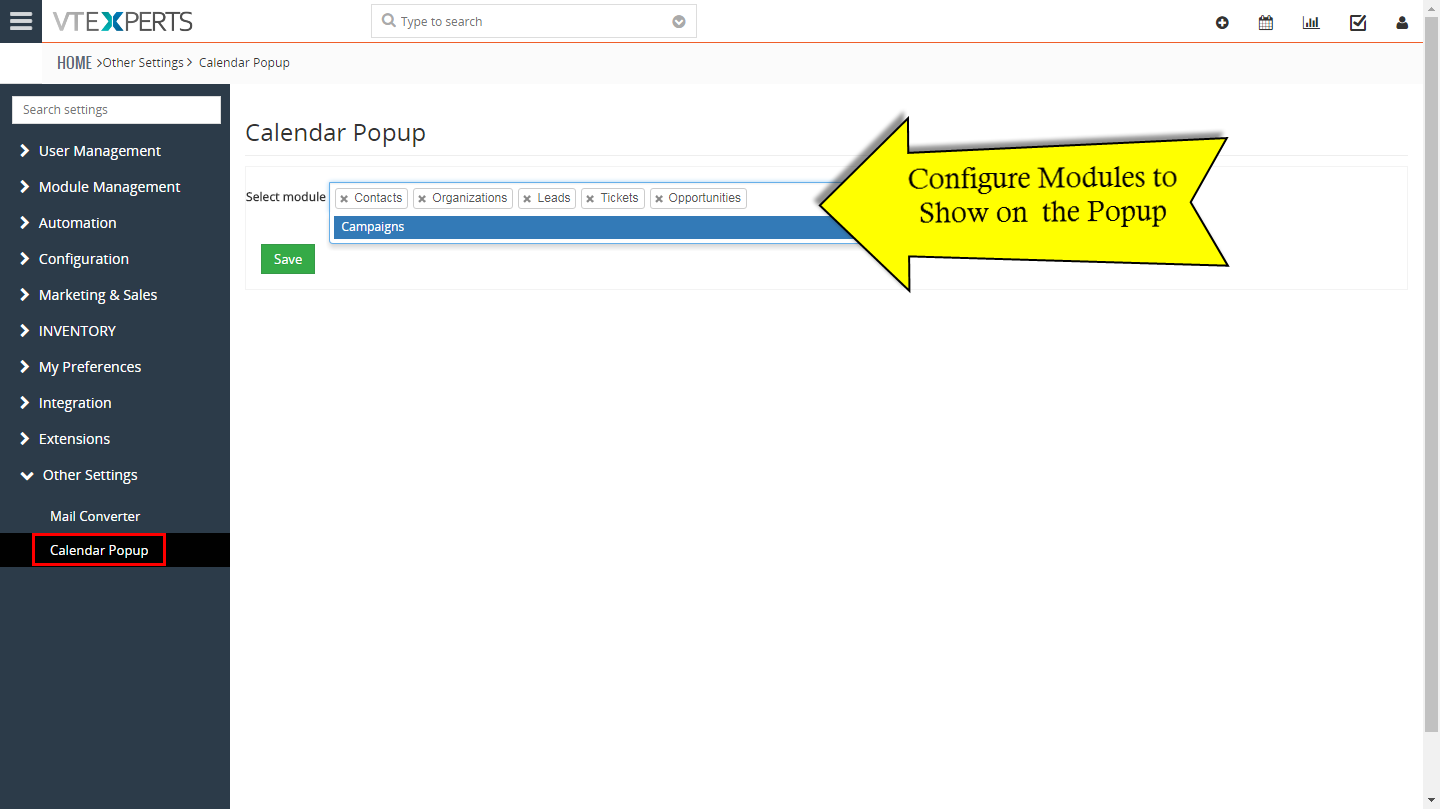
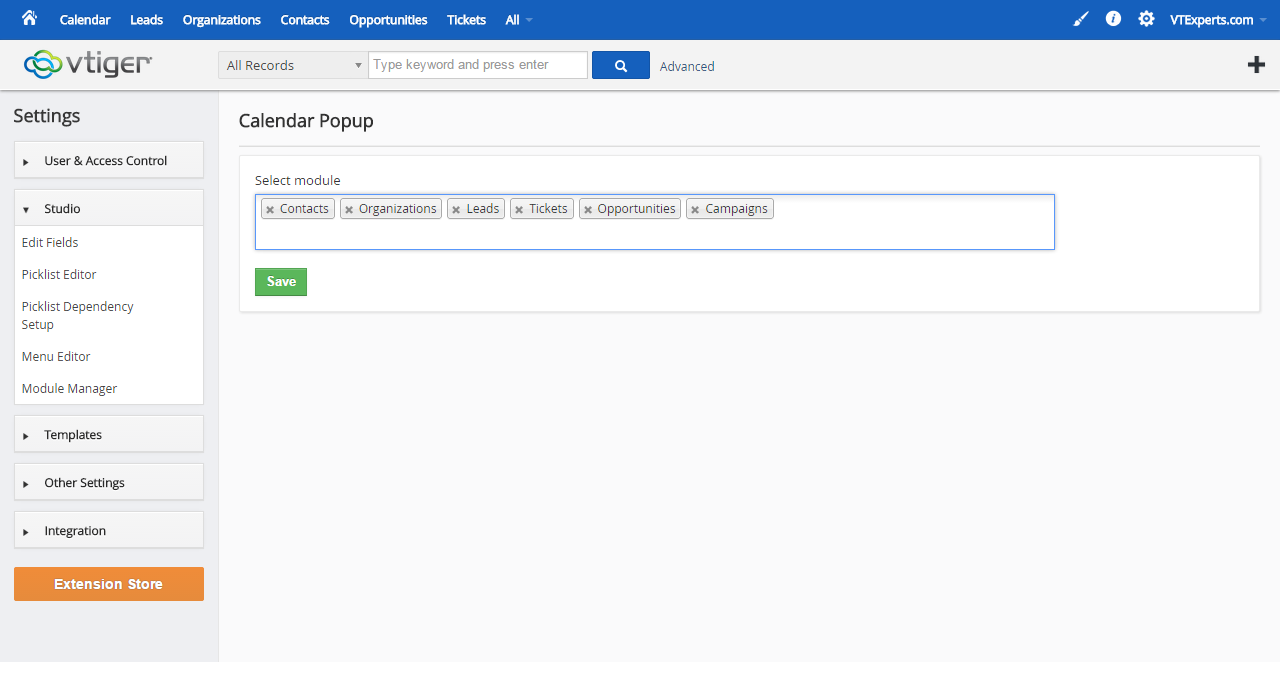
The extension can be configured by going to the CRM Settings > Other Settings > Calendar Popup.
Select Module: You can configure which standard and custom modules to be displayed as tabs in the Event Calendar Popup. Click in the field to open the list of all the available modules, then select a module. Or use the “x” on every added module to remove it. Hit “Save” and the sequence on the Calendar popup is updated.
Calendar Popup Explained
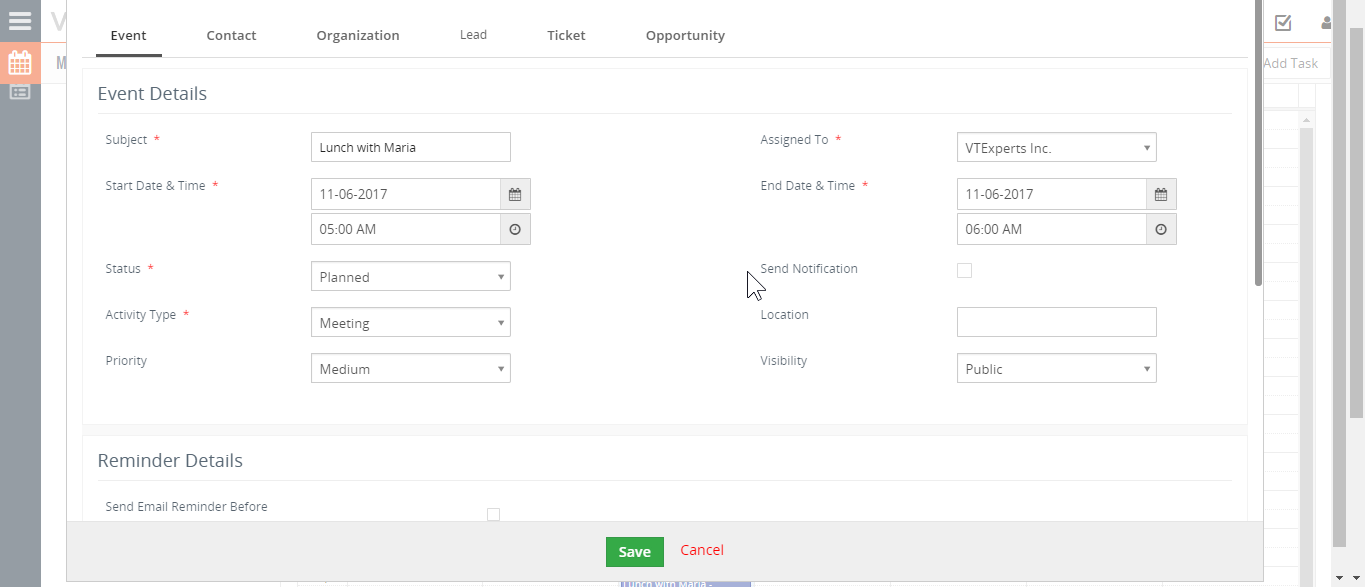
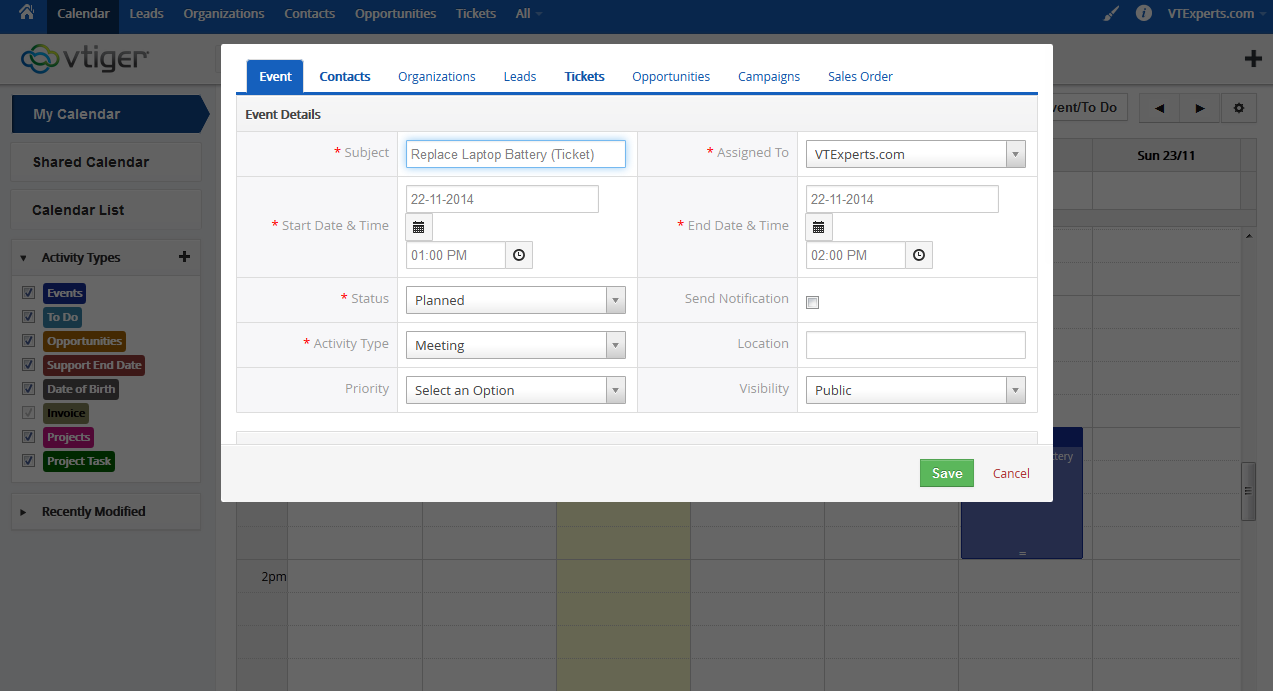
To open a popup of an event, go to the “Calendar” and click any event. In contrast to regular details, it will now show you a popup like this:
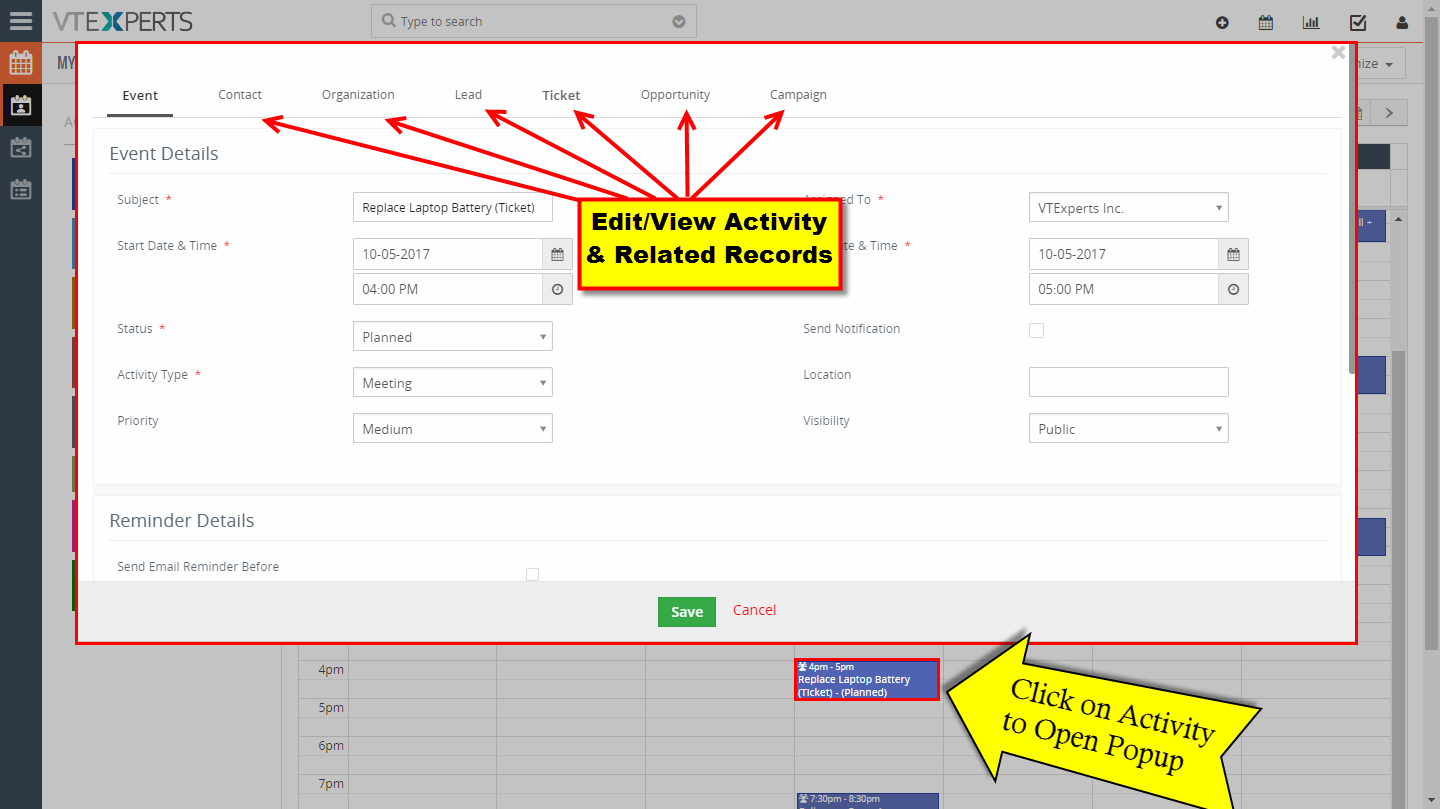
You can see all of the modules selected during the configuration of the extension as tabs in the popup. These tabs are the records related to the activity. I’m going to give brief information about standard modules, below. Custom modules also work in a similar way.
Event:
First tab is always “Event”. This tab contains all the details of that specific event. You can modify those details right there e.g. if you want to change the date/time, status, or assigned user.
Related Records:
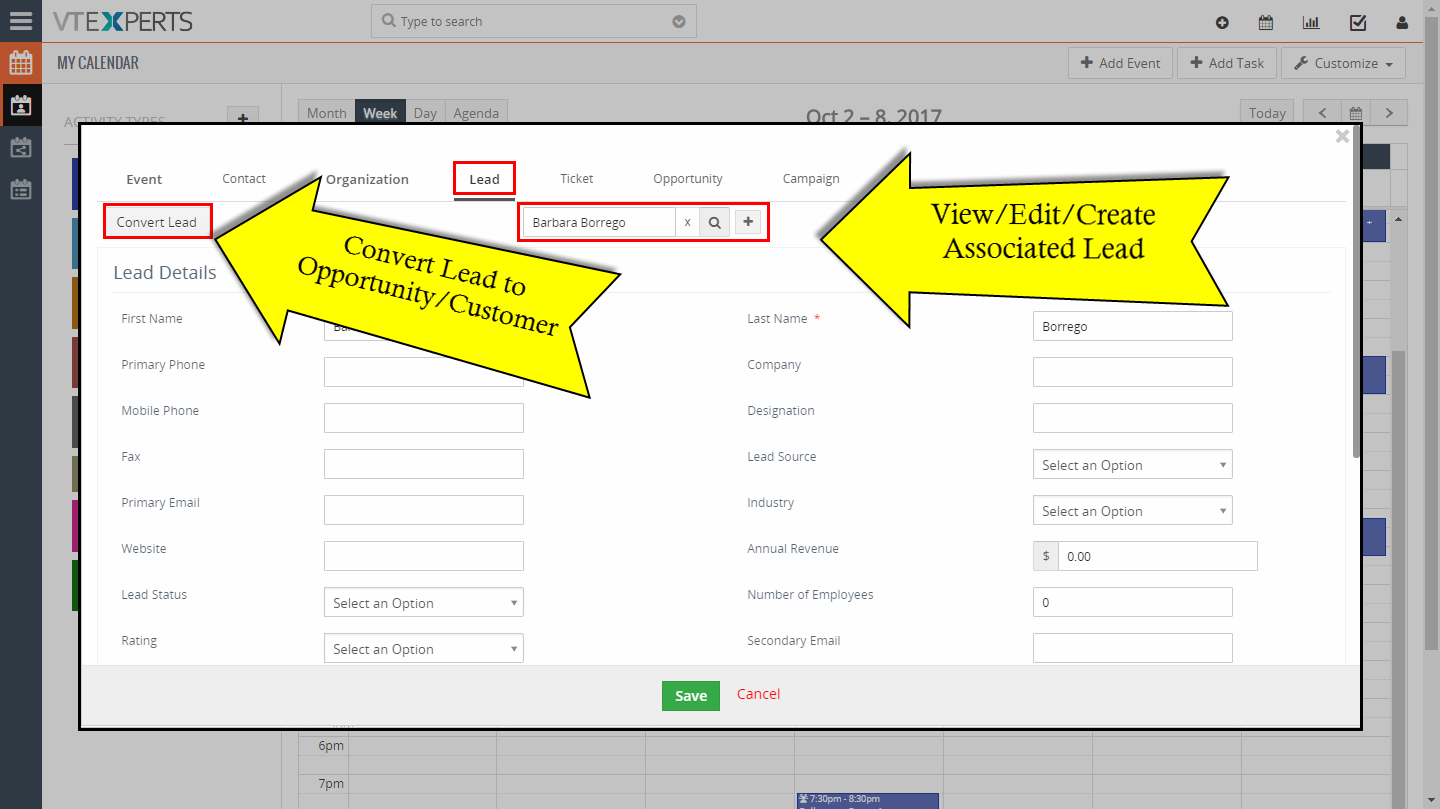
All the related records are displayed as tabs in the popup. You can go to individual module’s tab and update the records.
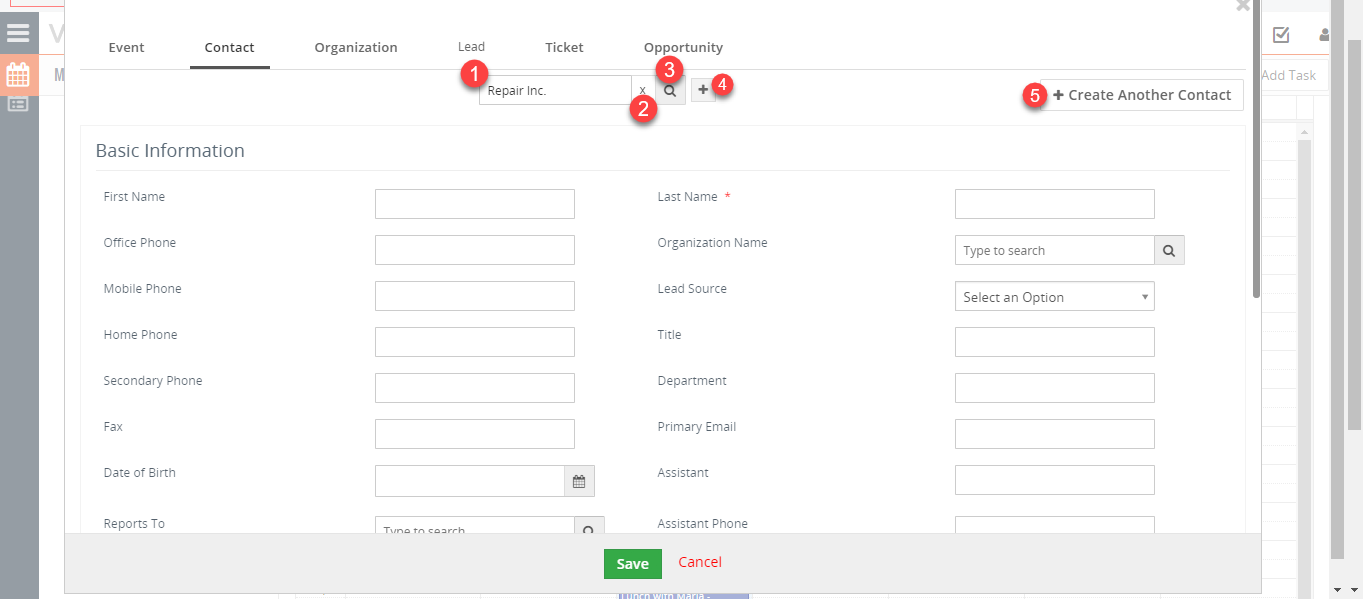
For example, if you open “Contact” tab, it will allow you to modify the current related contact, add a new contact, or change the existing.
Type to Search (1): in the search field, you can type a record’s name and it will show suggestions. Then from the suggestions, click on the desired record and it will be linked to the activity. Moreover, all the details of that record will be populated in the fields below. You can modify those details right from that popup as well.
Clear Related Record (2): next to the Search field is this “x” button, which clears the related record from that tab. Say if you want to remove or change that related record, click this button and it will reset the tab and form for you.
Select a Record (3): it allows you to select a record to fill in the tab from the complete list of records. For example, if you’re in the “Contact” tab, clicking the search button will open a list of all contacts. You can select any contact to link to the activity and fill in the details with.
Add New Record (4): if you have not selected any record to link and want to fill in the information manually, click the “+” button. It will enable all the fields in the form which you can fill in as desired.
Extra Buttons
Some of the modules also have extra buttons depending upon the relation of the module.
Create Another Contact/Opportunity (5): “Contact” and “Opportunity” tabs have this button “Create Another Contact” or “Create Another Opportunity”. The buttons allow you to add multiple records and link them to the same activity. Once you create a new record (contact or opportunity), it will be shown as a new tab along with other tabs.

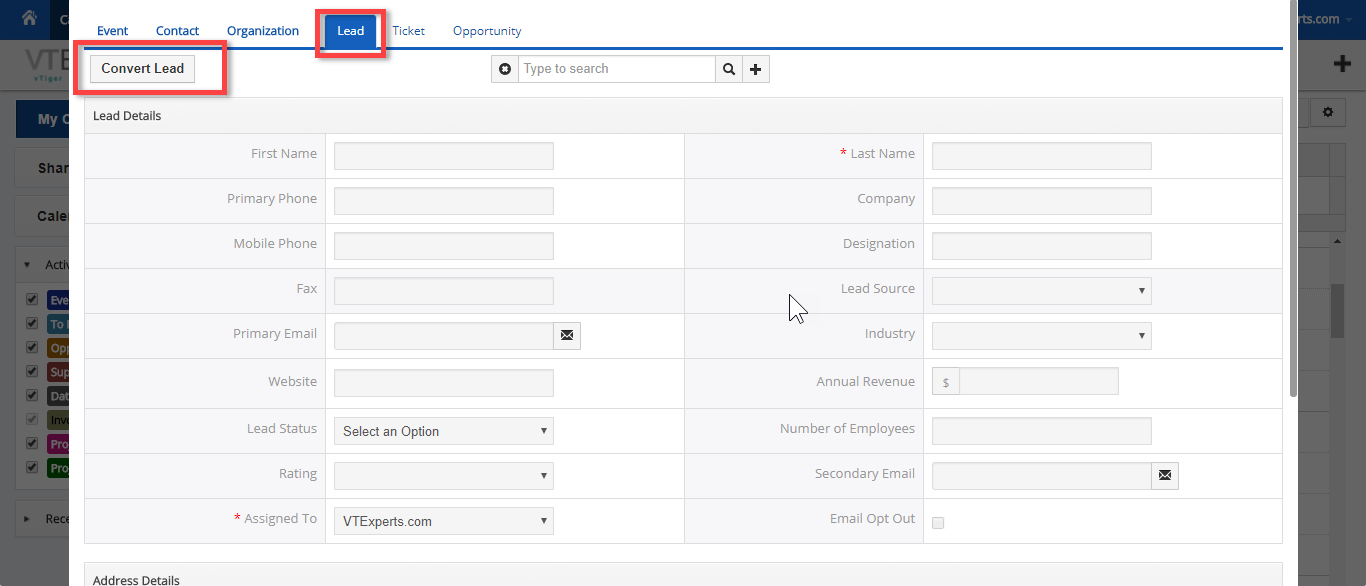
Convert Lead: this button is available for “Leads” module. If you go to “Lead” tab, you can see this button “Convert Lead”, which quickly converts a lead into opportunity.
After all the records have been selected/created, hit the “Save” button and it will link all those records to the activity. Next time you’ll open that activity; you will be able to see which records are linked to it.