

VTiger Automated Backups Extension is designed to allow system administrators to easily backup VTiger Files & Database to a local folder or an off-site FTP.
The VTiger Automated Backups module grants the facility to go through and schedule out your automated backups whenever it is most convenient for you. You can define the days to keep the backups, frequency, and email notifications. Should you need to retrieve your backup, it’s as simple as returning to the interface for VTiger Automated Backups and they’ll be all right there for you.
Configuration
The module is configured by going to the CRM Settings > Other Settings > Automated Backup. There, you can setup to save backups locally or send via FTP. You will also be able to configure the email notifications once a backup is run.
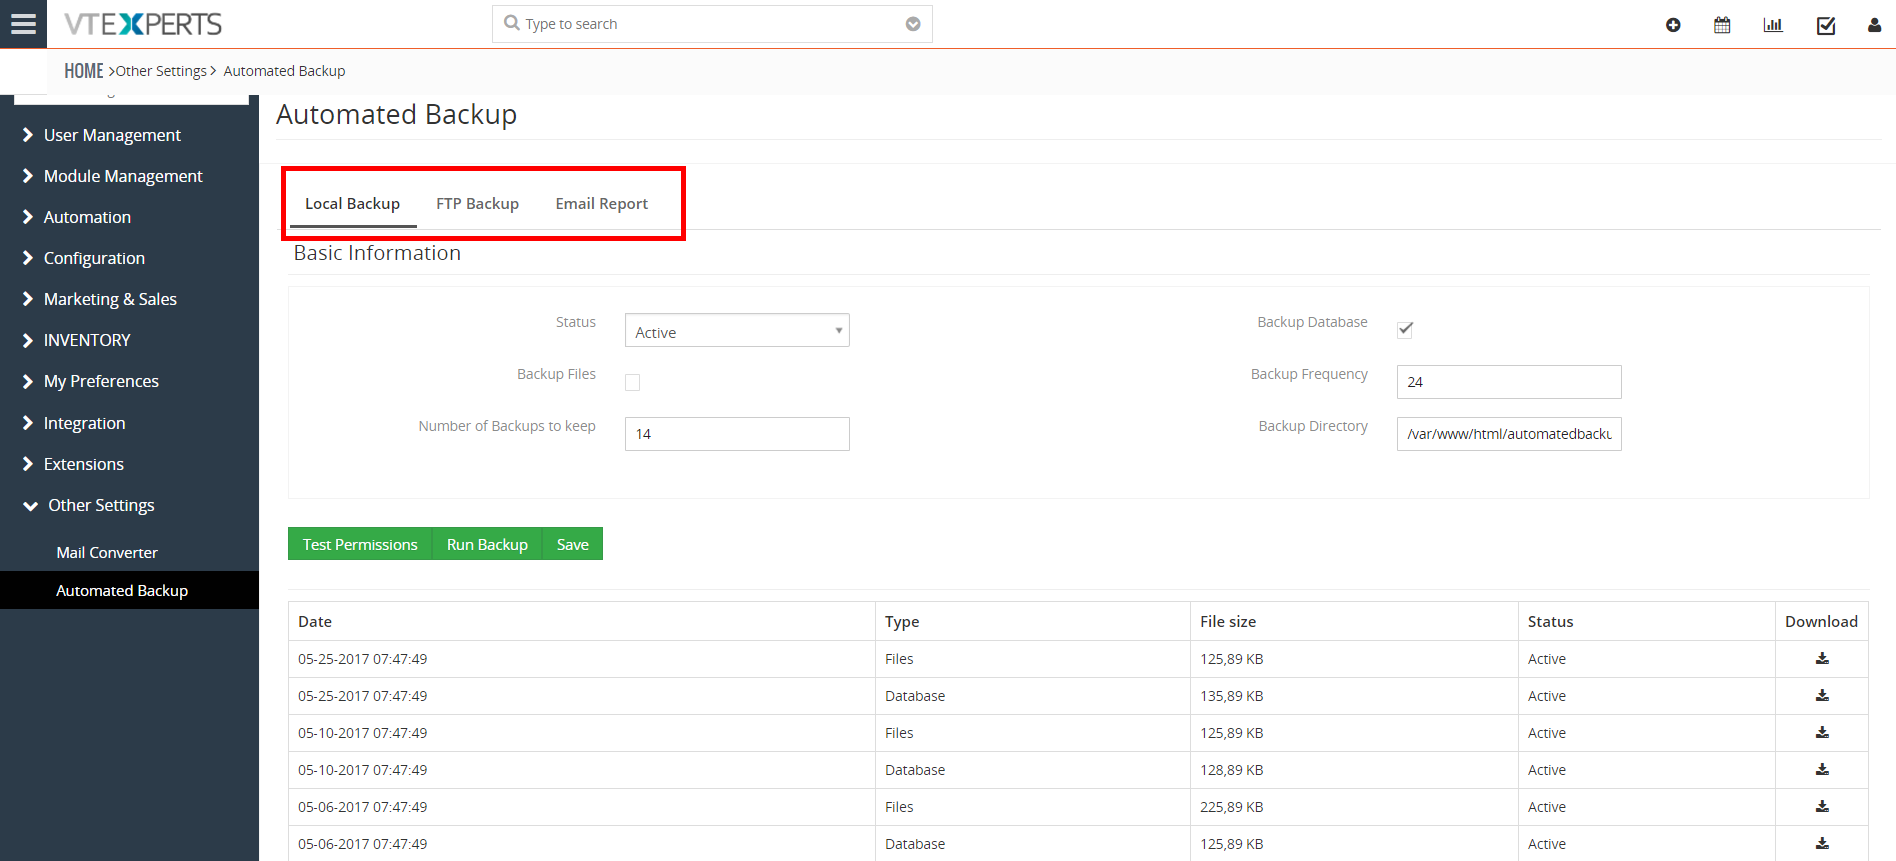
Local Backup: to backup your files and database on your VTiger server
FTP Backup: to backup your files and database on a server other than your VTiger server
Email Report: setup emails to be sent once a backup is completed.
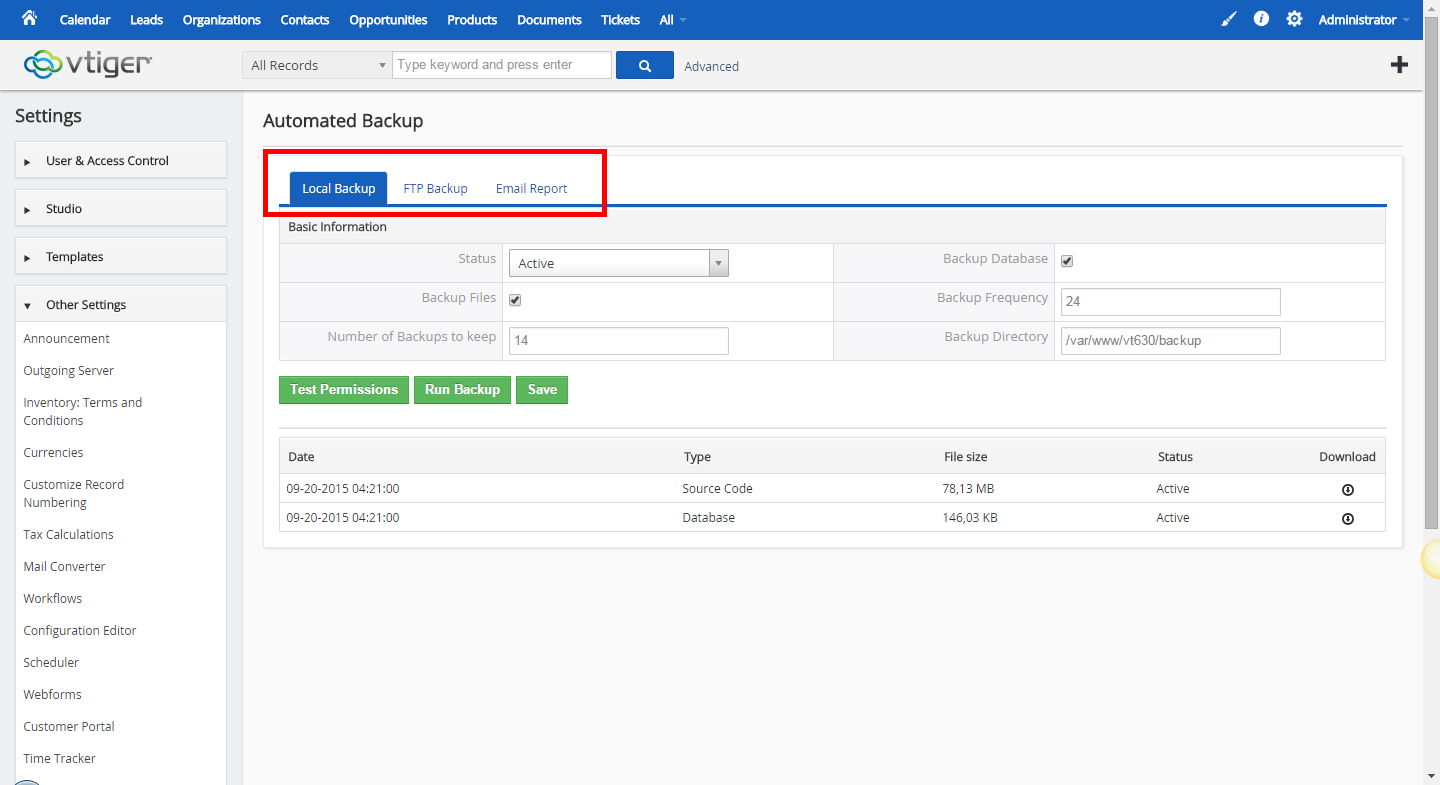
Local Backup
This is where you will setup to locally backup the database and files. Let’s understand what each field means and does:
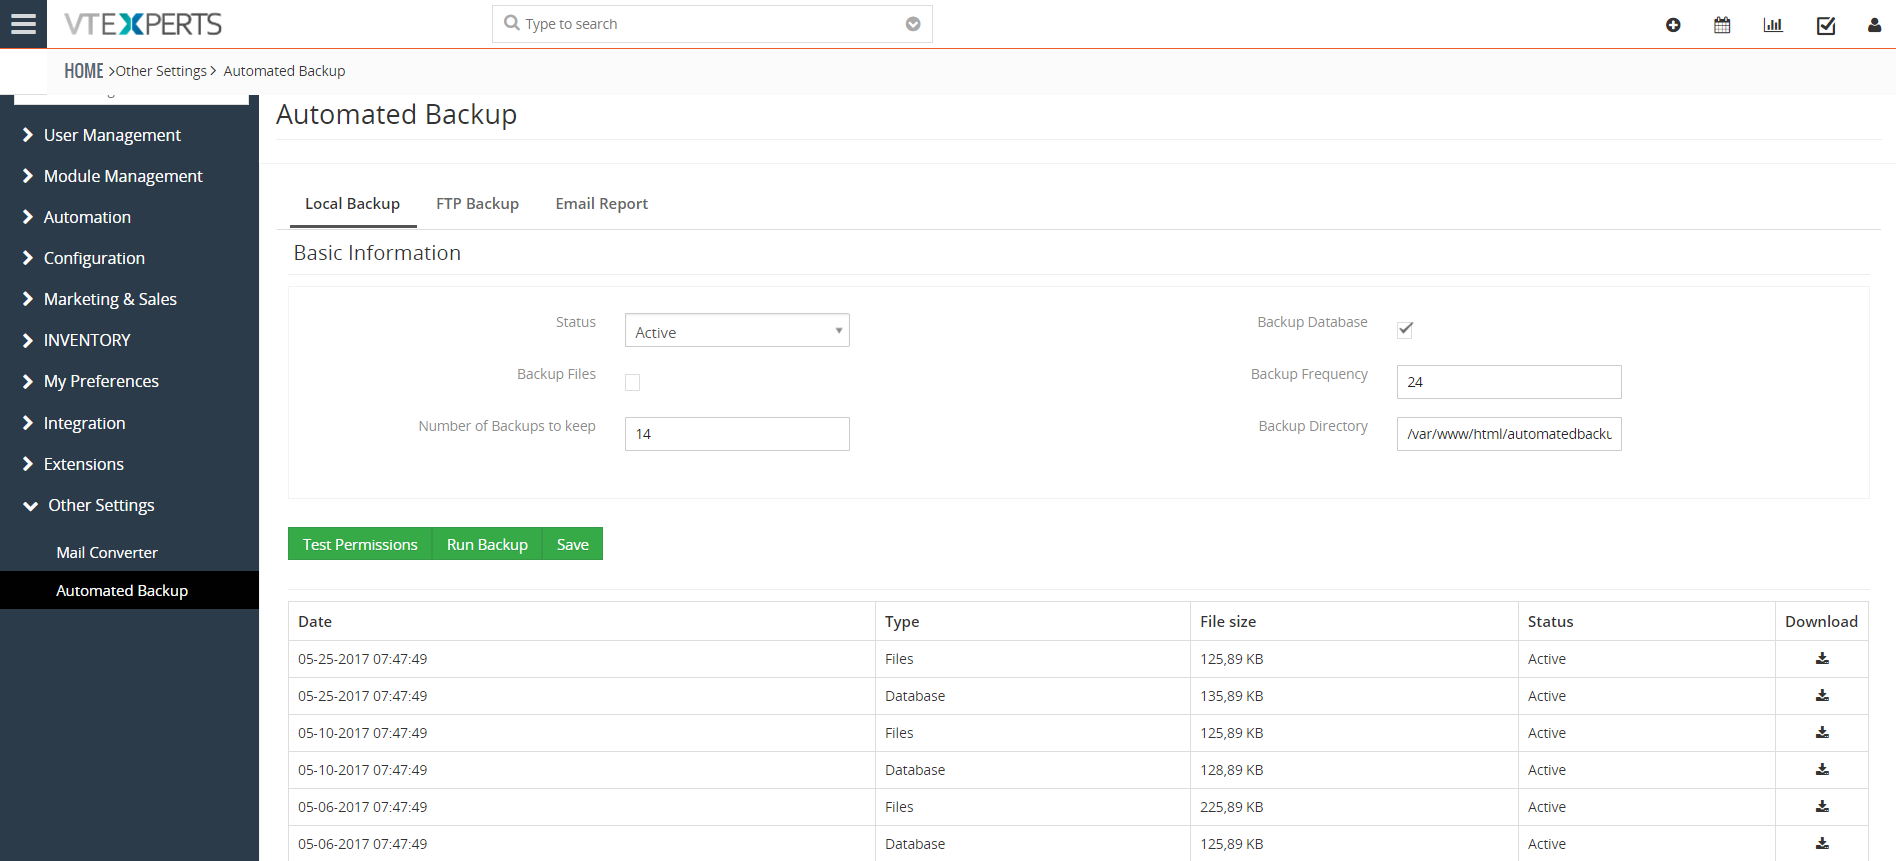
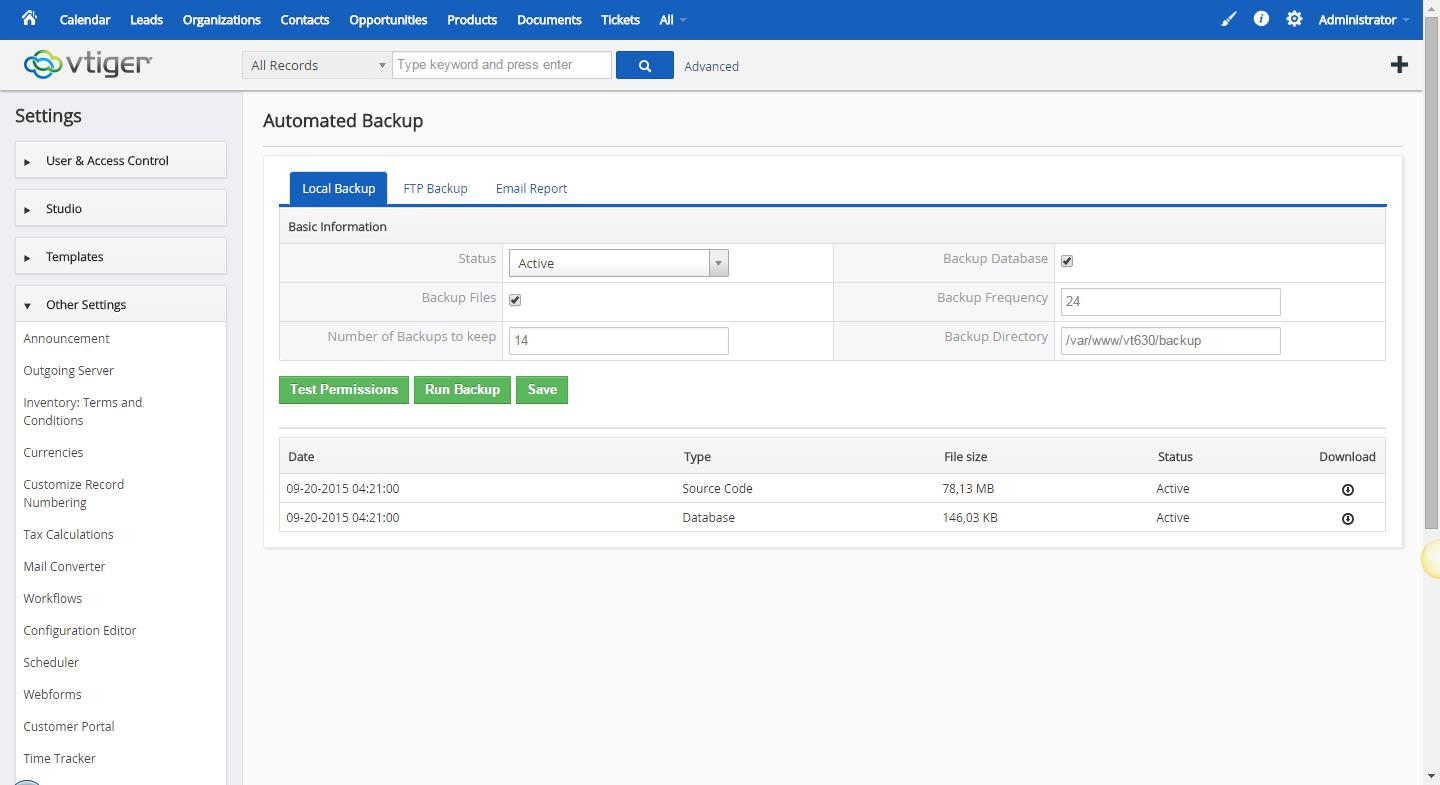
Status: set the status of the automated local backup as active or inactive
Backup Database: check this if you want to backup the database locally
Backup Files: check this if you want to backup the files locally
Backup Frequency (hours): set the duration after which you want to run the automated local backups (the frequency is in hours)
Number of Backups to keep: configure how many backups do you want to keep (we recommend at least last 14 days)
Backup Directory: the location where you want the backup to be saved
Test Permissions: test the permissions beforehand and see if you’re able to save the backup or not. That way, you want run into any problem when a backup is triggered
Run Backup: it allows you to manually run the backup from your web browser (other than automation)
Save: after the configuration, save your settings to run the backup at the configured time
History: this block contains the history of the backups that were made previously. It shows you all the necessary information like Date and Time of the backups, type, File size of the backup (in megabytes), status, as well as the ability to download the backed up files.
FTP Backup
Now we are going to explain how you can setup the automated backups to be uploaded to a server other than your VTiger server.
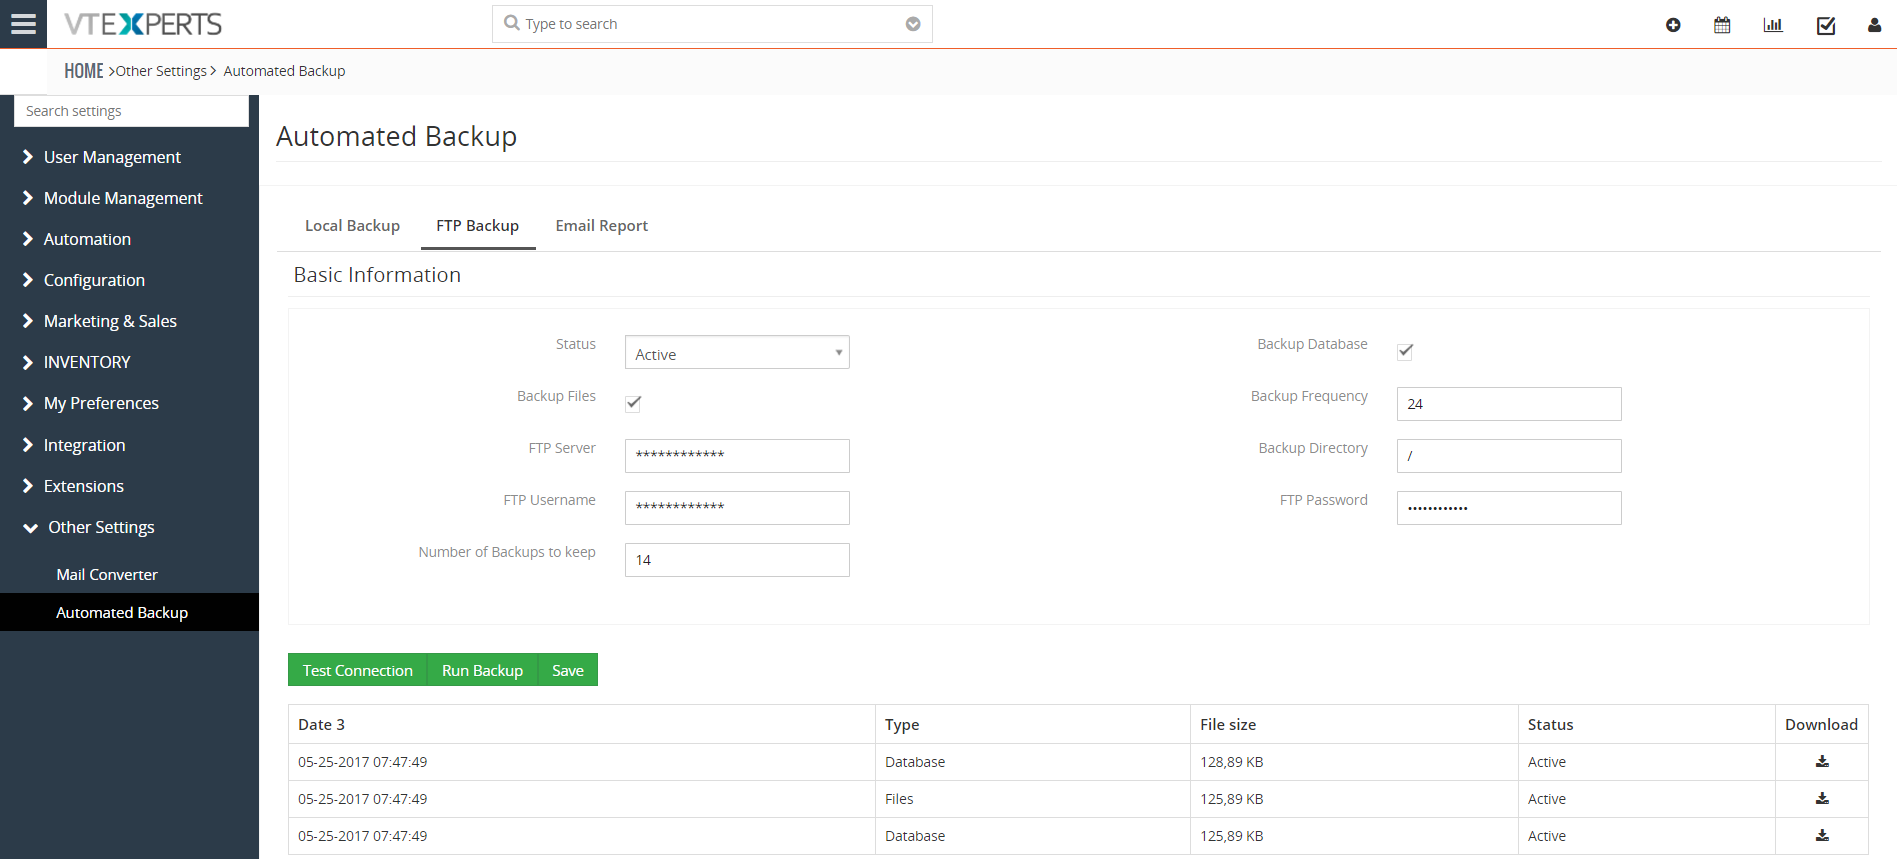
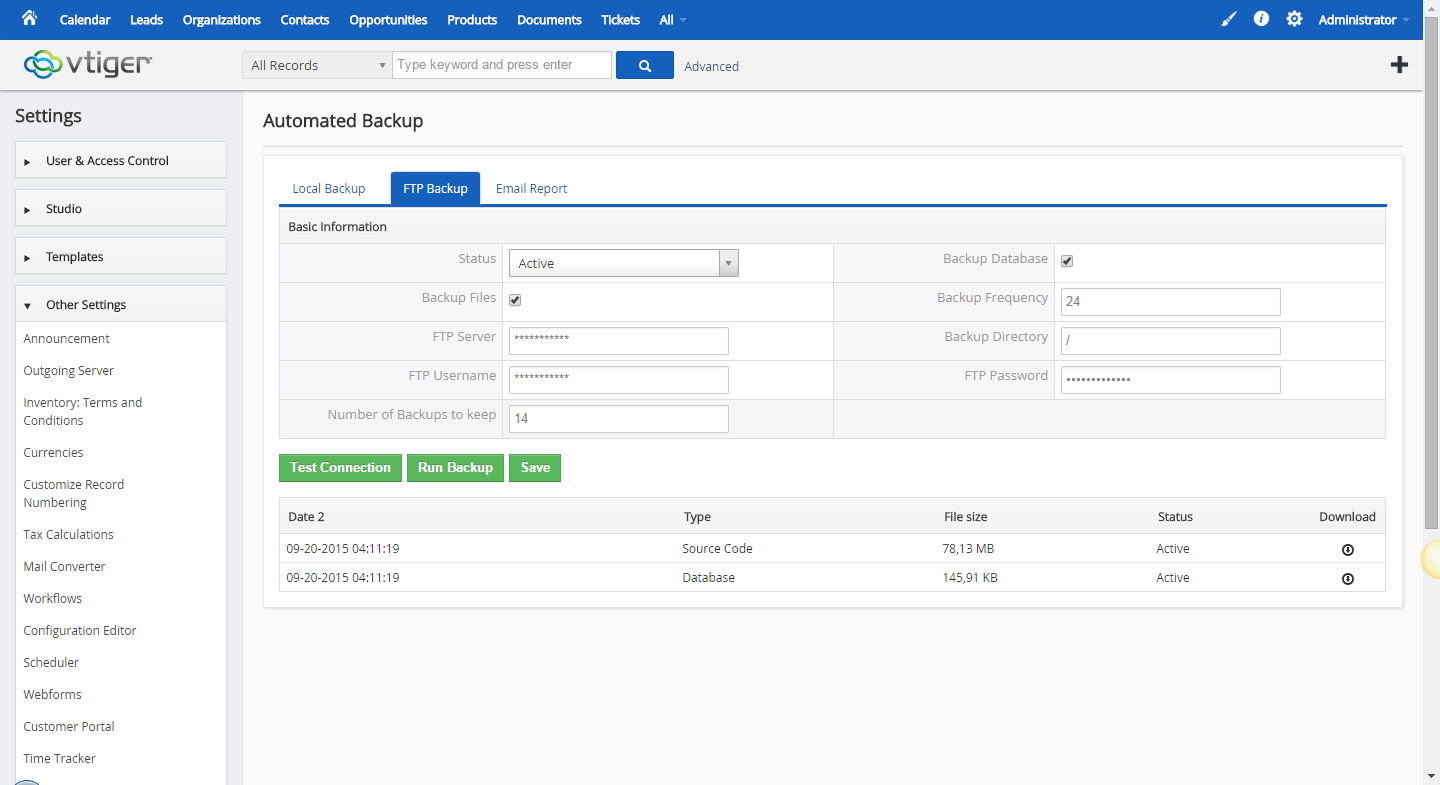
Status: set the status of the automated FTP backup as active or inactive
Backup Database: check this if you want to backup (FTP) the database
Backup Files: check this if you want to backup (FTP) the files
Backup Frequency (hours): set the duration after which you want to run the automated FTP backups (the frequency is in hours)
FTP Server: write the name of the FTP server
Backup Directory: the location where you want the backup to be saved over FTP
FTP Username: enter the username to login to the FTP server
FTP Password: enter the password for the FTP account
Number of Backups to keep: configure how many backups do you want to keep (we recommend at least last 14 days)
History: same as the Local Backups, this block contains the history of the FTP backups that were triggered previously. It shows you all the necessary information like Date and Time of the backups, type, File size of the backup (in megabytes), status, as well as the ability to download the backed up files.
Email Report
Finally, you can configure Email Reports that you will receive once a backup is completed. This tab contains a full email composer with all of the basic text formatting tools as well as some other features. Let’s take a look at what options are available:
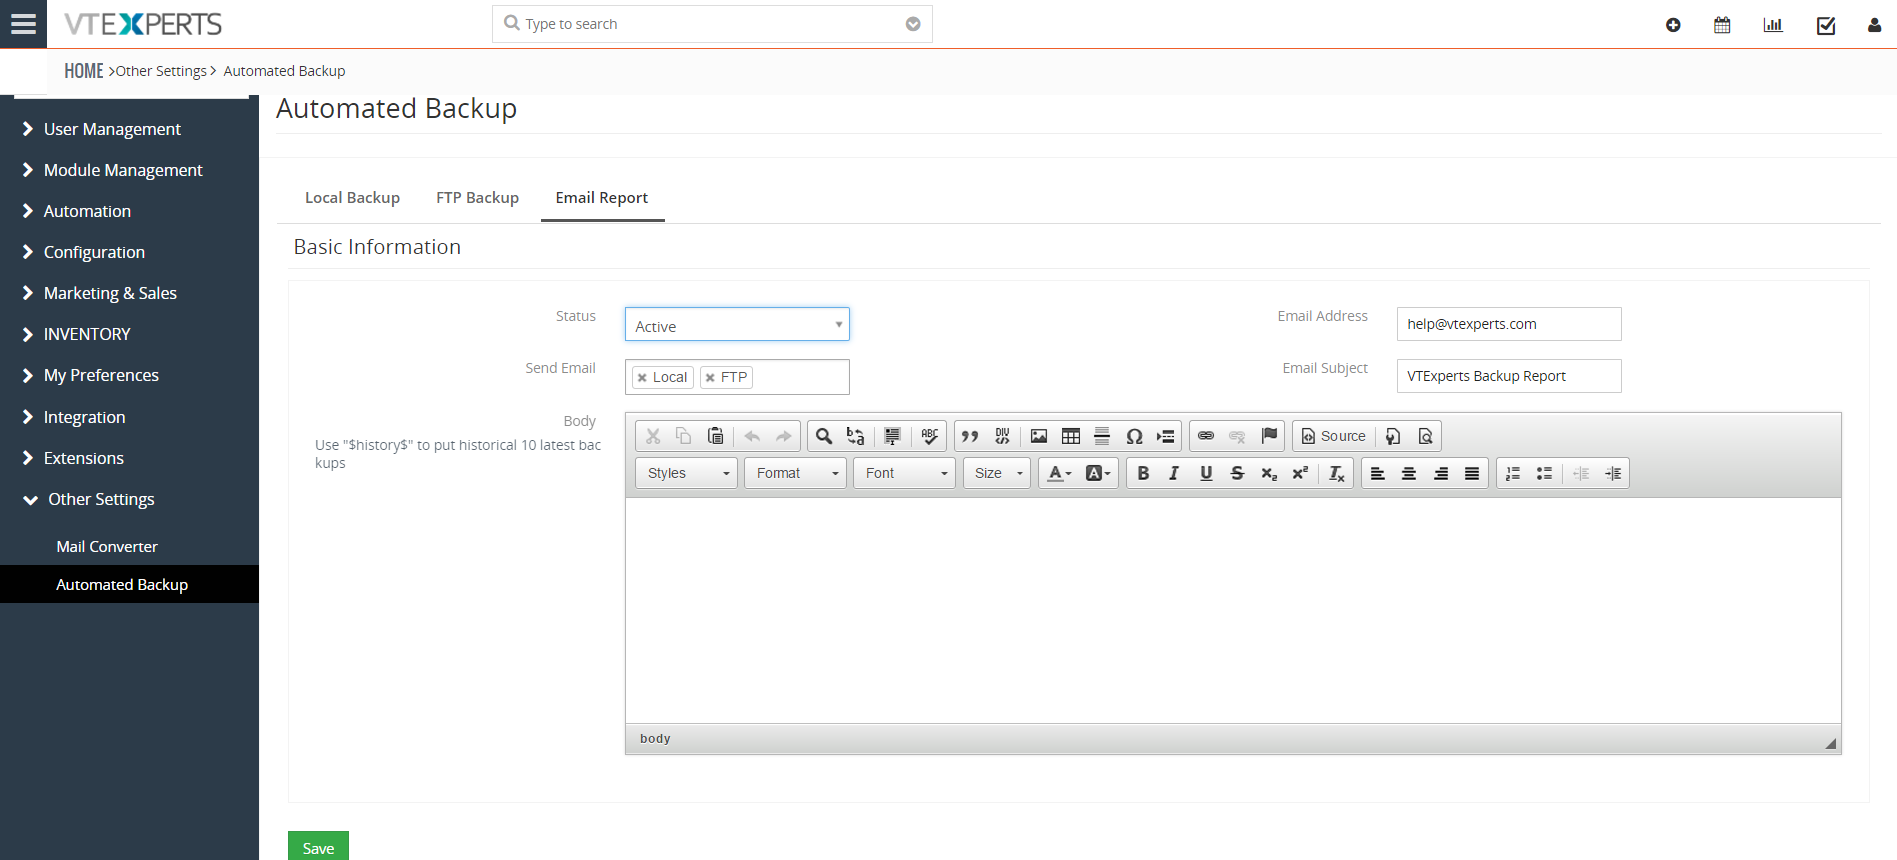
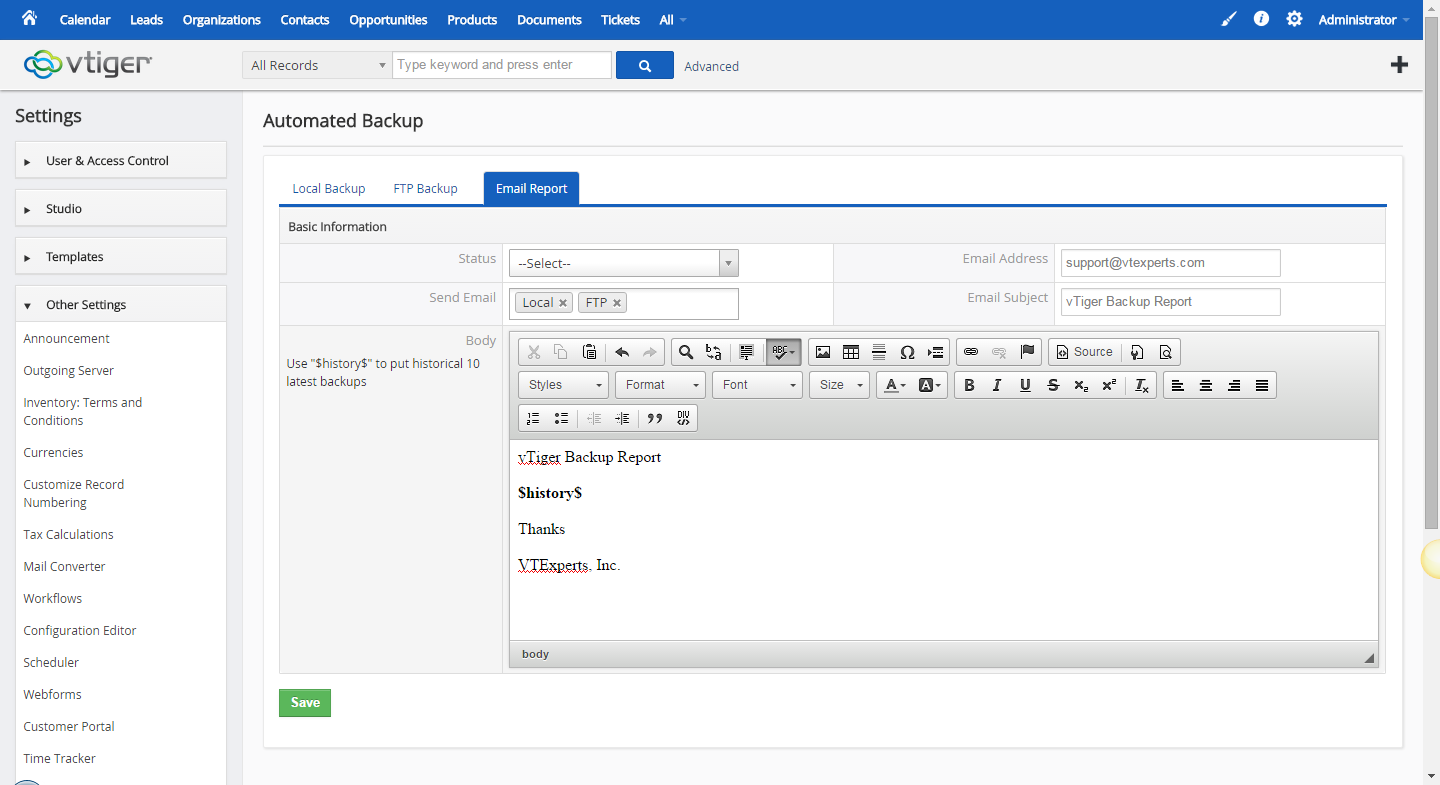
Status: set the email reports as active or inactive
Email Address: fill in the email address you want to receive the reports on
Send Email: configure if you want to send the email via FTP or locally
Email Subject: you can also use a custom subject for the email report to clearly see the email in your inbox or have it moved to a specific folder
Body: the text field where you’d configure the context of the email report. You’ll find all of the necessary + advanced tools to customize the email template
Use “$history$” to put historical 10 latest backups: this is a formula that you can use in your template and you will receive 10 latest backup reports every time you receive a report, as a table.
Setup the Scheduler
After configuring the backup and schedule settings, you’d need to configure the Scheduler in VTiger to do the scheduled backups as well as send the reports.
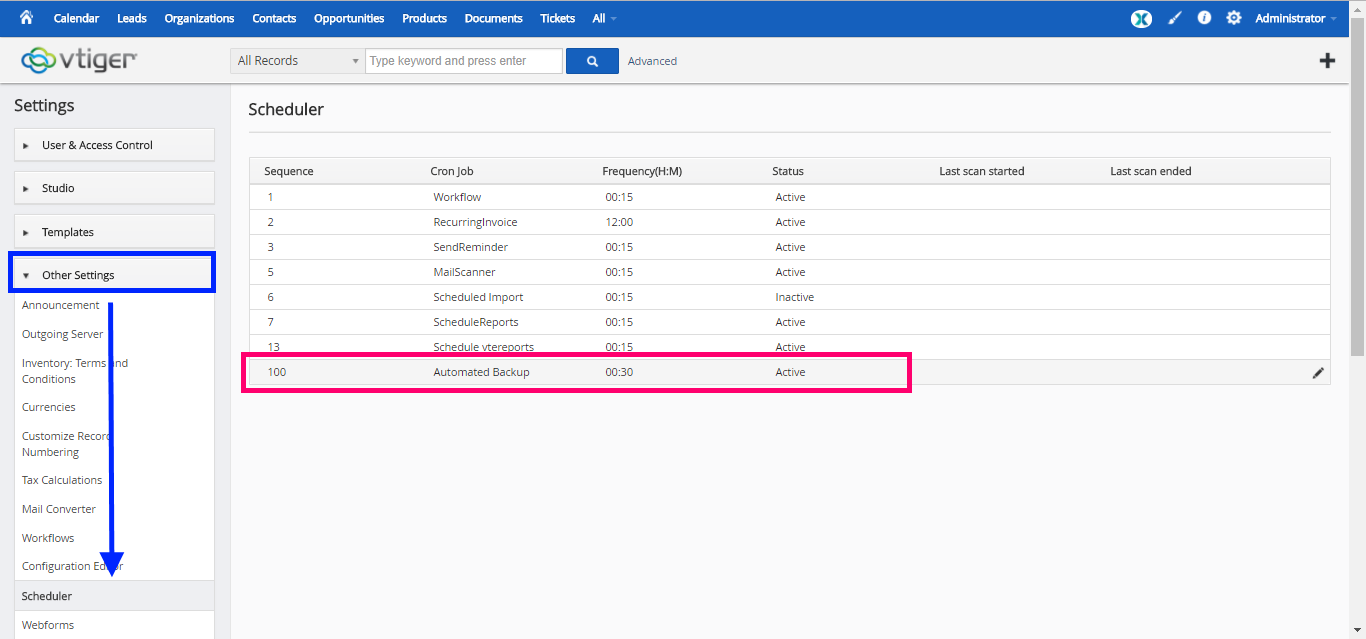
For VTiger 6, go to the CRM Settings > Other Settings > Scheduler
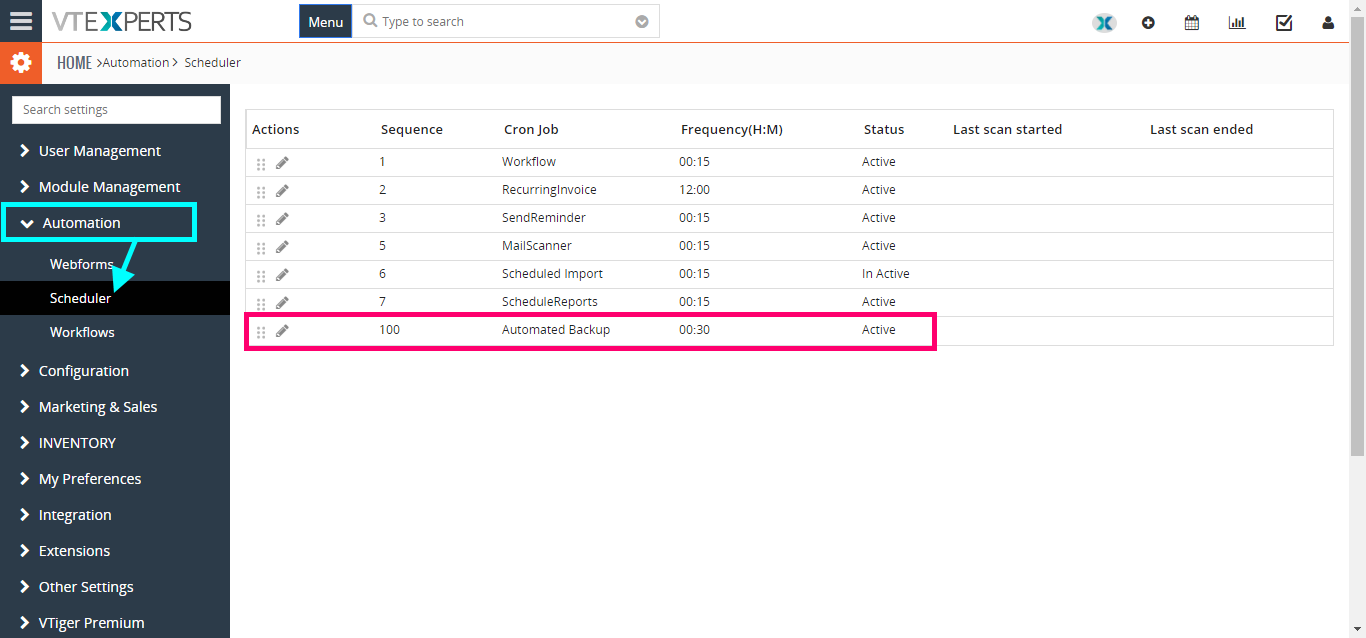
For VTiger 7, go to the CRM Settings > Automation > Scheduler.
You’d see the designed “Automated Backup” schedule in the list:
It simply asks for a couple of basic options:
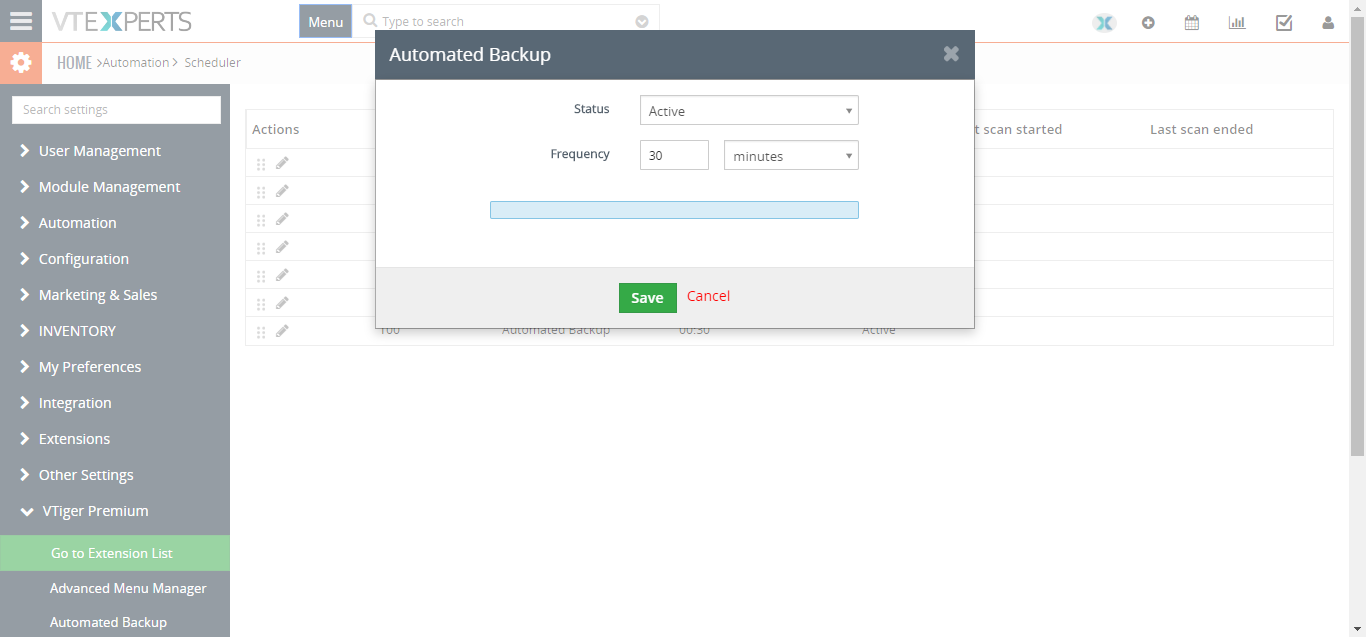

Status: set the status of the Scheduled backup. This is pretty much the VTiger permission as we already set it up in the extension configuration
Frequency: the frequency with which you want the scheduled backup to be run (after how many hours). You may need to set it up same as what you did in the module settings