

VTiger Custom Module & Relationship builder is an extension that allows crm administrators to create custom modules within few clicks. All custom modules are created following strict VTiger standards. In addition, the relationship builder allows crm admin to link together existing modules as well as new custom modules. It supports One way, 1:M and M:M relationships.
Configuration
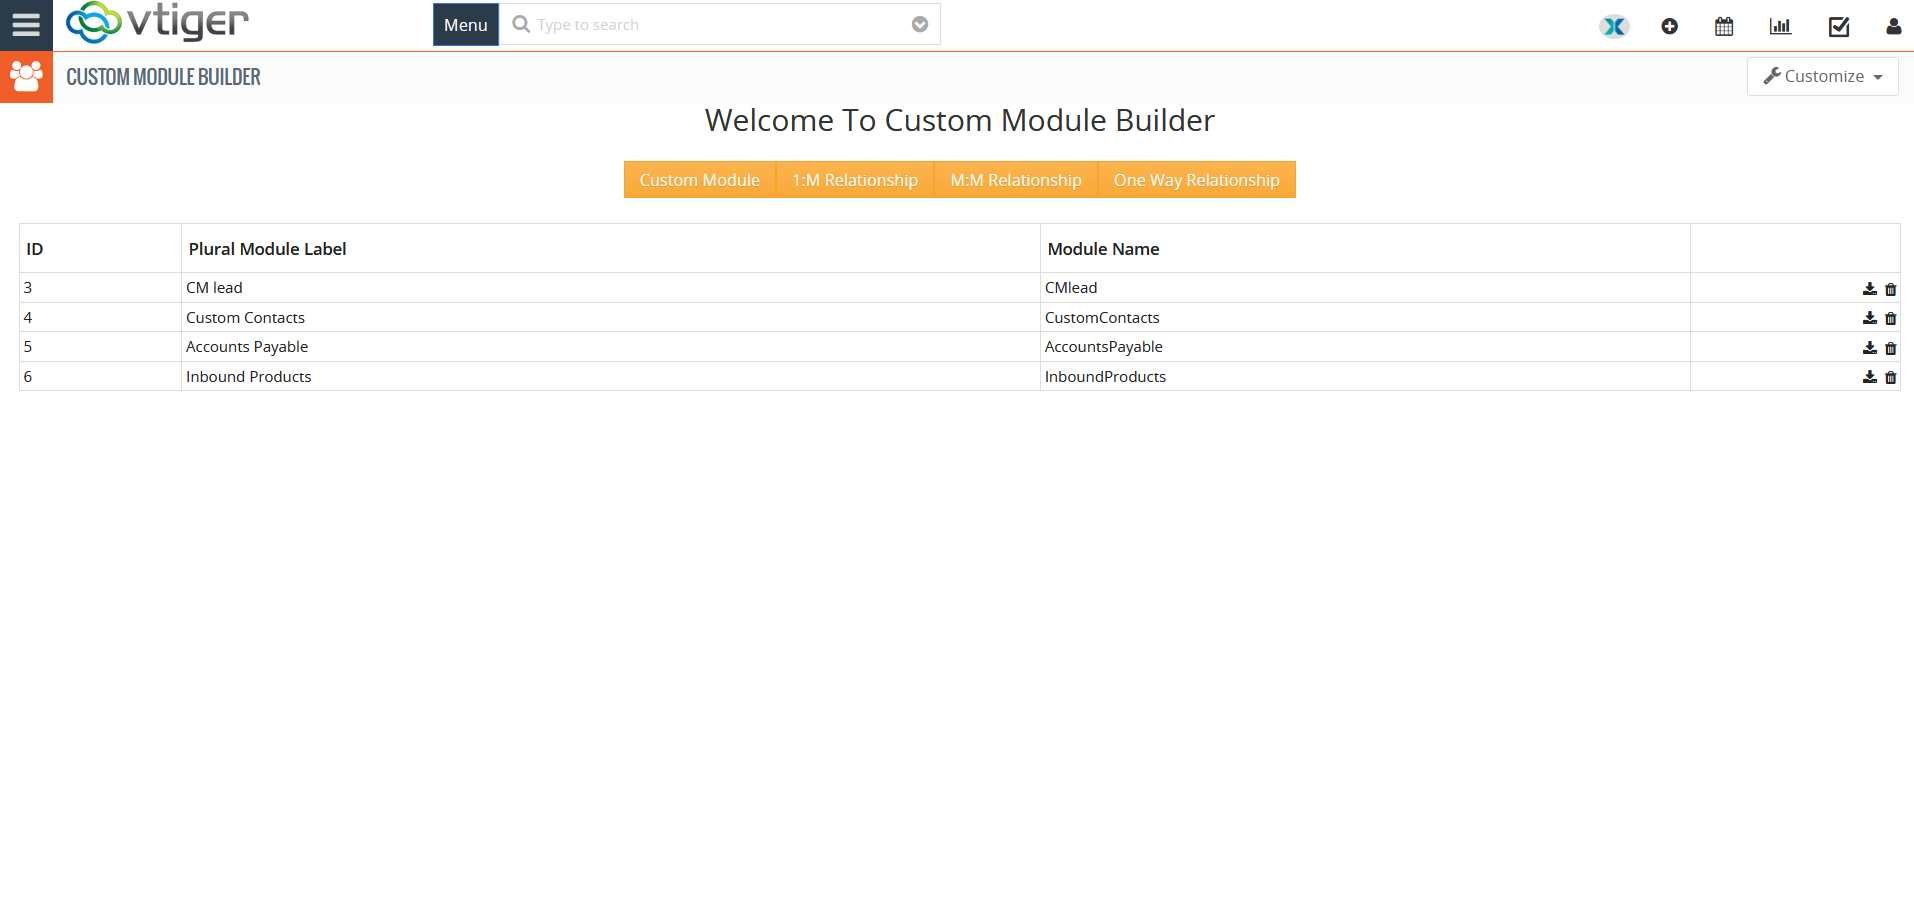
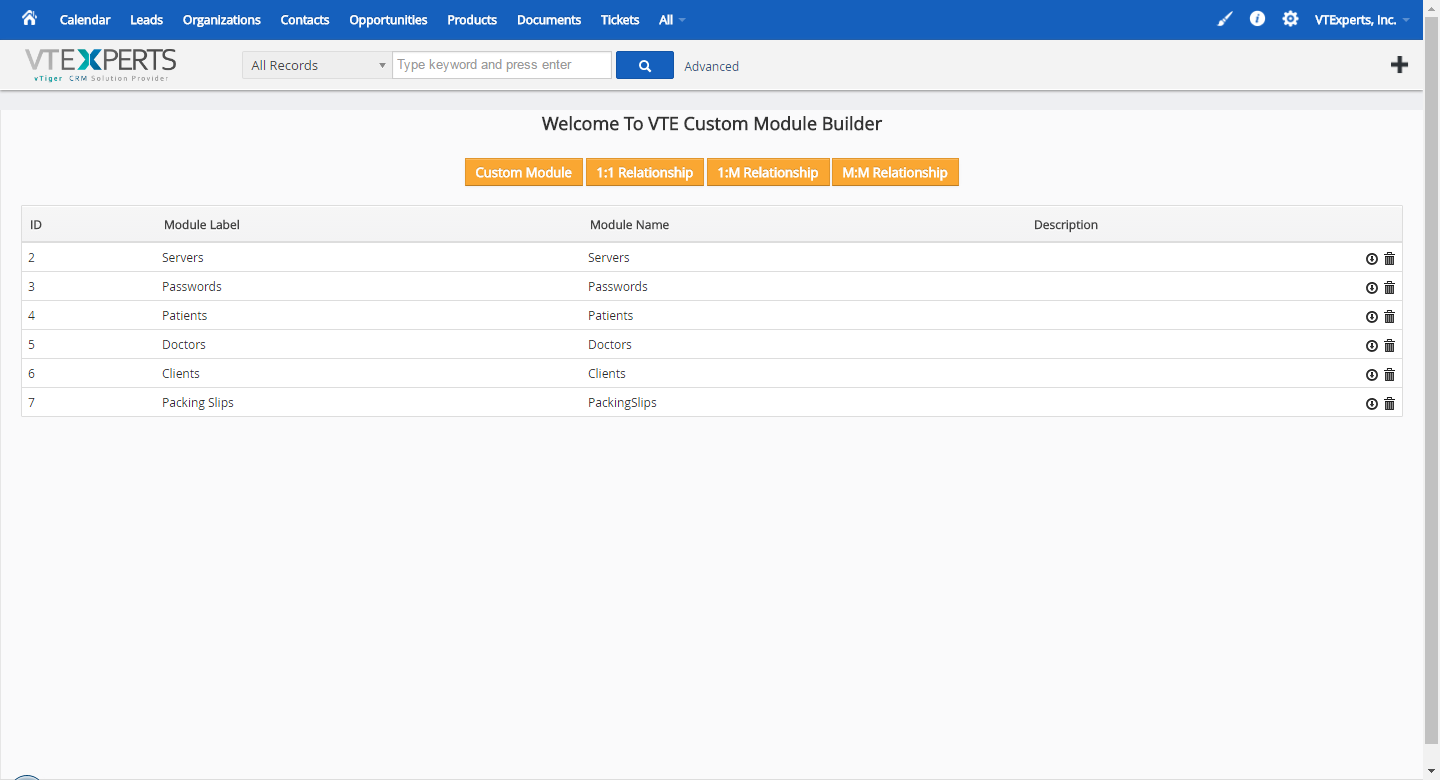
The module can be configured by going to CRM Settings > Other Settings > Custom Module and Relationship Builder. This is how the Configuration panel looks like:
Custom Module: create a new custom module
One way Relationship: In one way relationship, One record of primary module is linked to a single record from secondary module and the communication can take place only in one direction only.
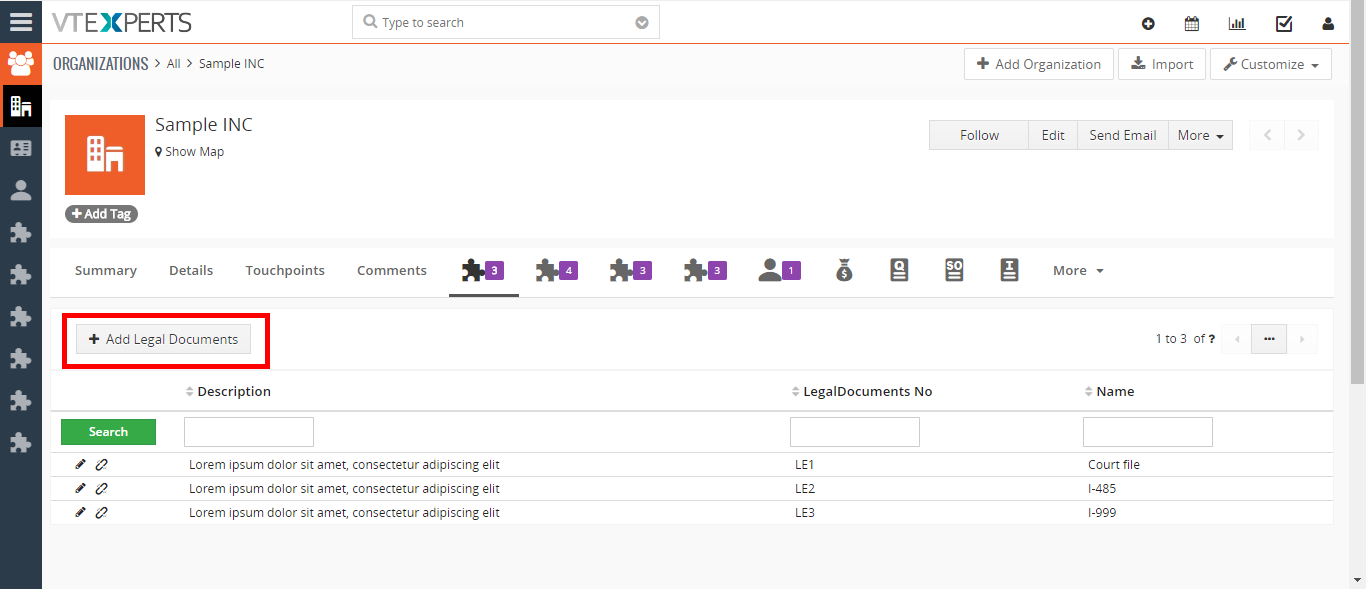
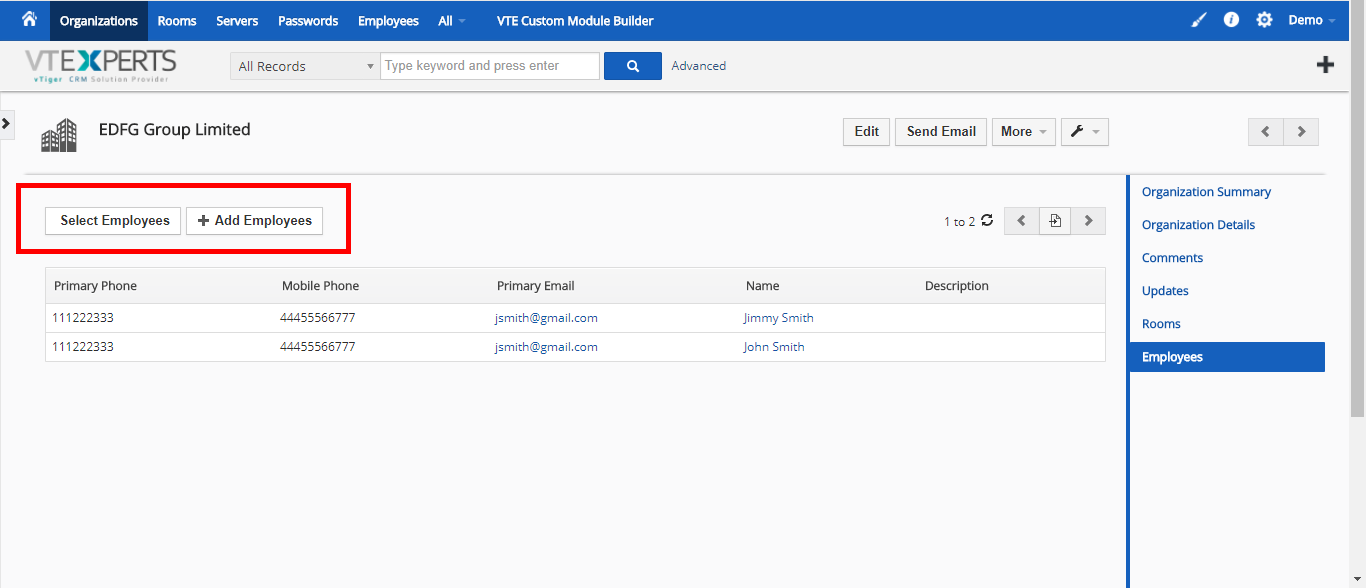
1:M Relationship: create a one-to-many relationship. So one record from primary module can be linked to many records from secondary module
M:M Relationship: create a many-to-many relationship. So multiple records from one module could be linked to multiple other records.
Modules list: the list of all the custom created modules
Delete: use the trash bin icon to delete previously created unwanted modules.
Note: In previous versions of this Extension, 1:1 relationship was also offered, it was removed because of its instability. Moreover, 1:1 relationship is not offered as a default relationship type in VTiger
Creating Custom Module
Creating a custom module with this feature is very simple. To do so, simply click the ‘Custom Module’ button in the Configuration Panel. You will see the module creation block.
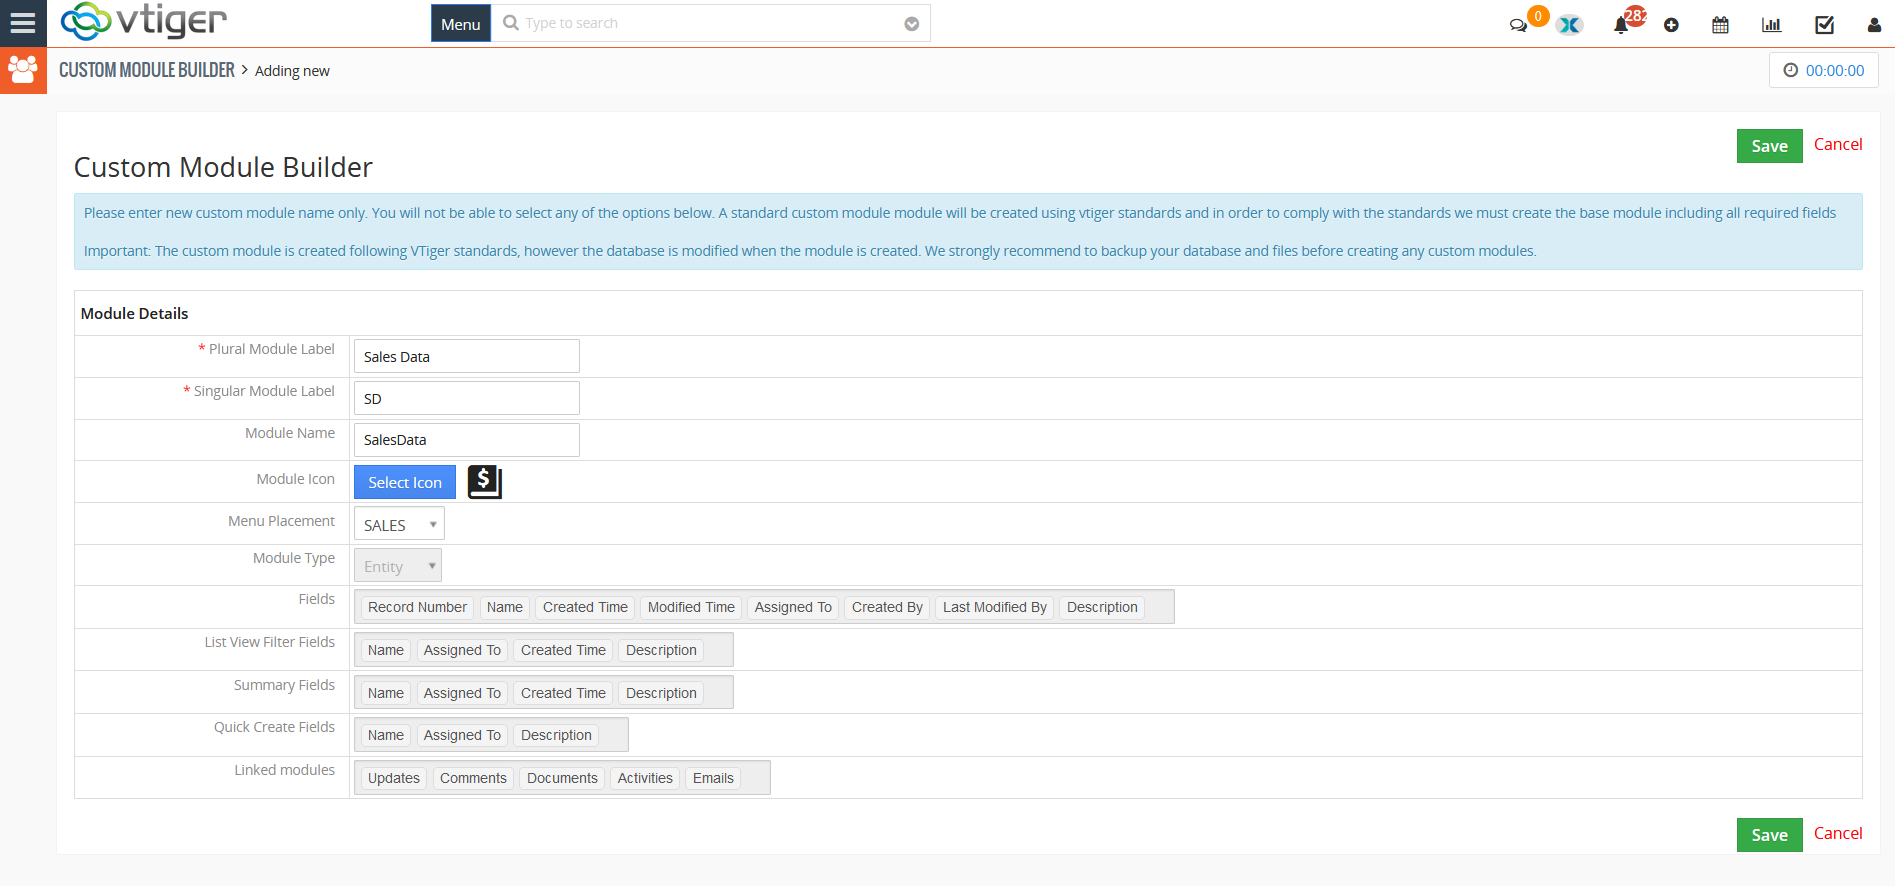

1. Plural Module Label: Provide the full name of the newly built module e.g. Sales Data
2. Singular Module Label: Provide the short single name for the module. e.g. SD (initials of the full name)
3. Module Icon “Select Icon”: in VTiger 7, there is also the option to set a custom icon for the new module. Click the “Select Icon” button and select a custom icon from the list
To modify the custom module as per your requirements, go to “Layout Editor” and create custom fields as any standard VTiger module.
Setting Modules’ Icons in VTiger 7
In VTiger 7, you can also set a custom icon for the custom modules. The option is available in the “Custom Module” section (while creating a new module.
Clicking the button will show a number of custom icons from which you can select an icon for the new module. It helps to quickly locate the custom module in CRM.
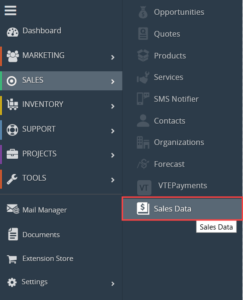
Menu Placement: Select the banner under which you want to place the newly created module in the menu
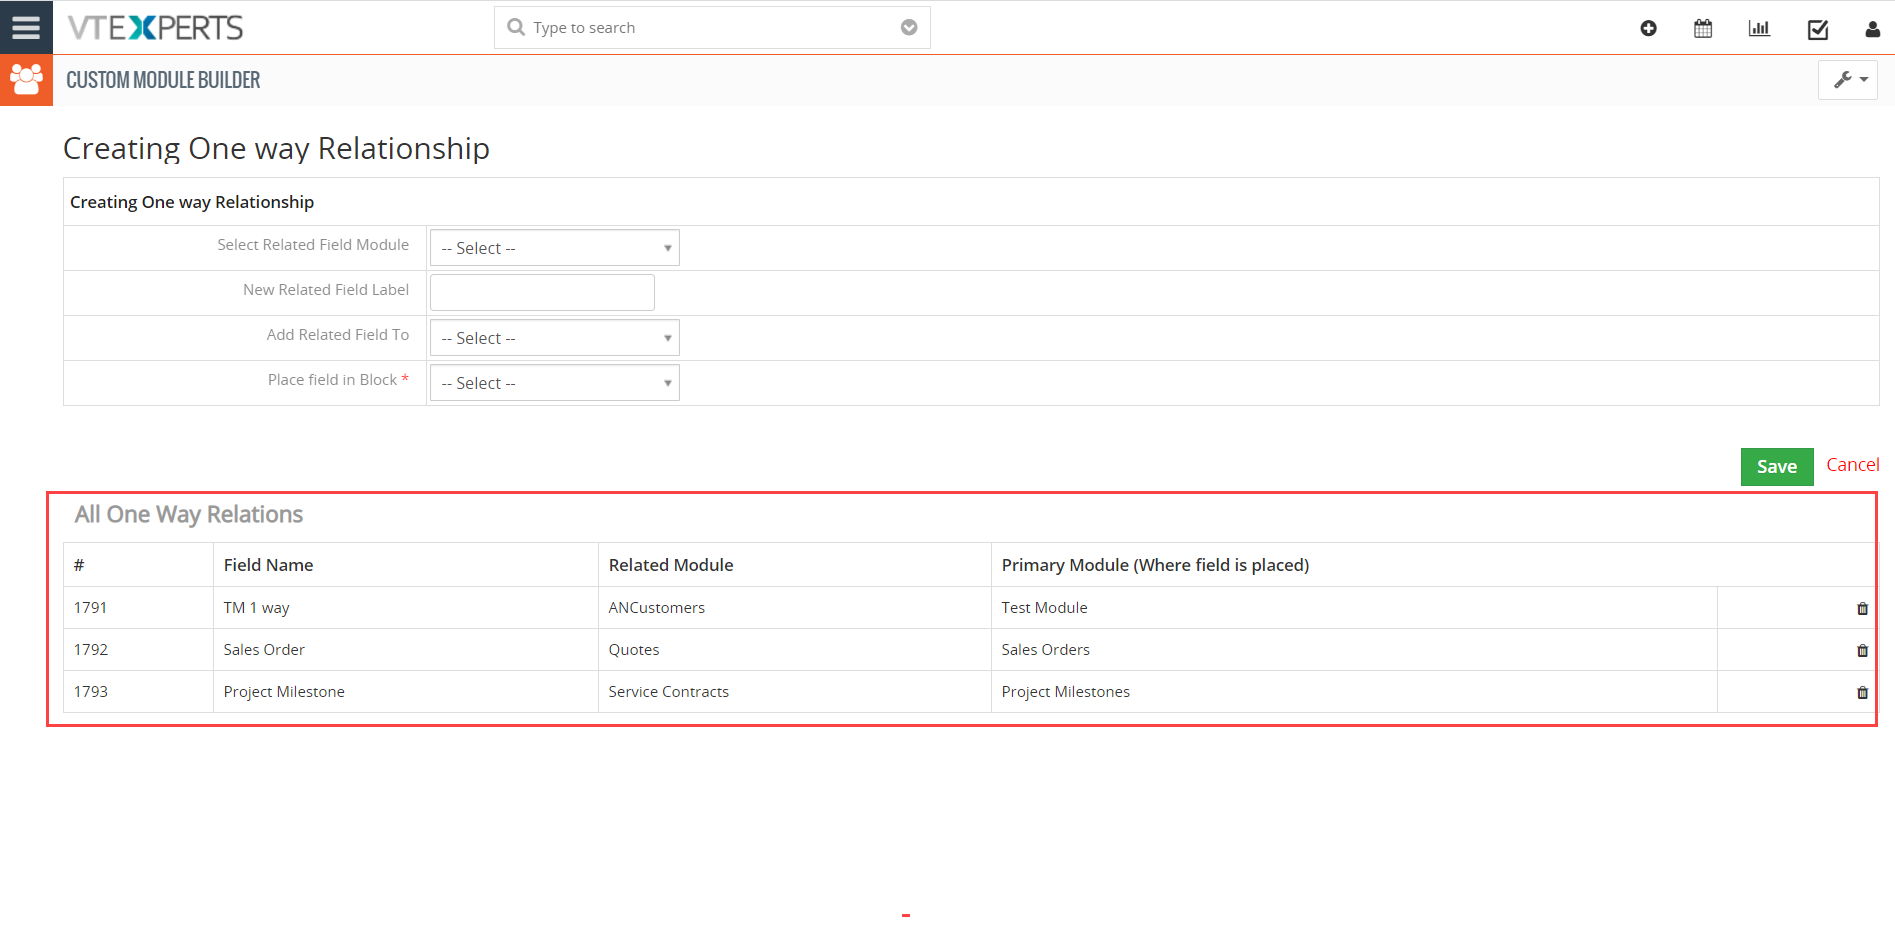
One Way Relationship
One way relationship is a newly added option in the module builder
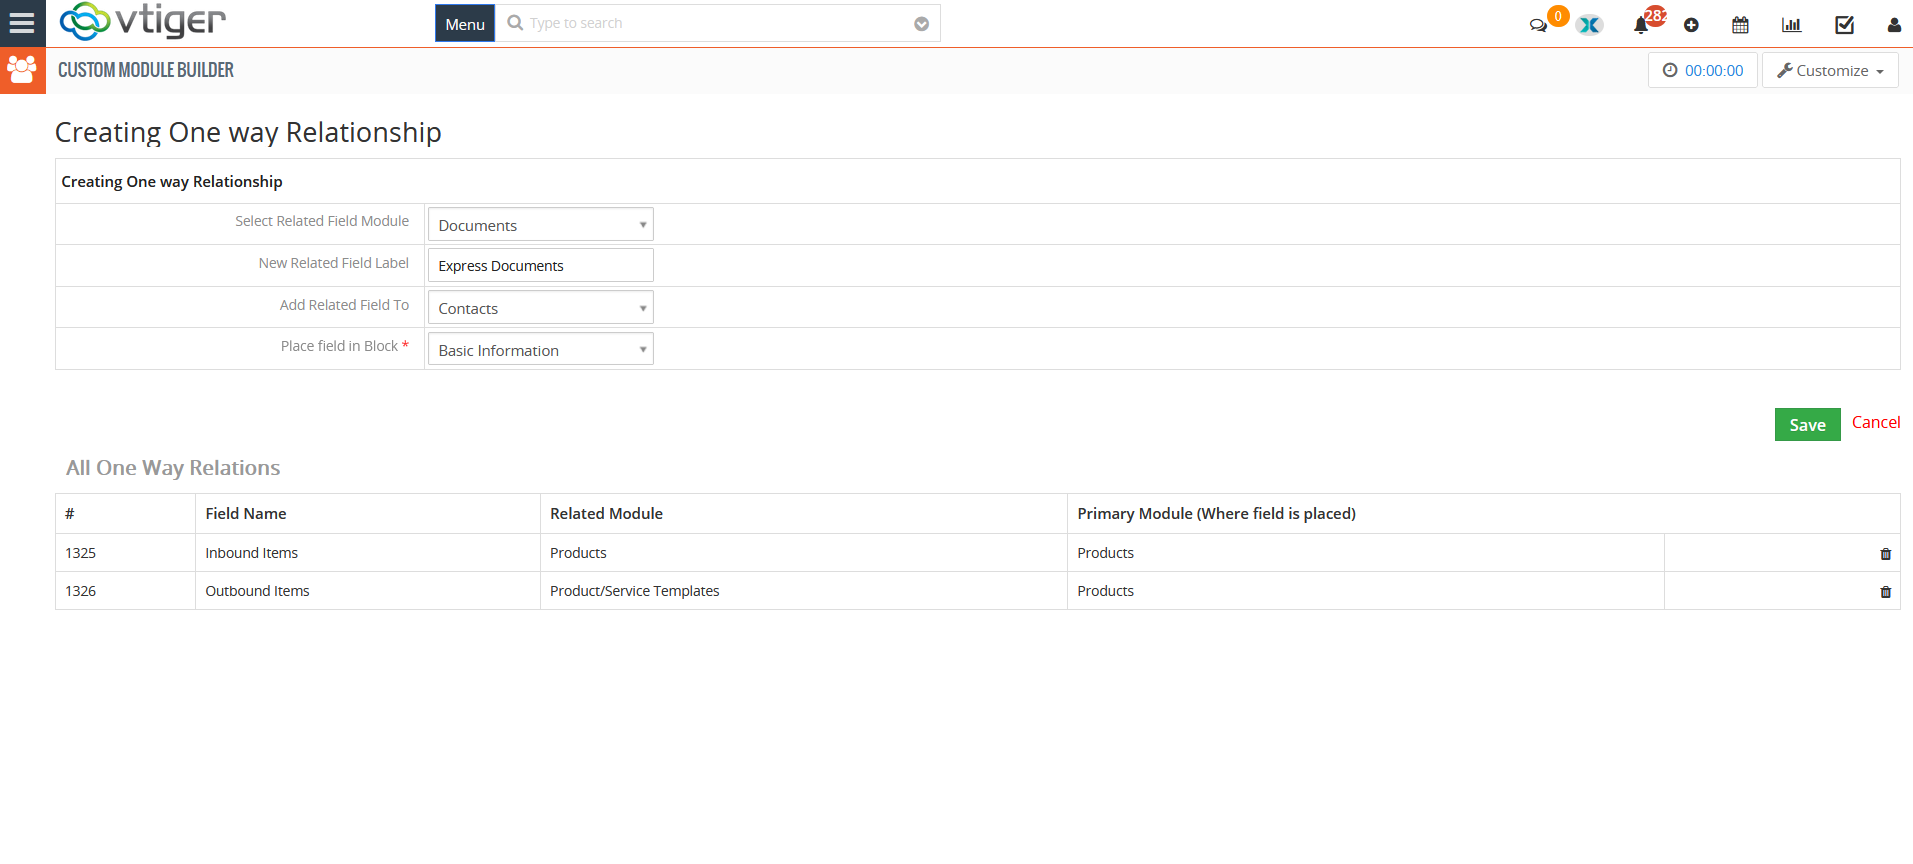
1. Select Related Field Module: Select the module to which newly created field is related to. e.g. Document
2. New Related Field Label: Provide the label for the newly created field. e.g. Express Document
3. Add Related Field To: Specify the module in which you want to place the newly created field. e.g. Contacts
4. Place field in Block: Choose the bock in which you want to place the newly created field. e.g. Basic Information
Following image shows the user interface, that how this one way relationship will appear to the user
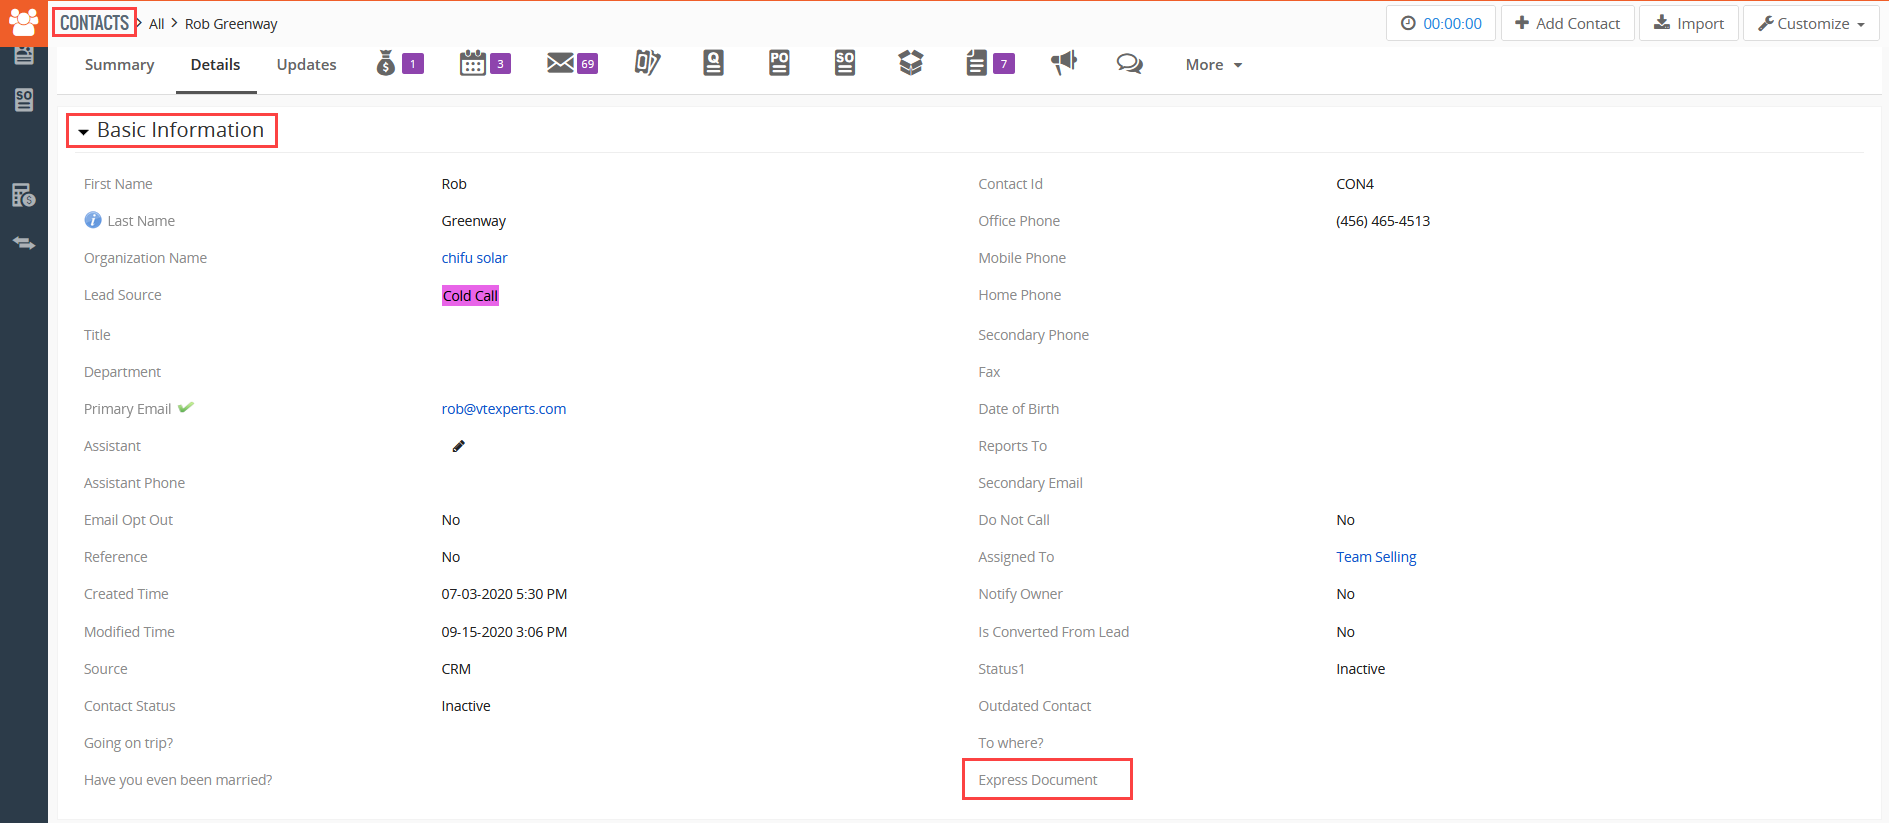
All One Way Relations: All the custom one way relations created can be seen in this list
1:M Relationship
To add a one to many relationship, go to the ‘1:M Relationship’ section from the Configuration Panel and set up the relationship.
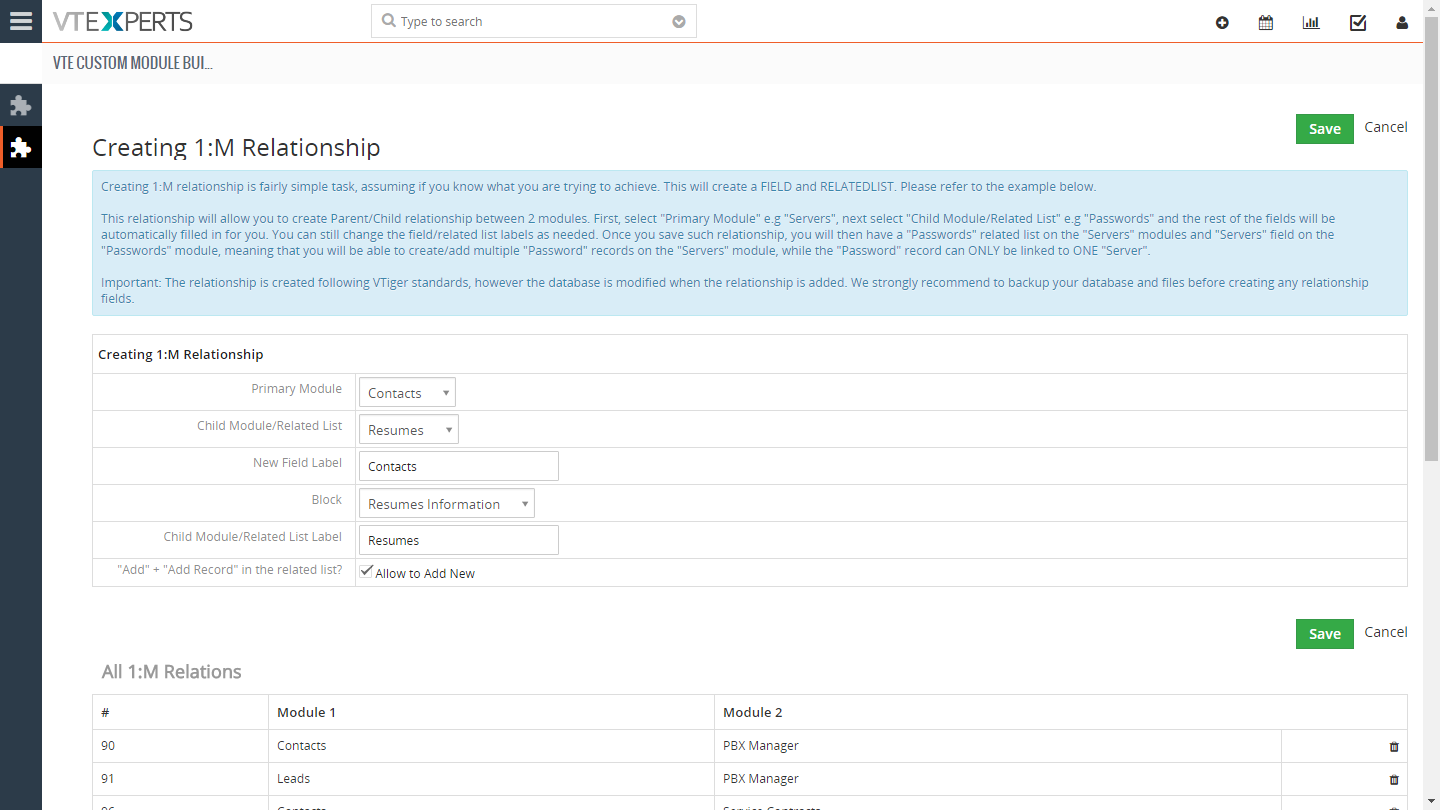
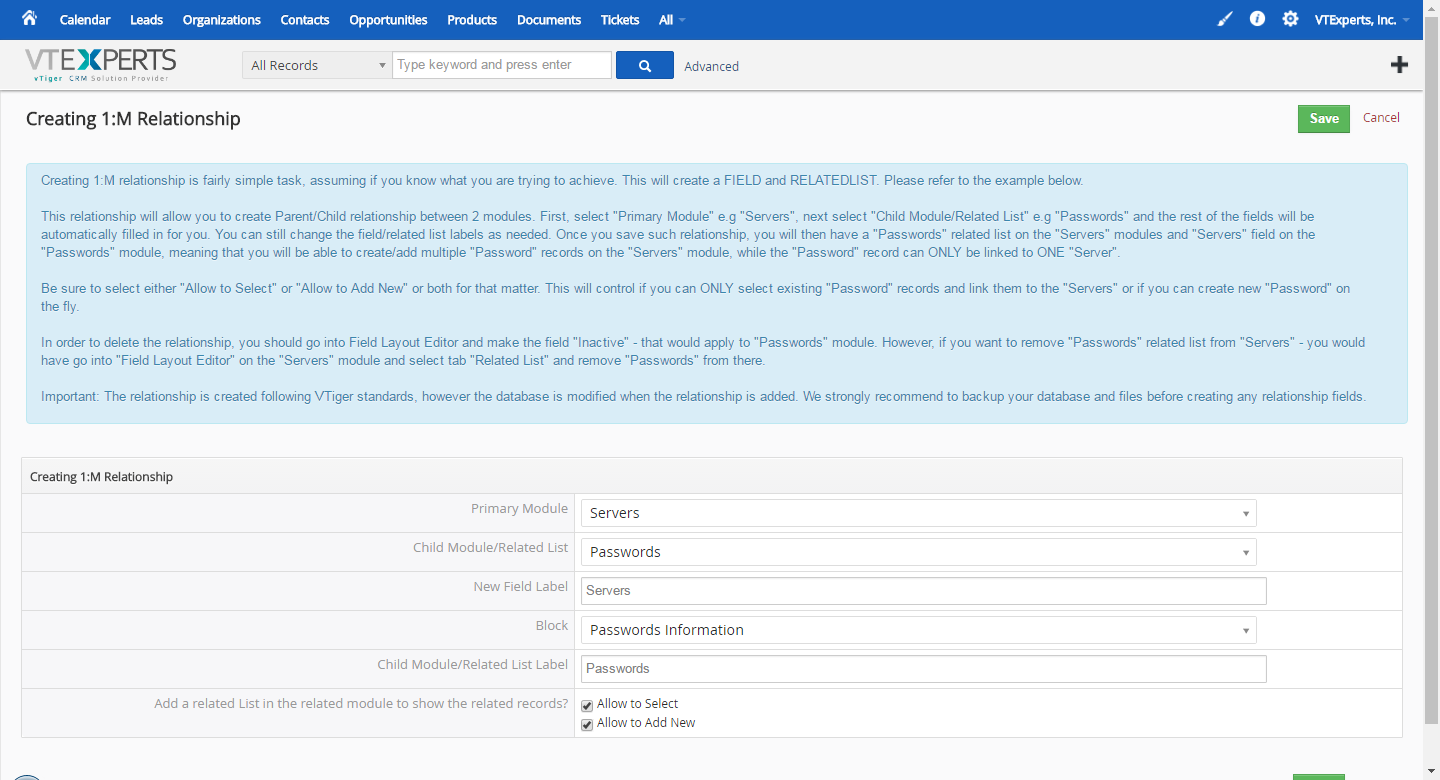
Primary Module: select the module you want to link to multiple records of another module
Child Module/Related List: select the module you want to link to the single primary module
Block: select the block of records from secondary module in which you want the field to be displayed
Allow to Select: check the option if you want to allow to select a record from child module within the primary module
Allow to Add New: check the option if you want to allow to add new record of child module from within the primary module
M:M Relationship
To add a many to many relationship, go to the ‘M:M Relationship’ section from the Configuration Panel and set up the relationship.
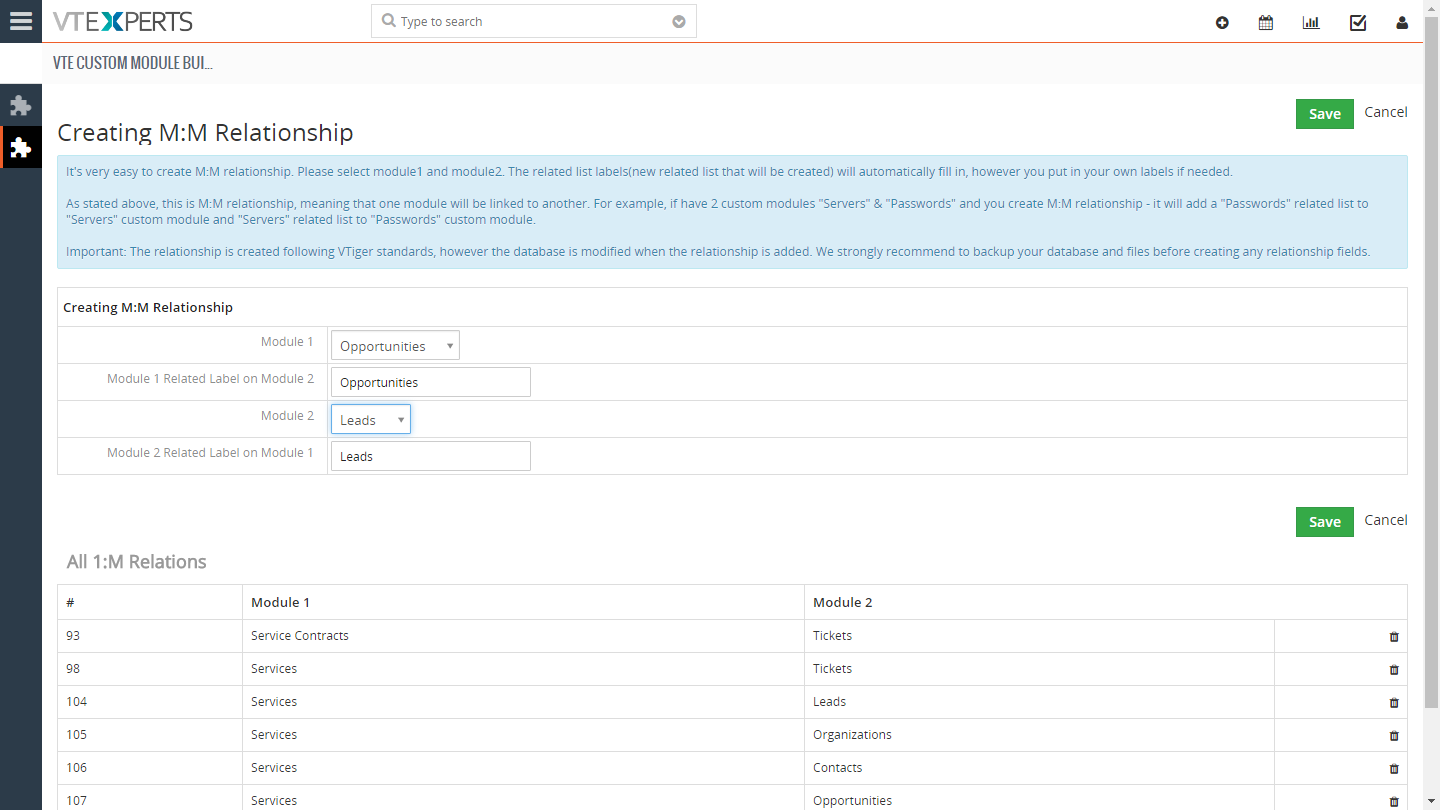
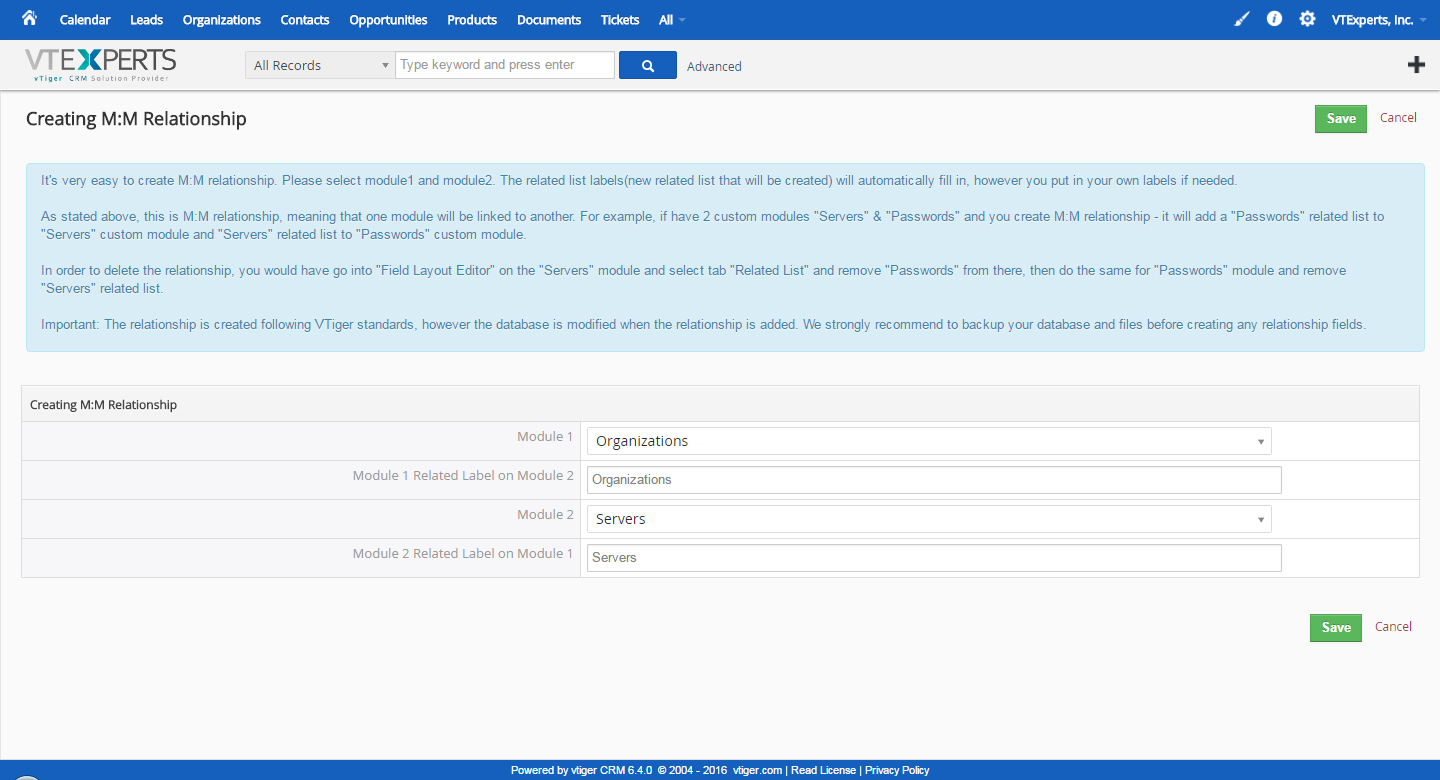
Module 1: select one of the modules you want to interlink in the many-to-many relationship
Module 2: select the other module you want to link to the first module in a many-to-many relationship.