Extension designed to trigger popups/alerts based on a certain field(s) value on the record. It supports edit/create views, meaning that as you fill in the field – you can trigger an alert/popup on the screen and prevent record from being saved. It also works with detail views and the alerts are shown as you open the record. It’s very powerful extension to enforce rules, policies as well as any other restrictions to maintain data integrity.
We’ll give you an example: Assume ticket is being created, however the customer(organization) has a status of “Unpaid” or “Suspended” – with the extension, you will be able to configure to alert the person creating a ticket (on the spot) and prevent ticket from being saved.
Configuration
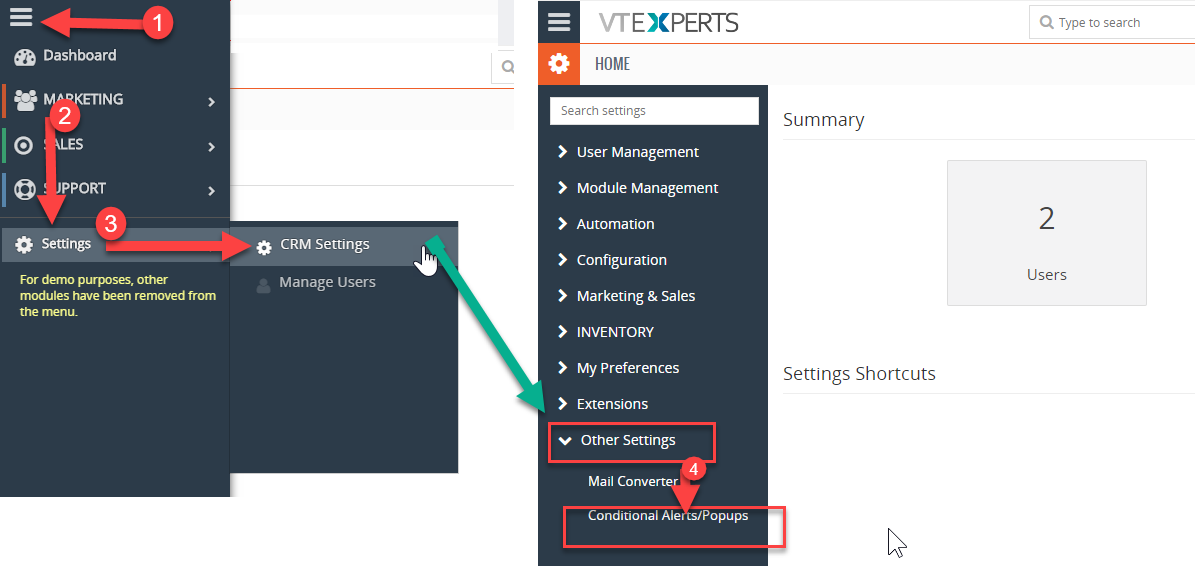
The extension configuration is based on standard VTiger Workflows. To configure the workflows, click the Menu button, scroll to “Settings” and click “CRM Settings”. From that page, on the left, look for the “VTiger Premium” drop down in the left bar and locate “Conditional Alerts/Popups”.
Here, you will see the following screen:
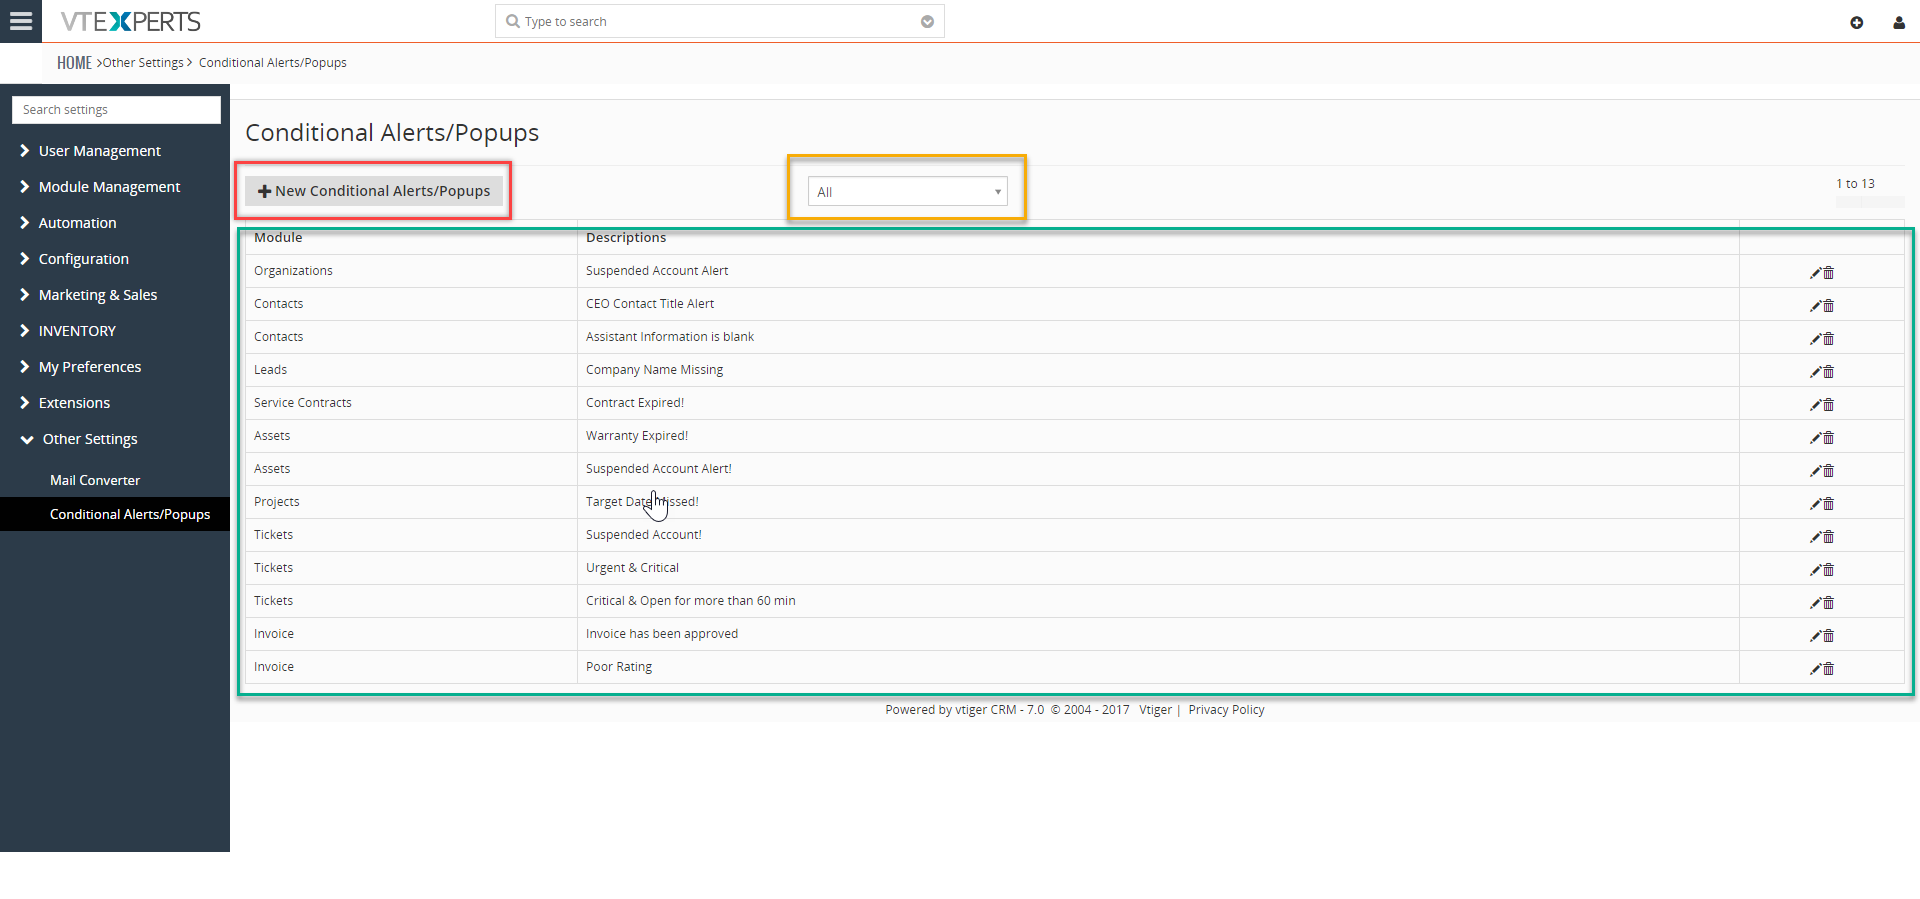
+New Conditional Alerts/Popups: to create a new workflow that will be the basis of alerts to show up
List of Conditional Alerts/Popups: the complete list of all the conditions configured already
“All” – Sort by Modules: sort down the configured conditions in the list by module
+New Conditional Alerts/Popups
This section will guide you how to configure a Workflow to meet your requirements to trigger a condition based alert. It has 3 steps:
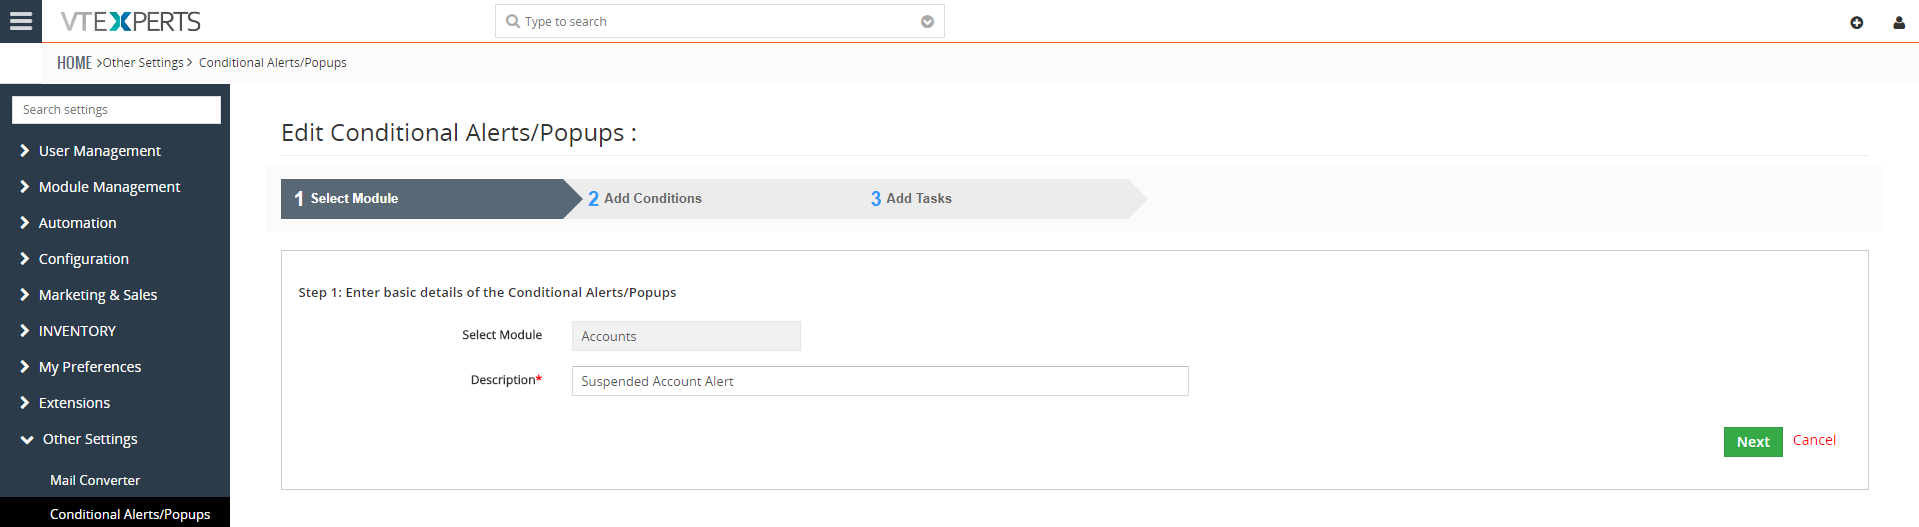
1. Select Module:
This section is for the basic details of the Conditional Alert being configured.
Select Module: choose the module for which you are configuring the Conditional Alert
Description: give a name/add info about the conditional alert
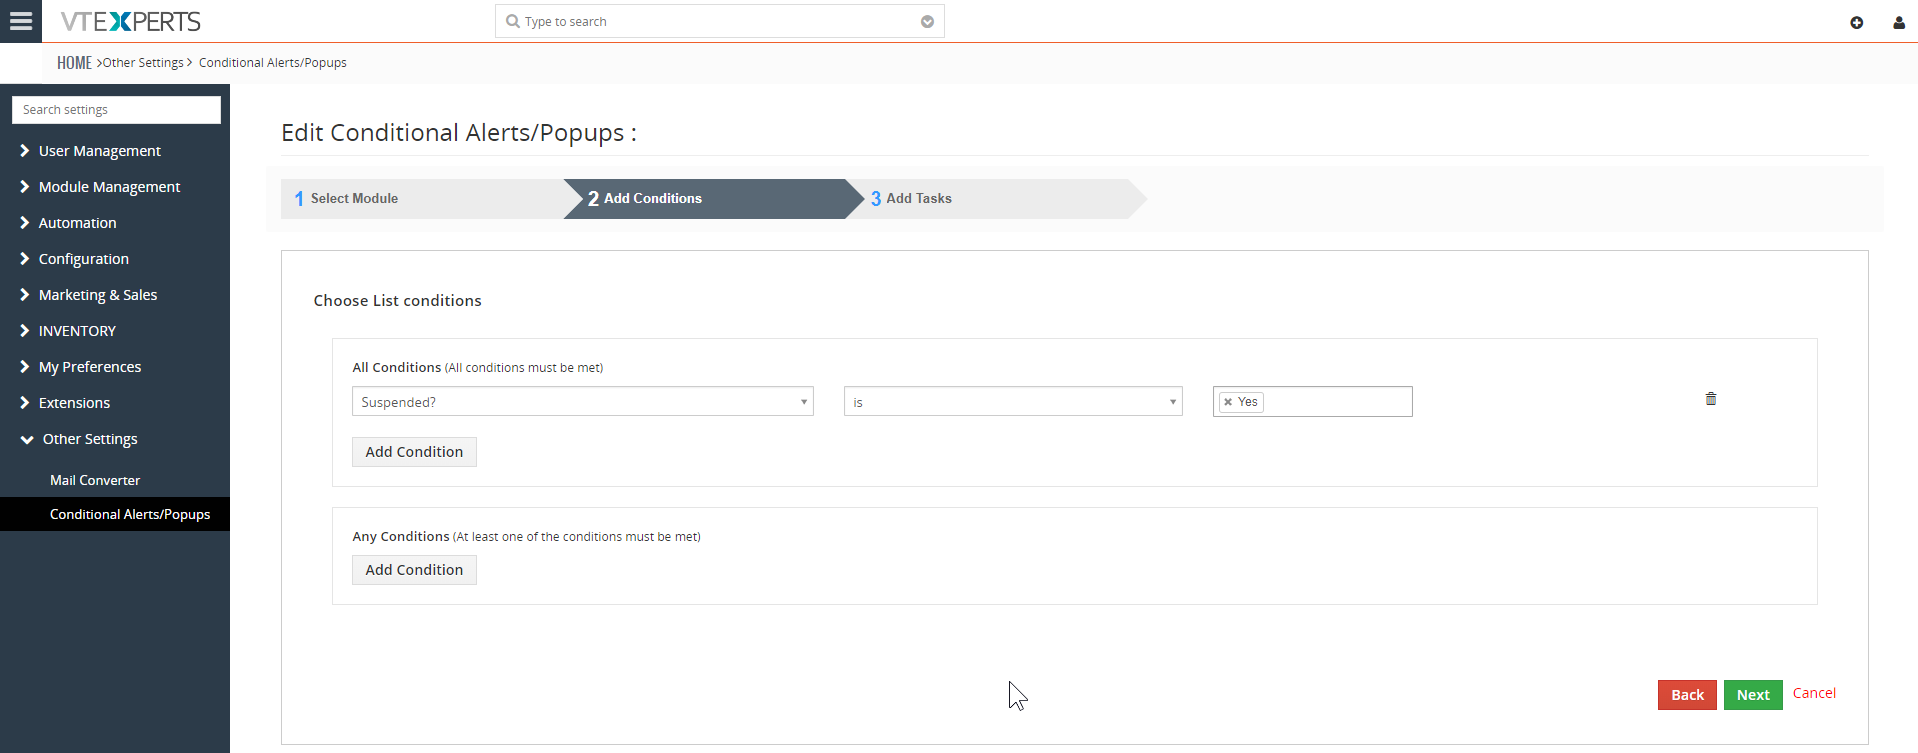
2. Add Conditions:
Now specify the condition on the basis of which you want the alert to be triggered
All Condition: this allows you to setup single or multiple conditions. The Workflow will be triggered if ALL of the configured conditions are met
Any Condition: if you need the Workflow to run if anyone of the conditions is met, setup the conditions here
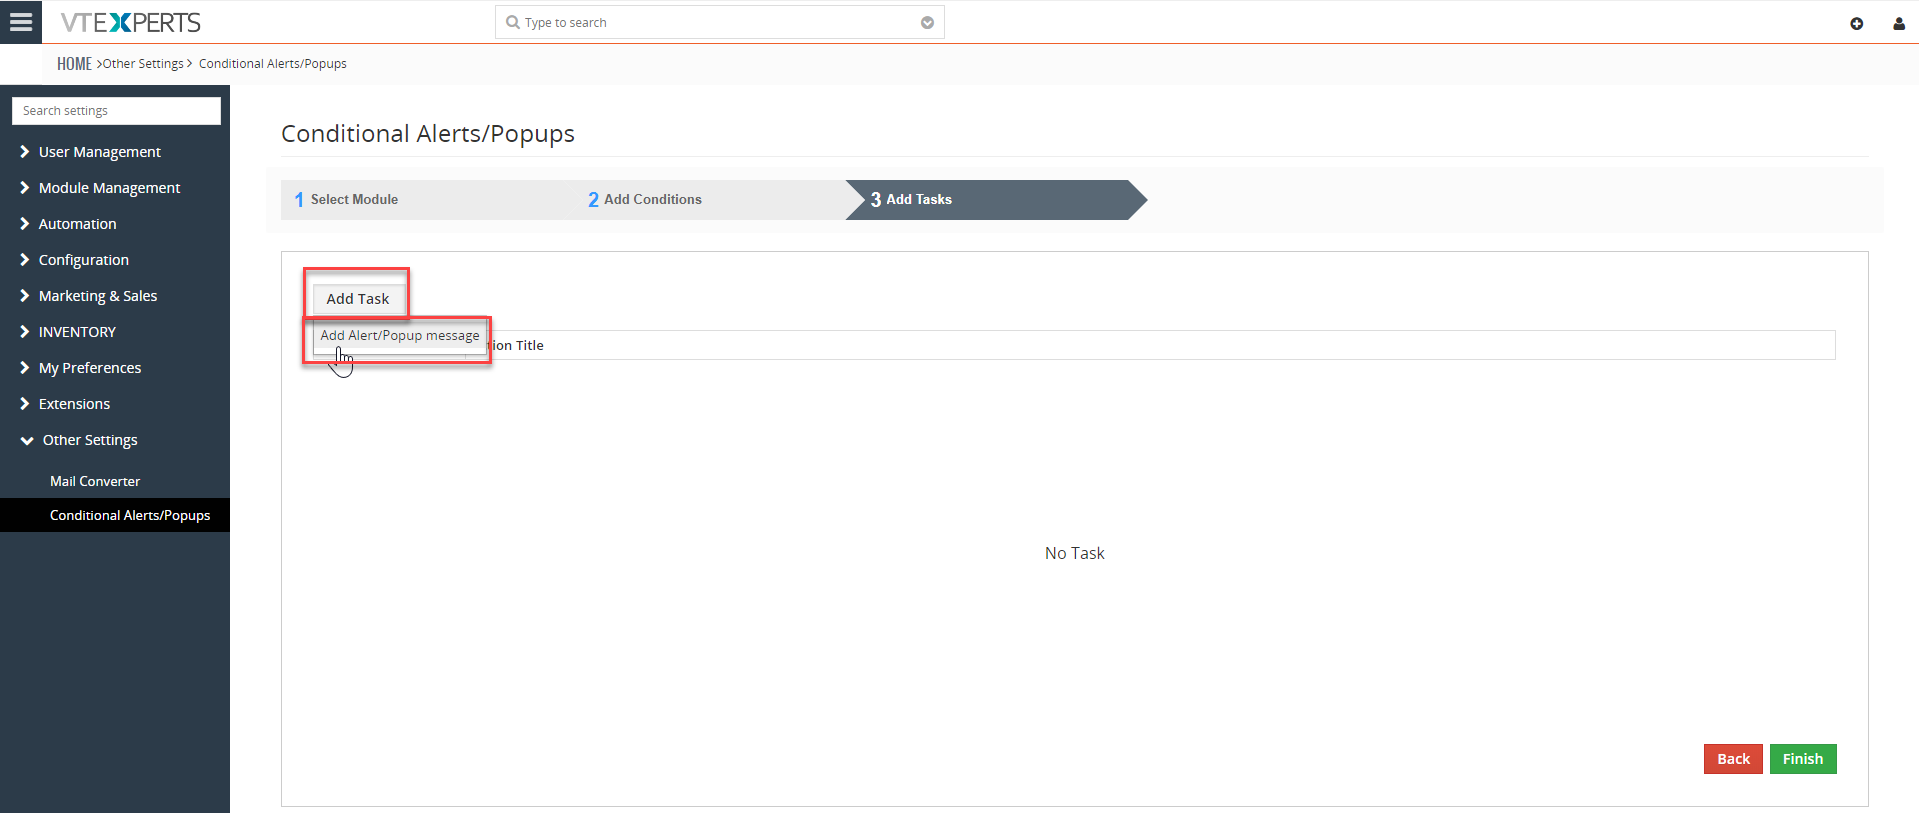
3. Add Tasks:
At this step, you will be allowed to setup the action that will be taking place once the step 2 conditions are met (standard VTiger Workflow functionality).
Click the “Add Task” button and select the only option present i.e. “Add Alert/Popup message”.
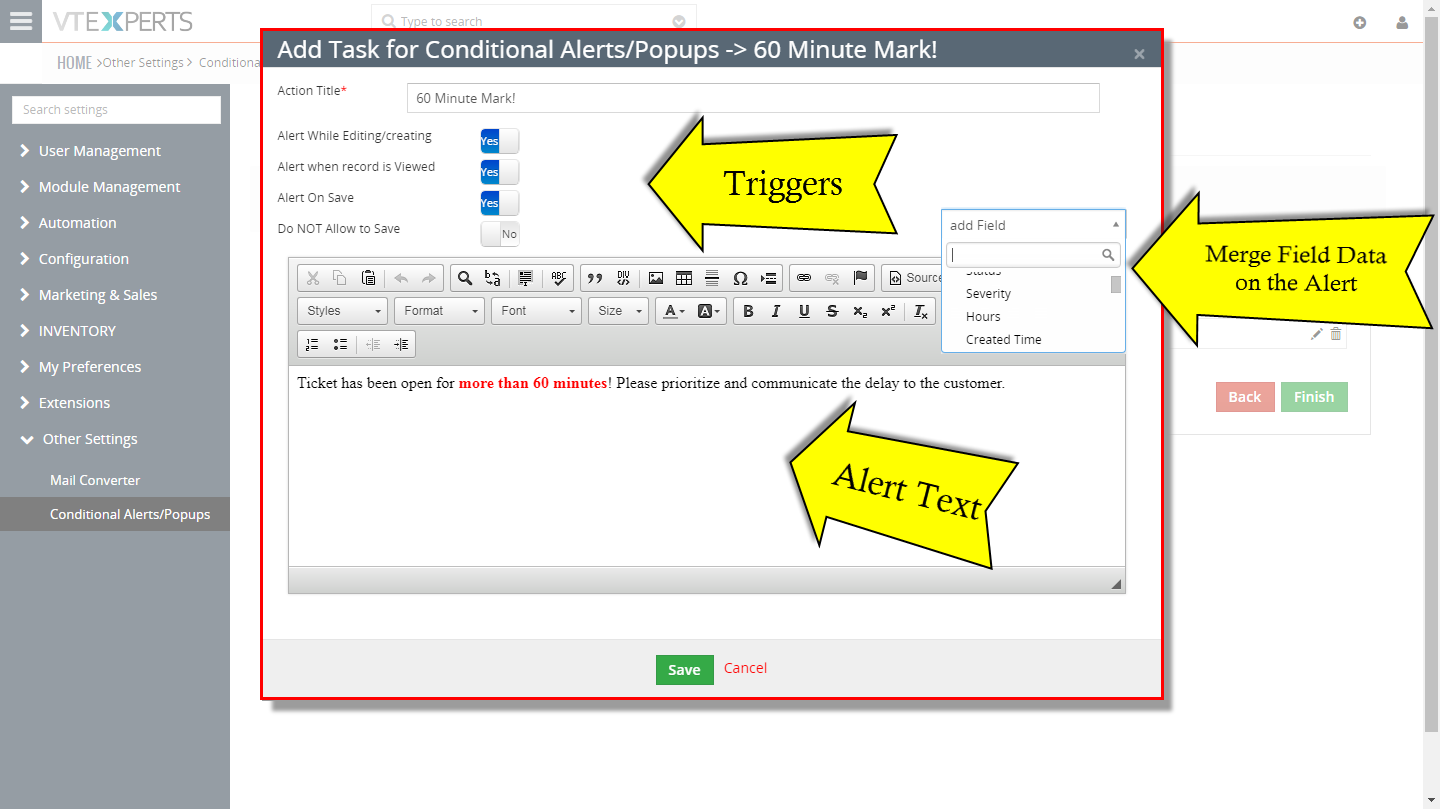
The settings popup will appear. Here, you can set the specifications of the alert that will be shown in the select module once the configured conditions are met.
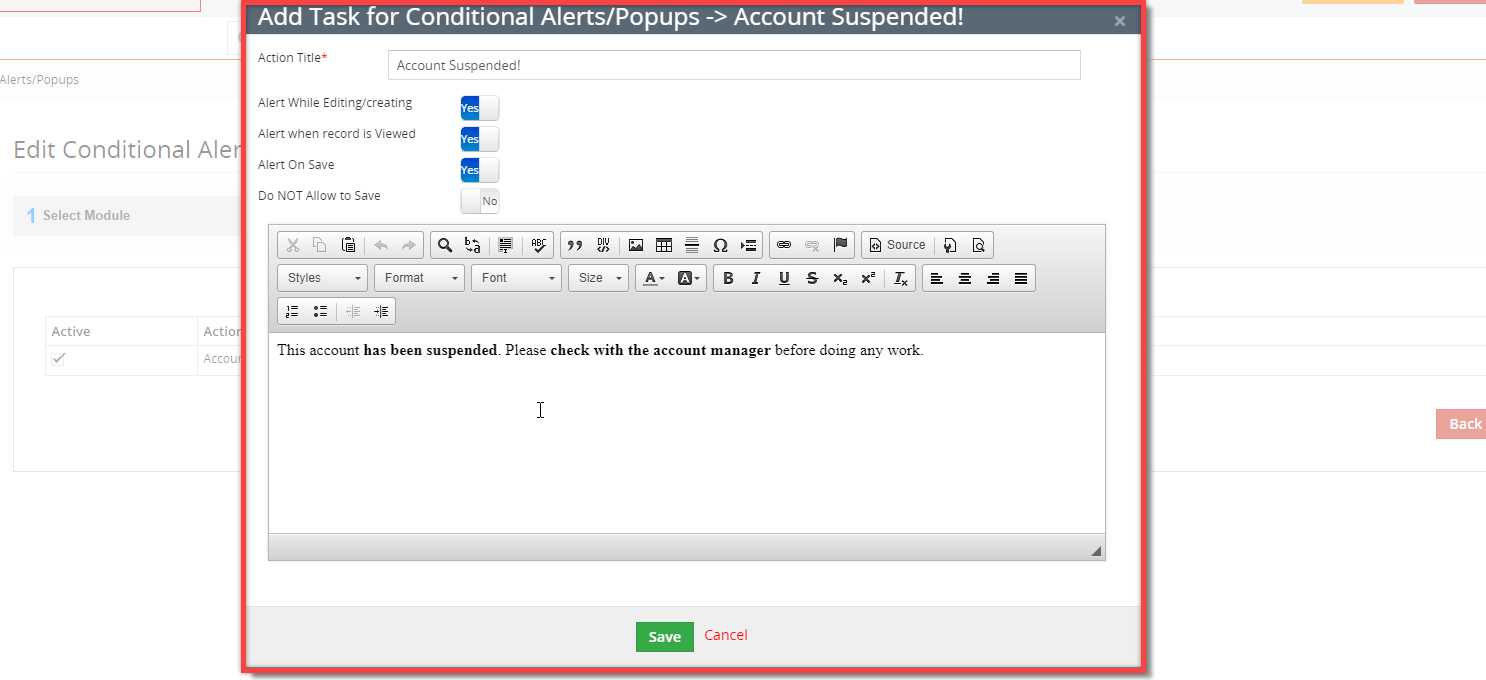
Action Title: assign a name to the actions
Alert While Editing/Creating: if this option is enabled (“Yes”), it will give alert when a record is being created or edited, considering the conditions are met
Alert when record is Viewed: if this option is enabled (“Yes”), when a user opens a record that satisfies the conditions of the Conditional alert, it will show the alert popup
Alert On Save: if this option is enabled (“Yes”), it will alert users while saving the record
Do NOT Allow to Save: if this option is enabled (“Yes”), users cannot save records that fall under the specified condition(s). This is meant to stop users from creating records/tickets/opportunities etc. that do not meet the requirements
Alert Text: after all the above explained conditions, there’s a Rich Text Field that allows you to write and format the text of the alert popup. It will allow you to convey proper message to the users about that record and why they need to be extra careful about it or stop working on it
Merge Data from Fields: You can also map data by simply using the short code for a field. For example, you can use $last_name$ to bring on the Last Name of the record, or to populate the conditional alert popup with email ID of the contact, $primary_email$ string will do the work. This mapping works with any of the field of the module that can be used in any way.
Once you configure the Workflow and proper actions, hit “Save”. Now the configuration is set and alerts will be shown according to your settings.
Example
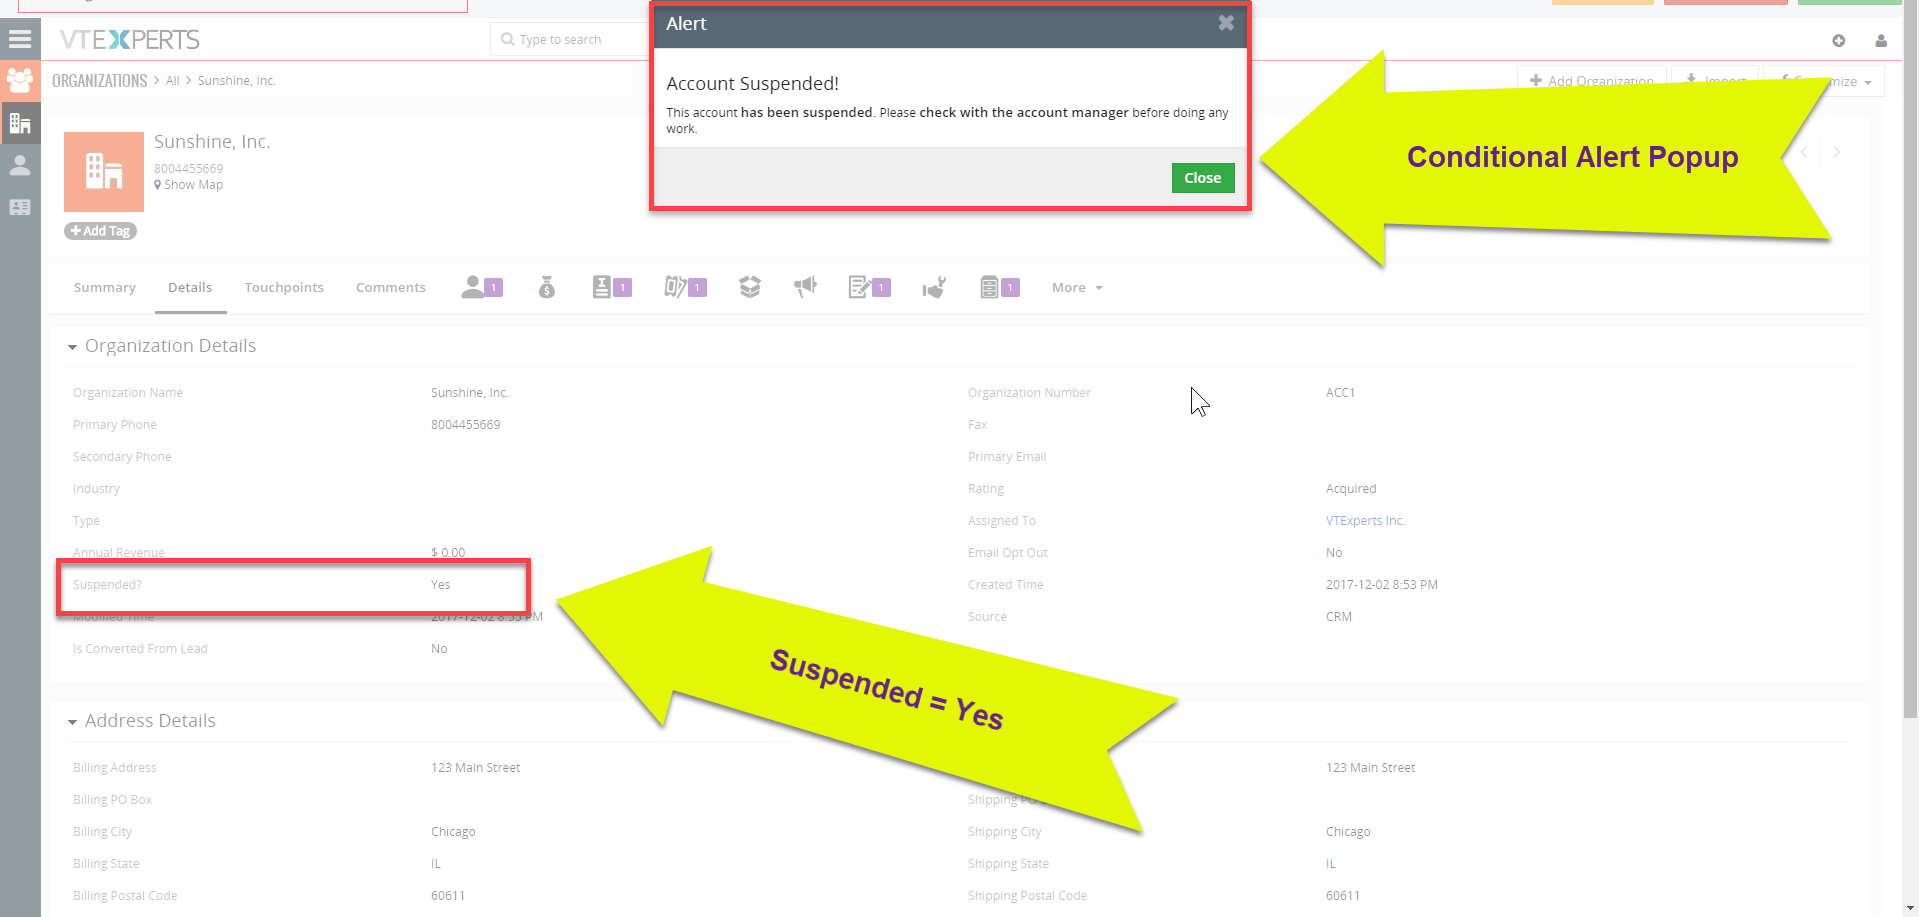
Opening a Record:
Consider that we configured “Organizations” as our module and the condition is if the field “Suspended” equals to “Yes”. Now, when we open an Organization which has “Suspended” field as “Yes”, it will show the popup alert when the record is opened. The popup will contain the alert text as you put in the settings. The popup will look something like this:
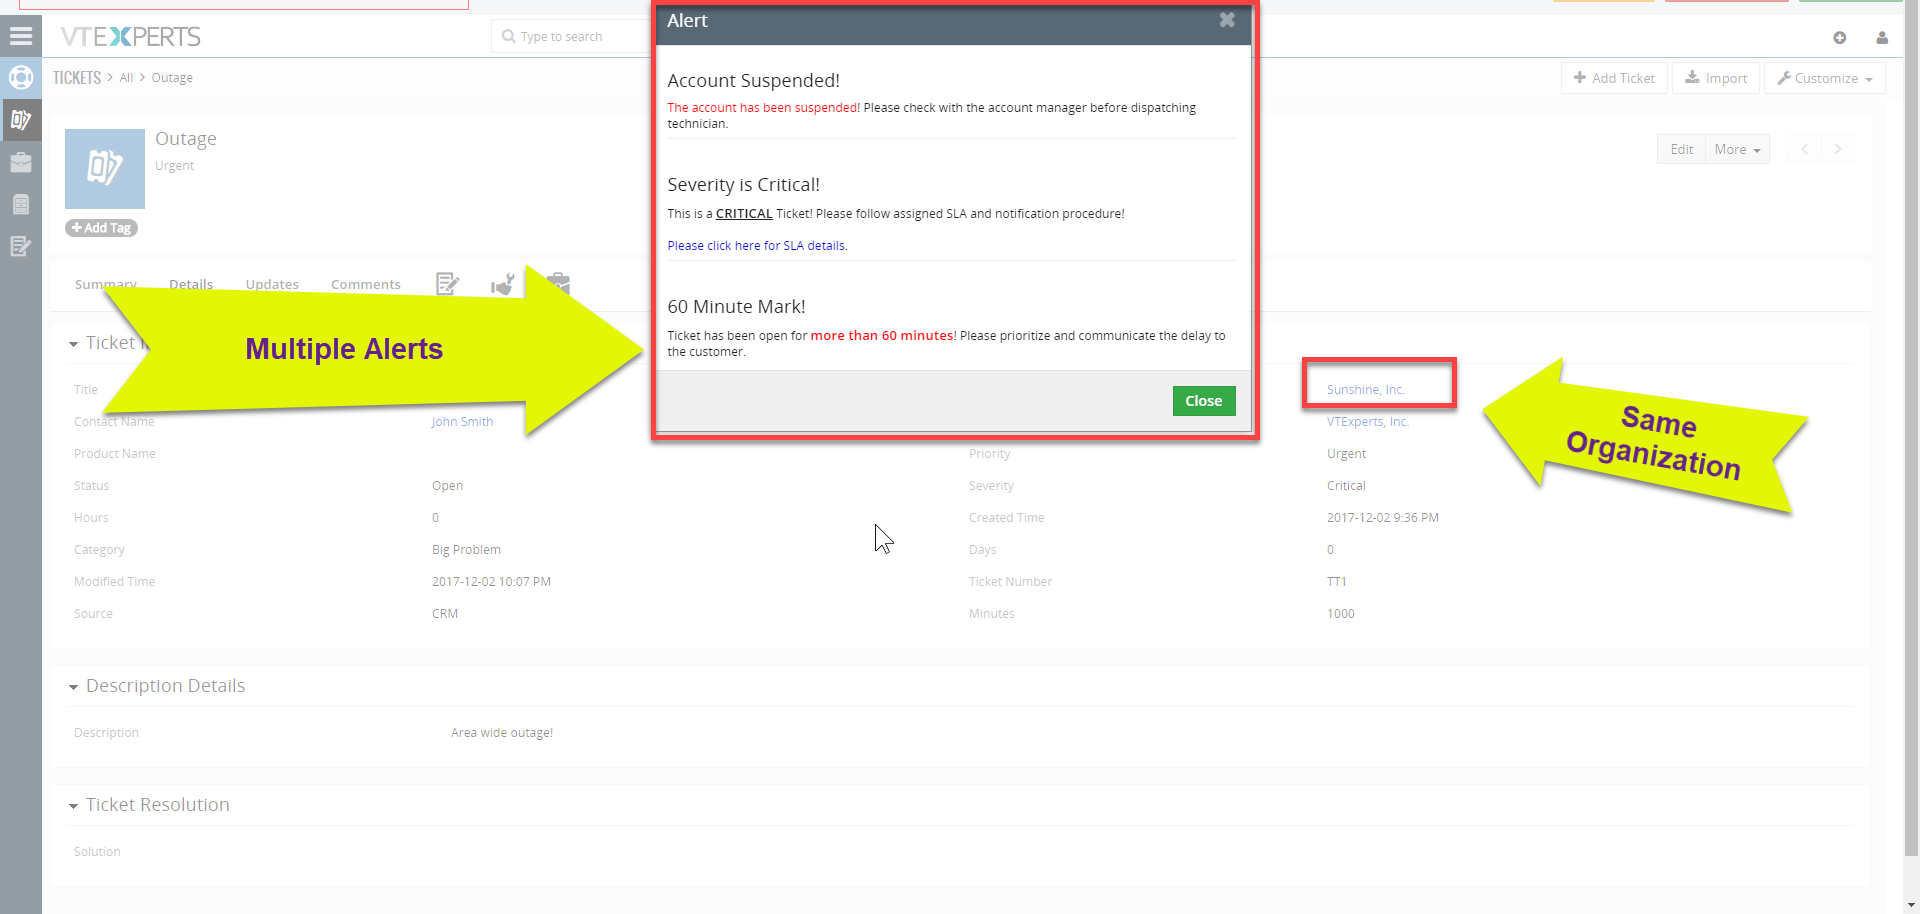
Opening a Related Record:
Same applies to related records. If you have a record related to that Organization e.g. a Ticket, it will show the same alert as the Organization, on that Ticket.
I also created a couple of Workflows for the Ticket to explain how multiple alerts will be displayed in a popup. It will look something like this:
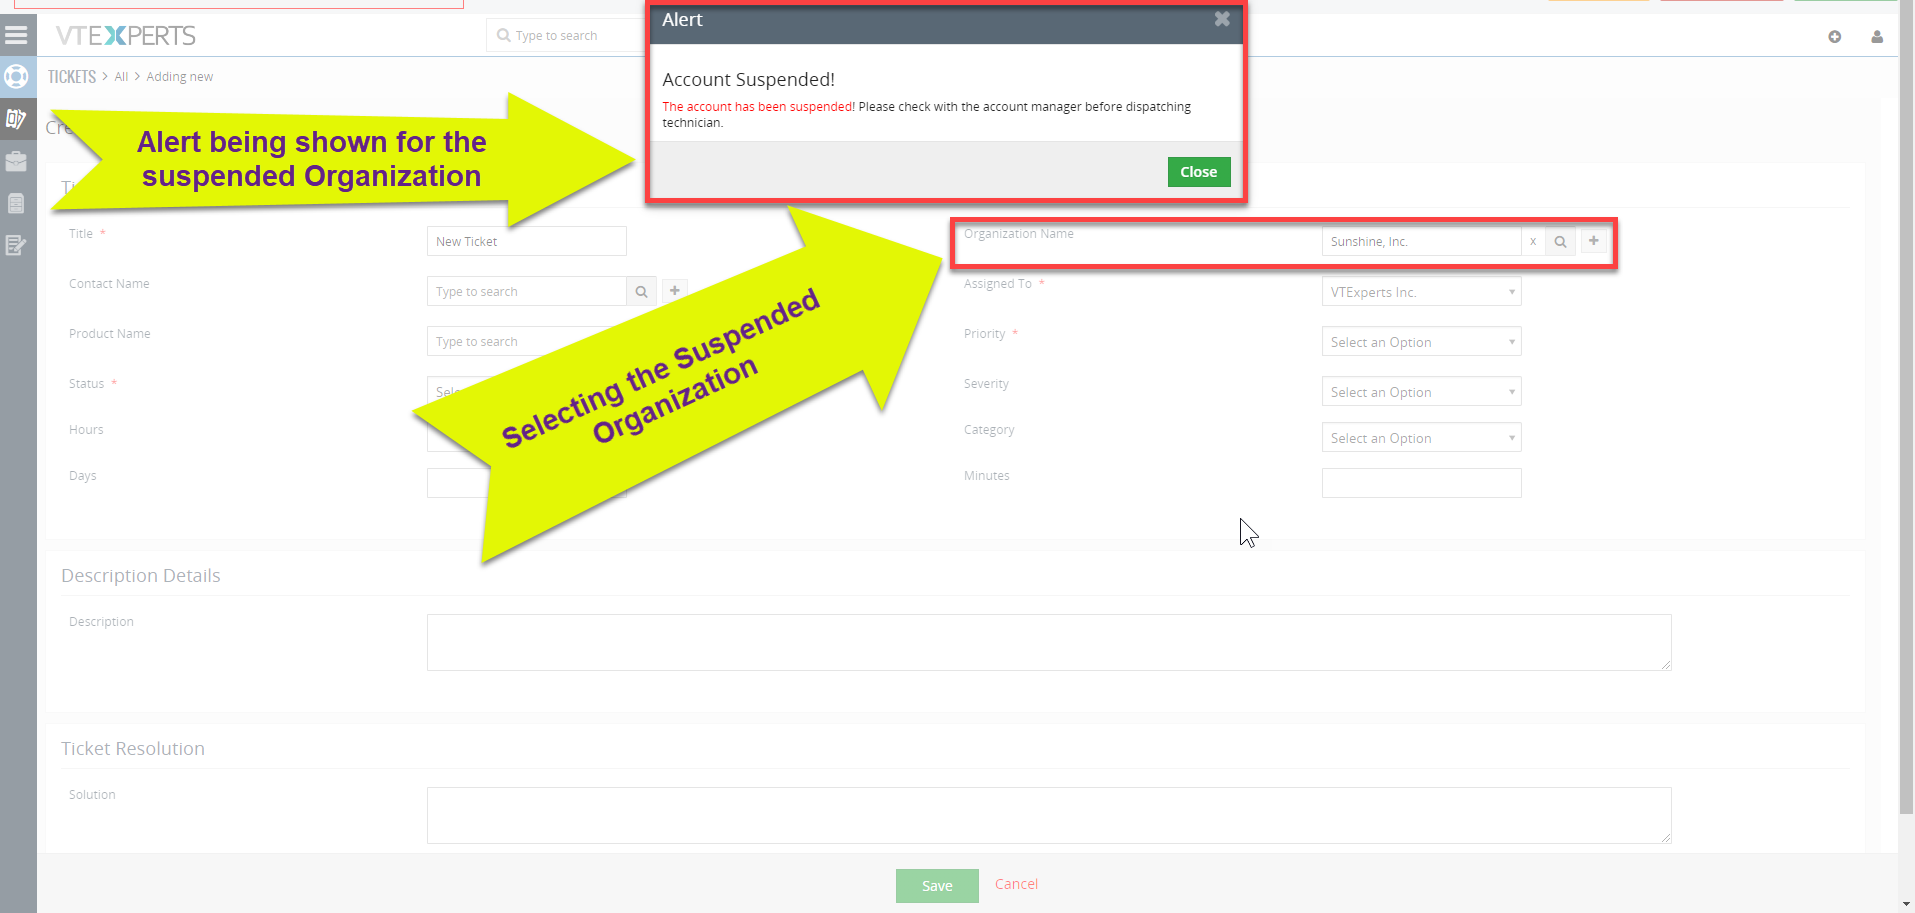
Creating New/Editing a Record:
Same applies to when creating a new record or editing an existing one. For example, while creating a new ticket, if we select and organization that is “Suspended” (according to our previous examples), it will immediately show the alert popup that is configured for that organization.
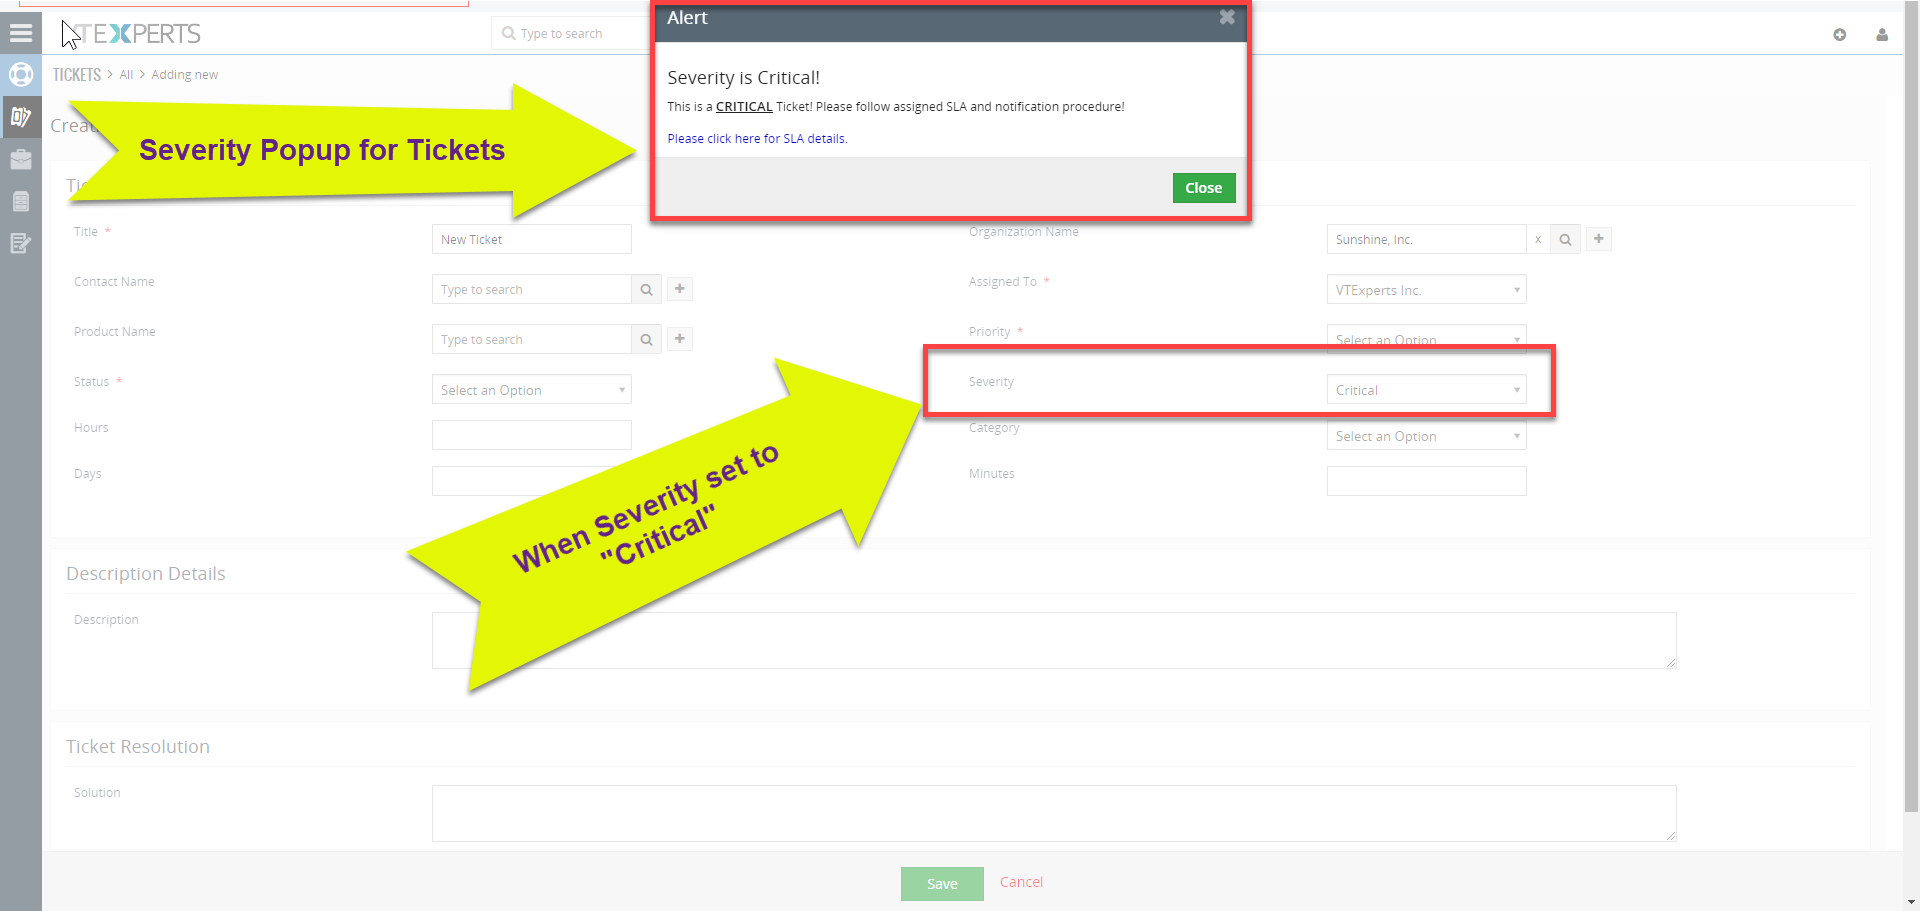
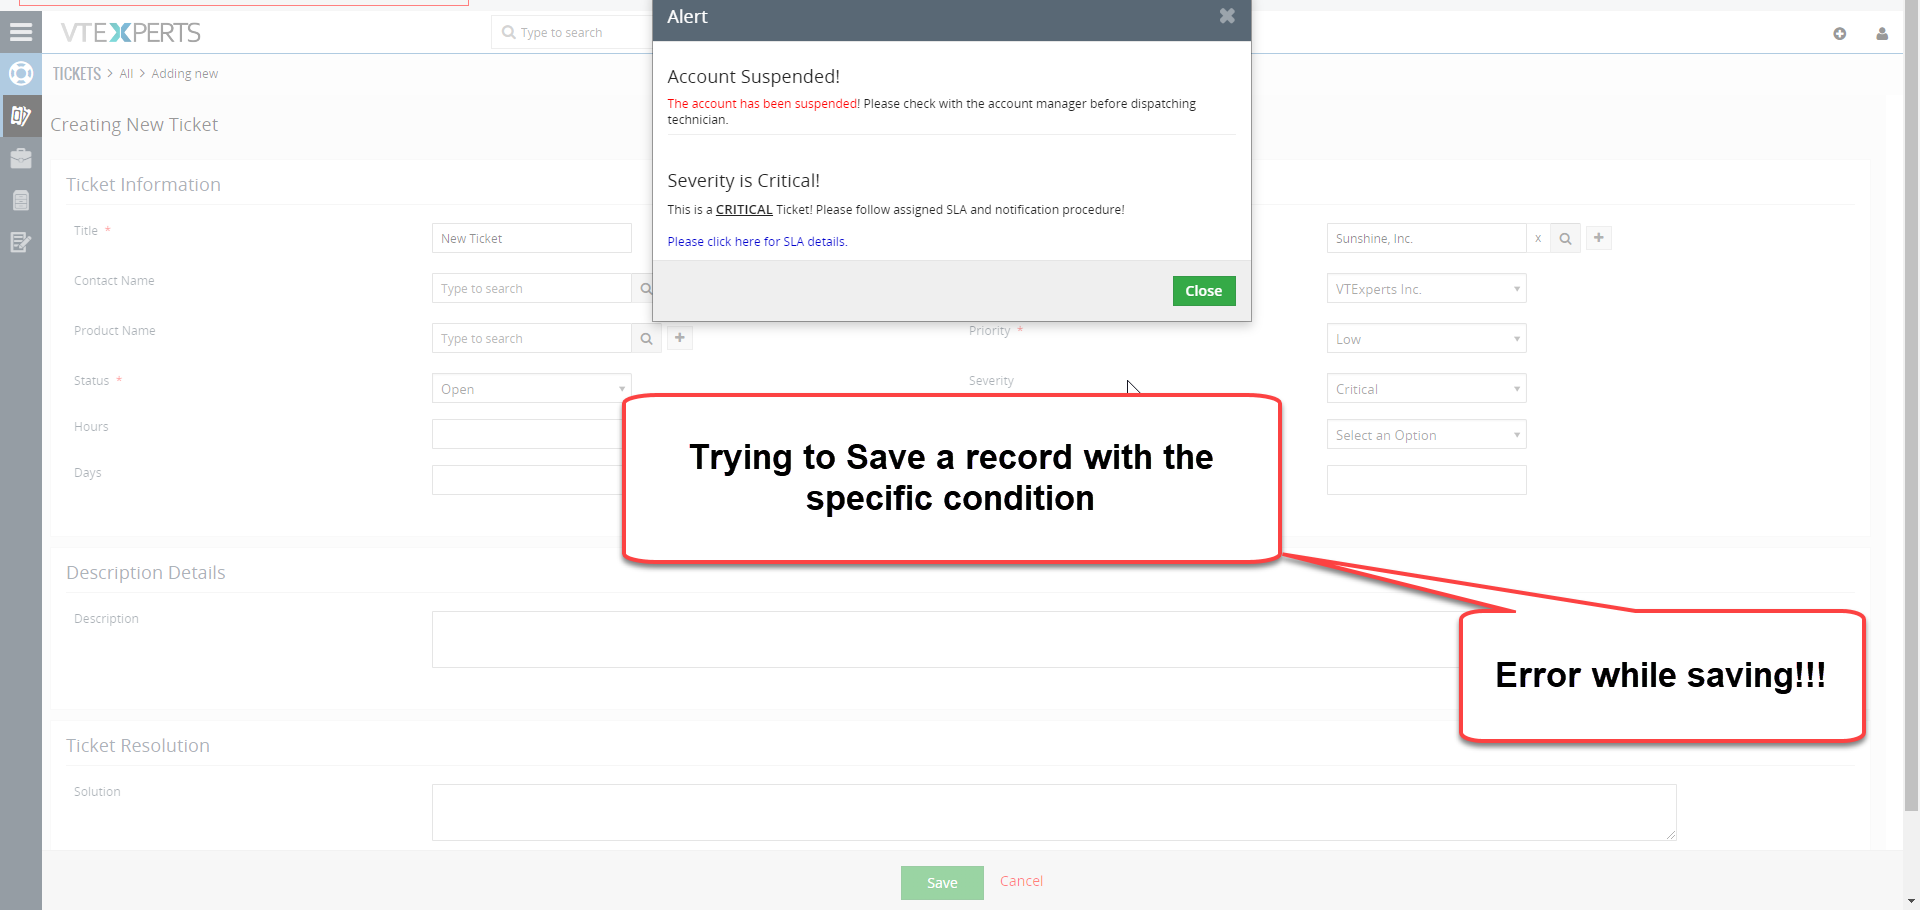
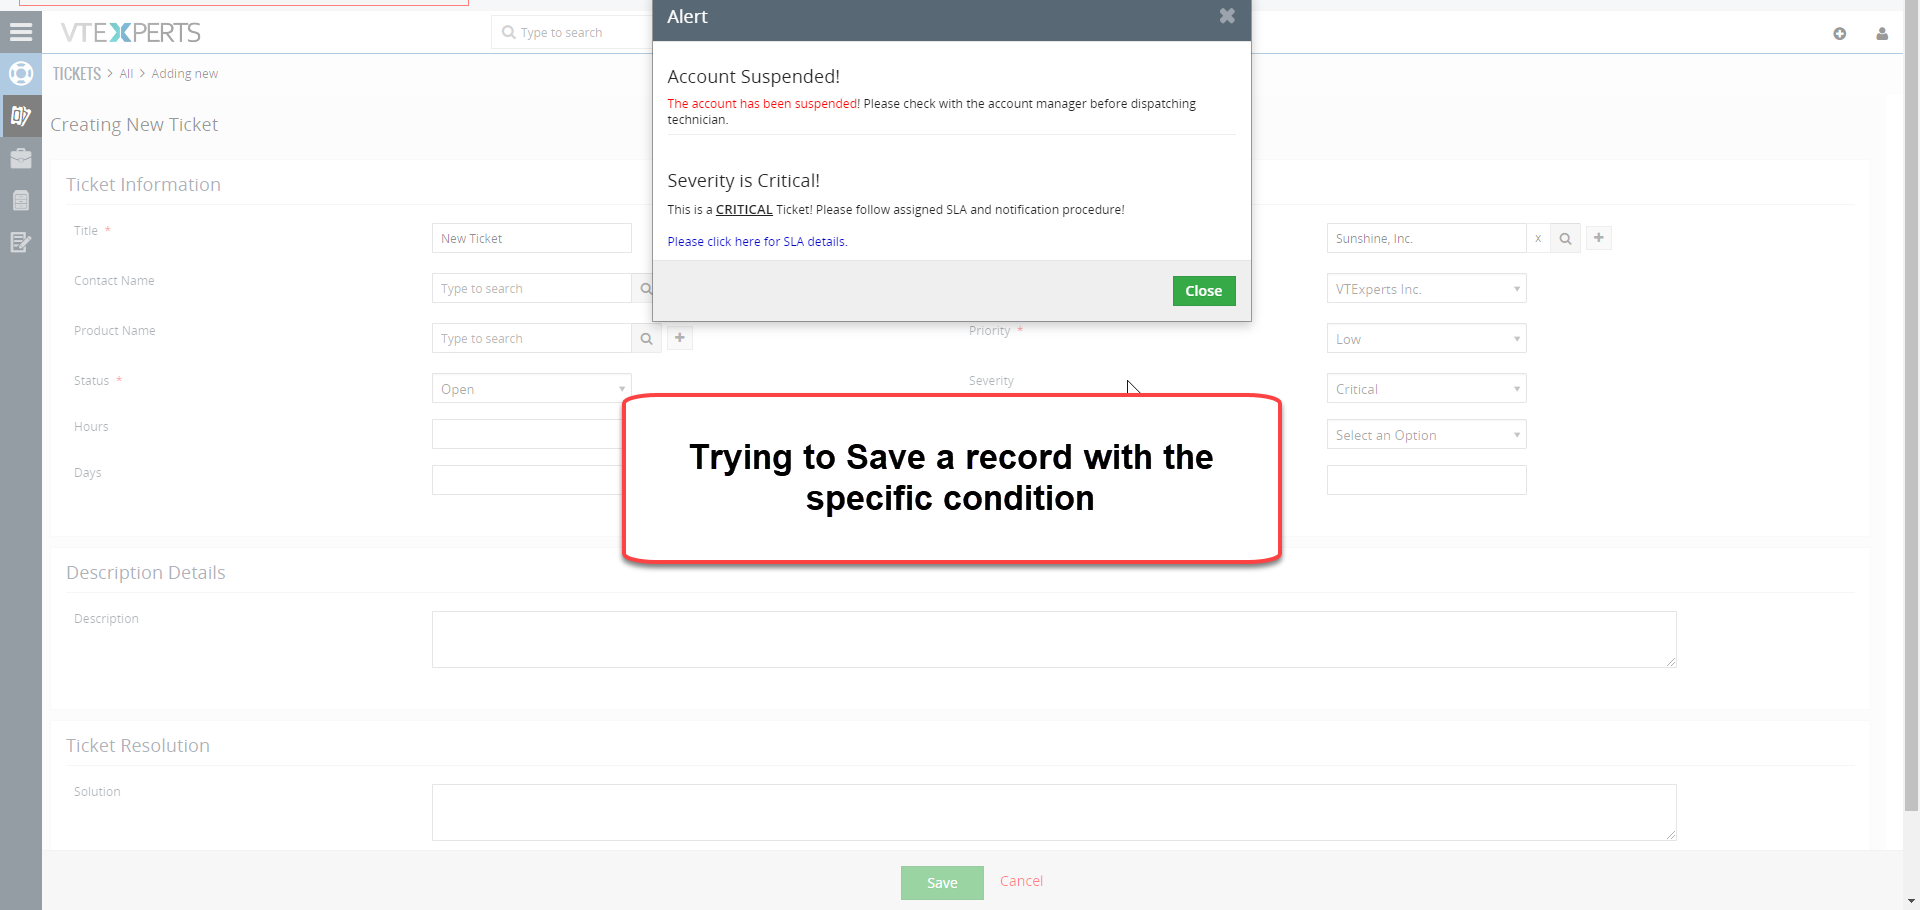
Alert when Saving:
Now, as we enabled the alerts to be shown while trying to save a ticket with the specific condition, we got the same popup giving the alert:
Not Allowed to Save:
If we selected the option to stop users from saving a record when a specific condition is met, the extension will not allow them to save such records: