

Box.com Integration for VTiger makes it very easy to manage documents from the CRM. It fully integrates the two applications, by assigning box.com folders to VTiger records. Folders are then accessible directly from VTiger, where you can then upload documents/folders, edit files online, review file revisions, share files and much more.
Integration supports all modules, meaning that you can assign folders to any record e.g project, opportunity, order and access the folder while in VTiger (without having to open box.com).
Configuration
To configure the Box.com integration, open the Main Menu > CRM Settings > VTiger Premium > Go to Extension List > Box.com Integration. The settings page will appear:

Let’s understand how to configure the extension:
Default Folder: it will be used as top level folder for your folder searches (to assign folder to record) as well as the default folder will open up if there is no folder assigned to a record.
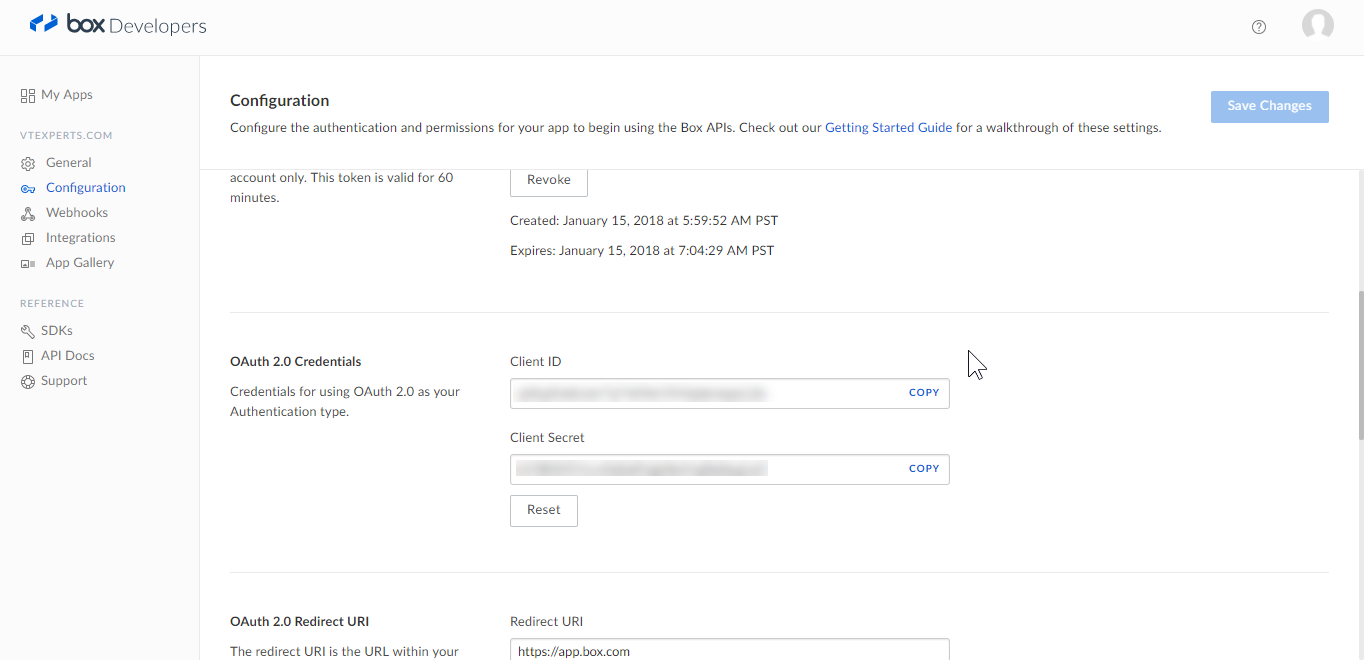
Client ID & Client Secret: follow the method below to get Client ID & Client Secret:
- Open this URL: https://app.box.com/developers/console/
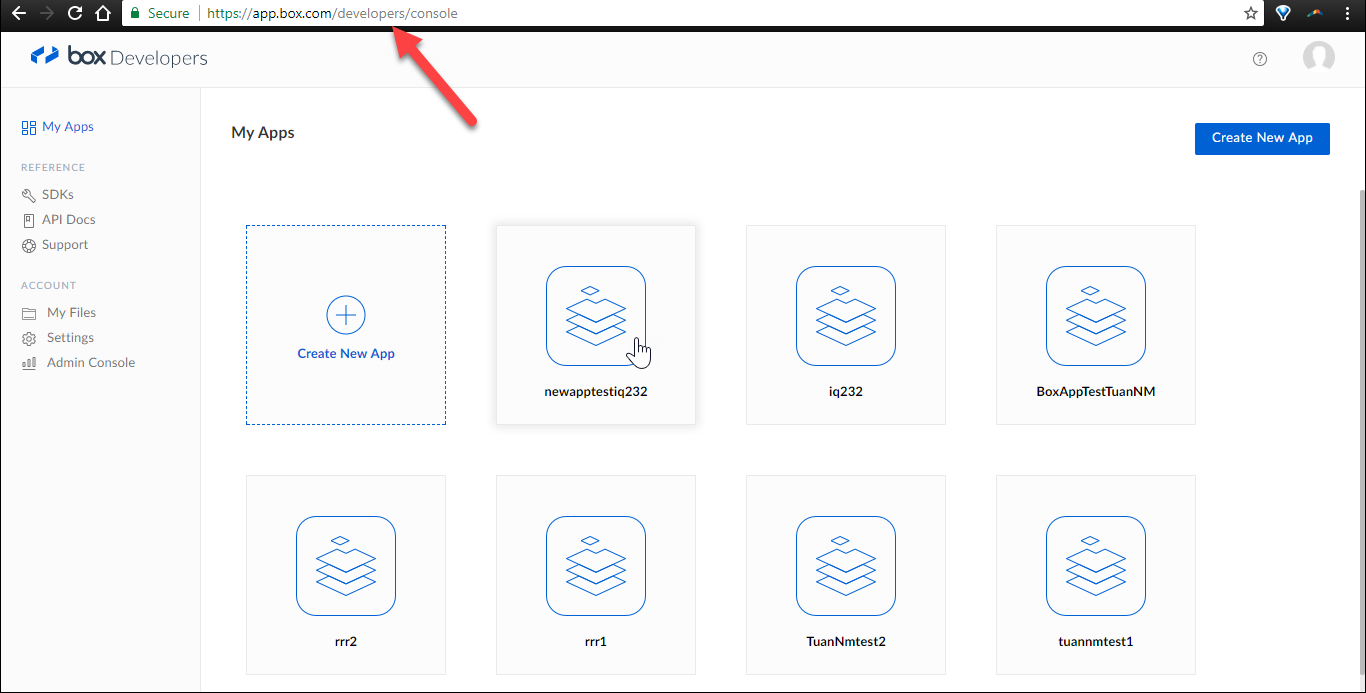
- Select “Create New App”

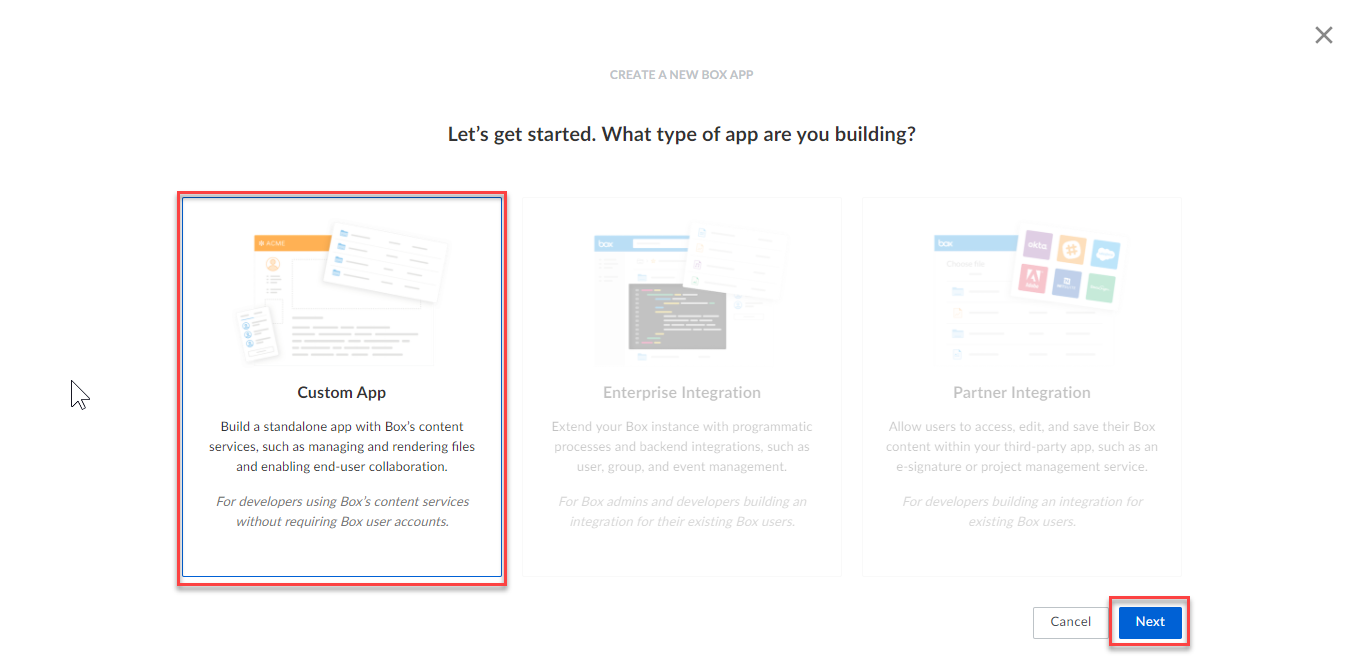
- Select “Custom App” and hit “Next”
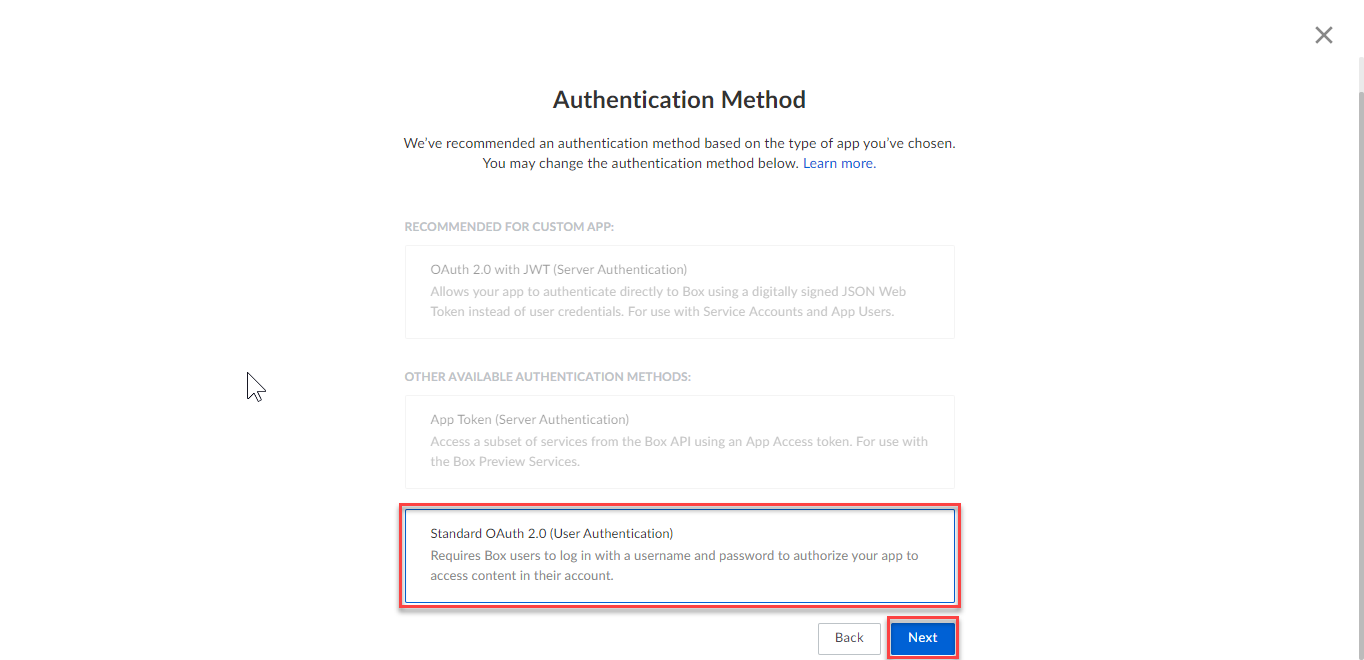
- Select “OAuth 2.0 (User Authentication)”. This is the login method that your CRM will be using to connect to the Box account. Click “Next”
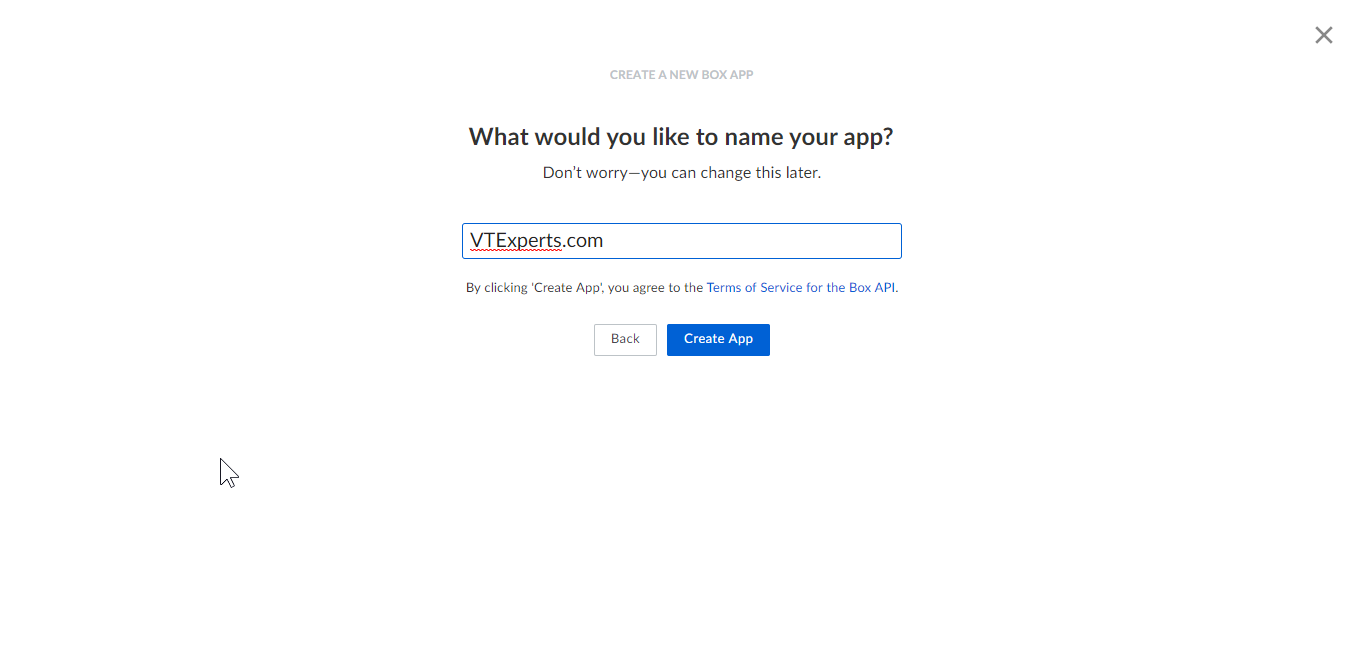
- Simply name your newly created app, read the Terms of Service for the Box API, and click “Create App” if agreed
- A confirmation will appear that your new app has been created. Hit the blue button saying “View Your App”.
- Under OAuth 2.0 Credentials, you will see the values “Client ID” And “Client Secret”. Copy the keys and paste into the CRM Box.com integration and configuration.
Redirect URI: the Redirect URI will be your CRM URL + this path: /modules/VTEBoxComFolder/BoxComAPI.php . So, the redirect URI should be something like this: www.yourCRMURL.com/modules/VTEBoxComFolder/BoxComAPI.php
Click to Enable Box.com Integration: select the modules you want to enable the Box folder sharing for
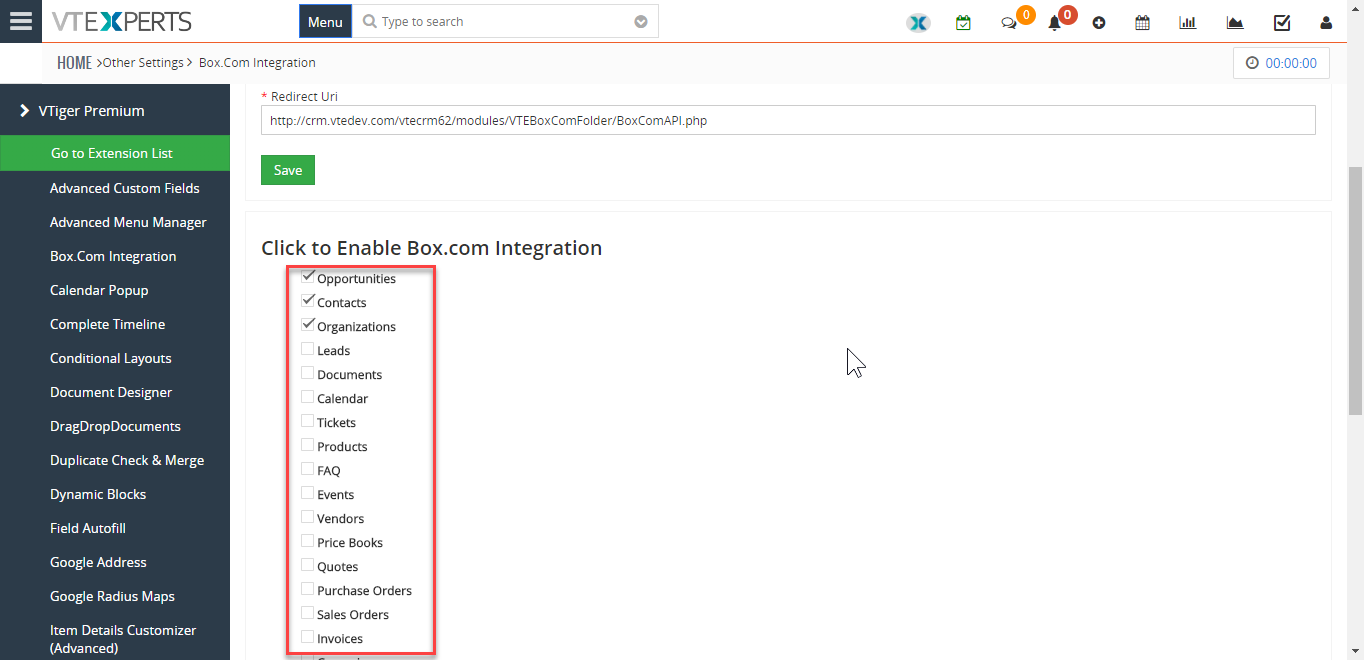
Enable Box.Com Integration: when you’re ready, tickmark the checkbox and hit “Save”
Managing and Viewing Box.com Files and Folders in VTiger CRM
Once the configuration for the Box.com extension is completed:
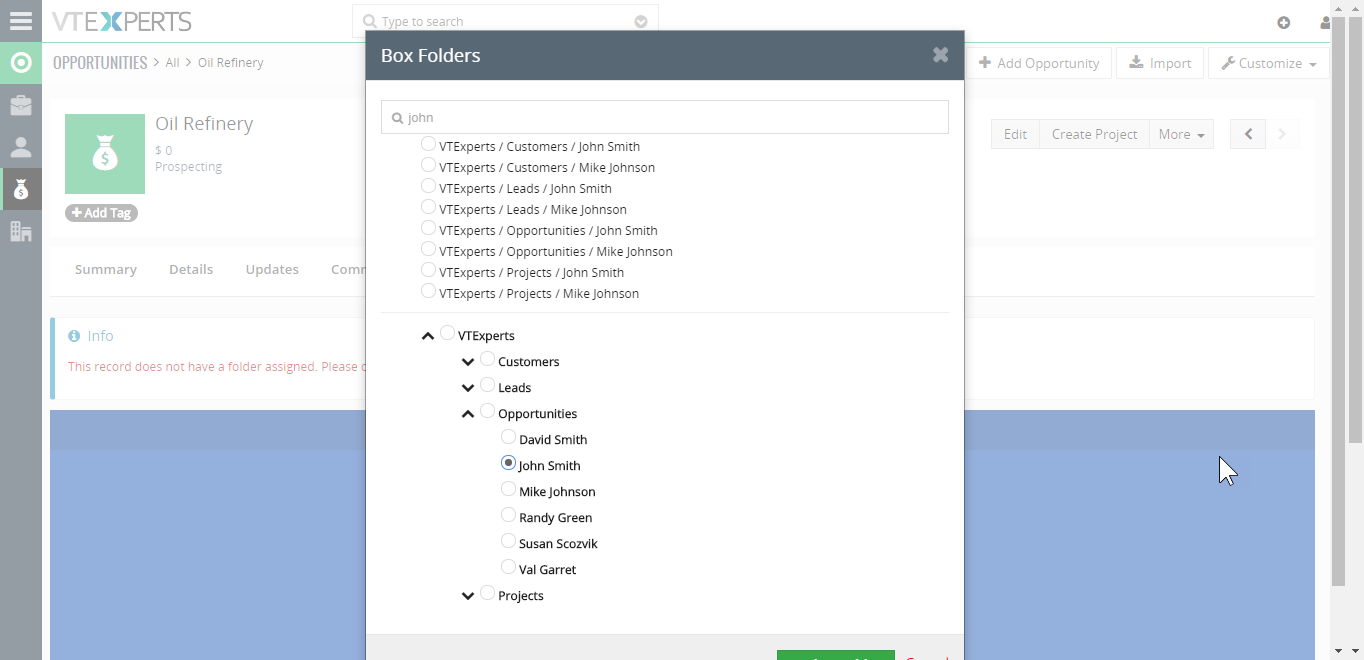
- Go to one of the selected modules and open a record.
- Then go to the Box.com tab

- Now you’d need to link a folder to this record. For that purpose, click the “Choose Folder” button. It might ask you to login for the first time.
- After you’ve logged in, a dialogue box will appear where you can search for folders from the Box account. You can select a specific folder and assign it to the record. Simply select a folder and click “Assign Folder”.
- Perform the basic security task for Box.com and you are in. Here you will have Box.com interface and all the available options for your account.