

VTiger Checklist Extension enables system admins to develop checklists for any record & module. It supports multiple checklists per module while giving you the ability to attach multiple documents and add comments on EACH checklist item. In addition, each checklist item has it’s own Status and ‘last touched date’.
It is thoughtfully designed to authorize users to update statuses by just clicking on the checkbox icon (which will update the status), add comments without going to comments module, and attach and view documents from the same view. It also supports workflows which allows email/text notifications setup.
Configuration
To configure the “Checklists” for VTiger extension, go to the Main Menu > CRM Settings > VTiger Premium > Checklists. You will find two sections here:
A. +Add More
B. List of Configured Checklists
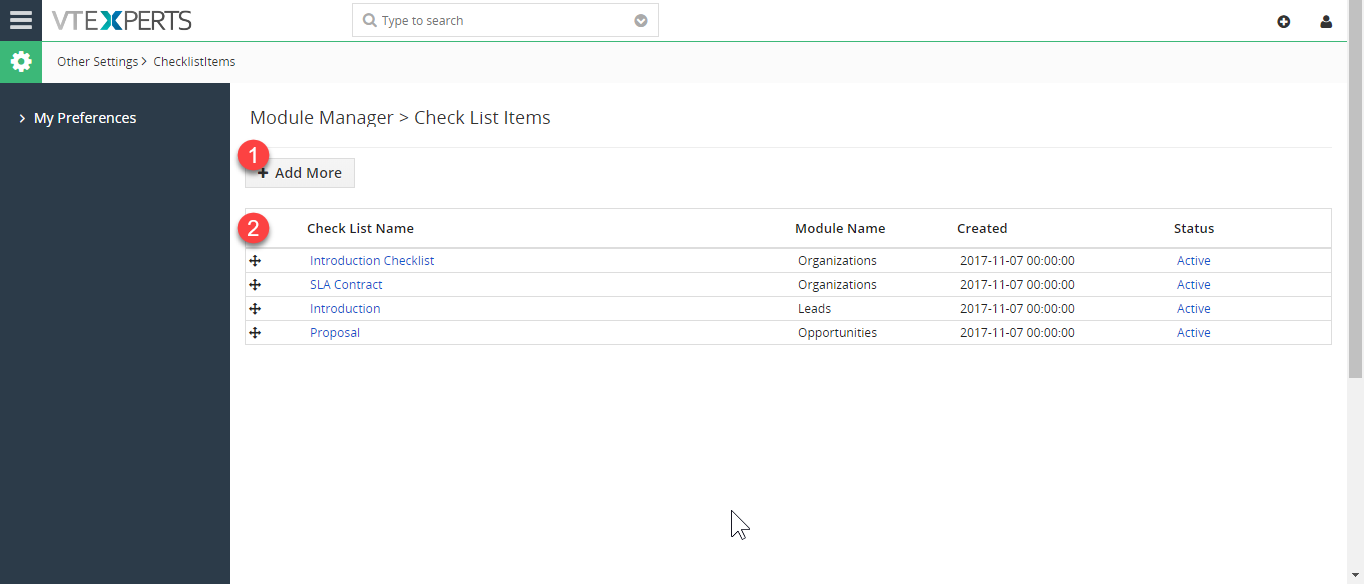
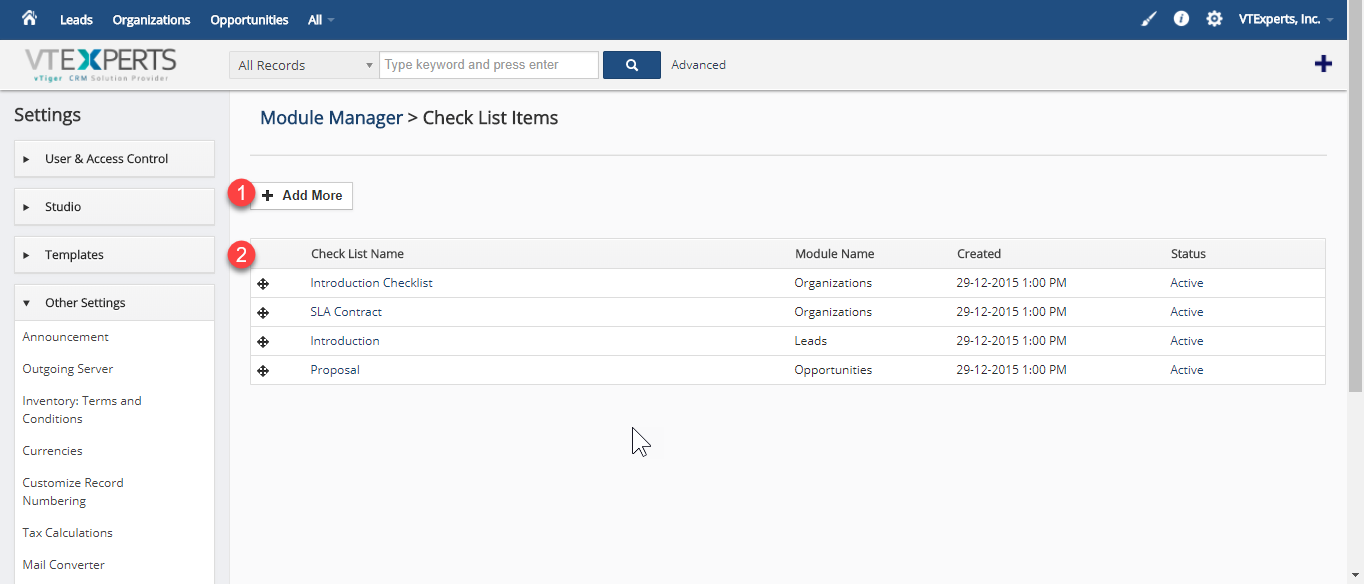
A. +Add More
This button allows you to create and configure new checklists. Clicking the button will bring up the following dialogue box:
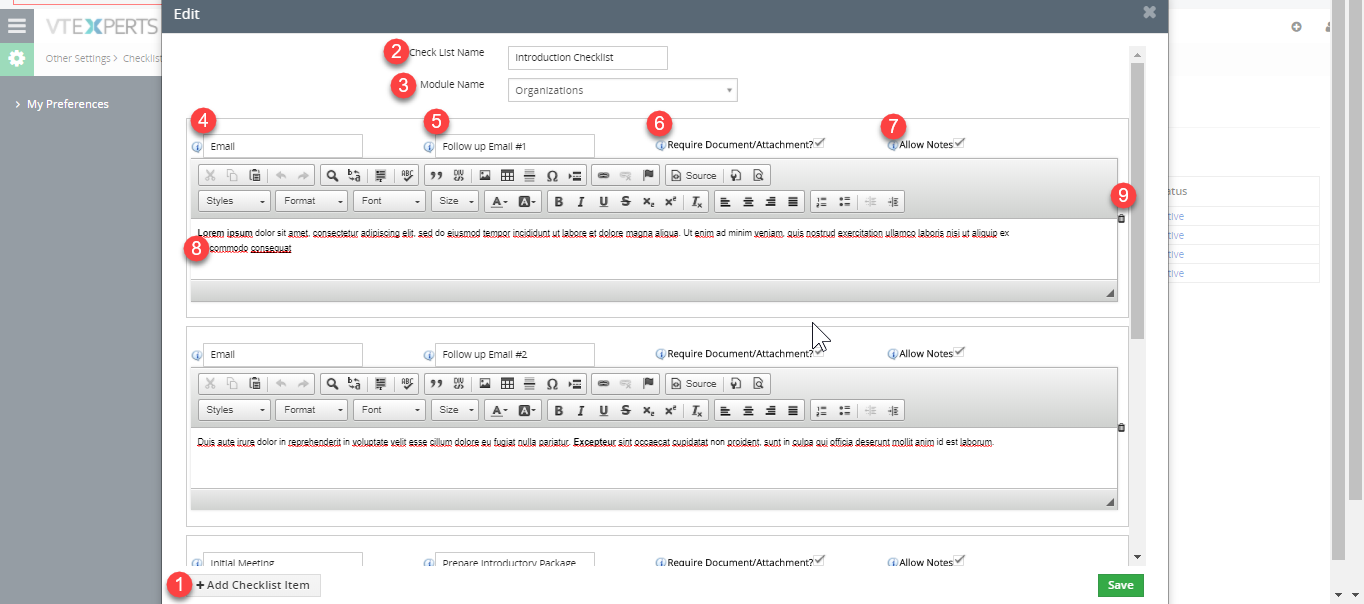
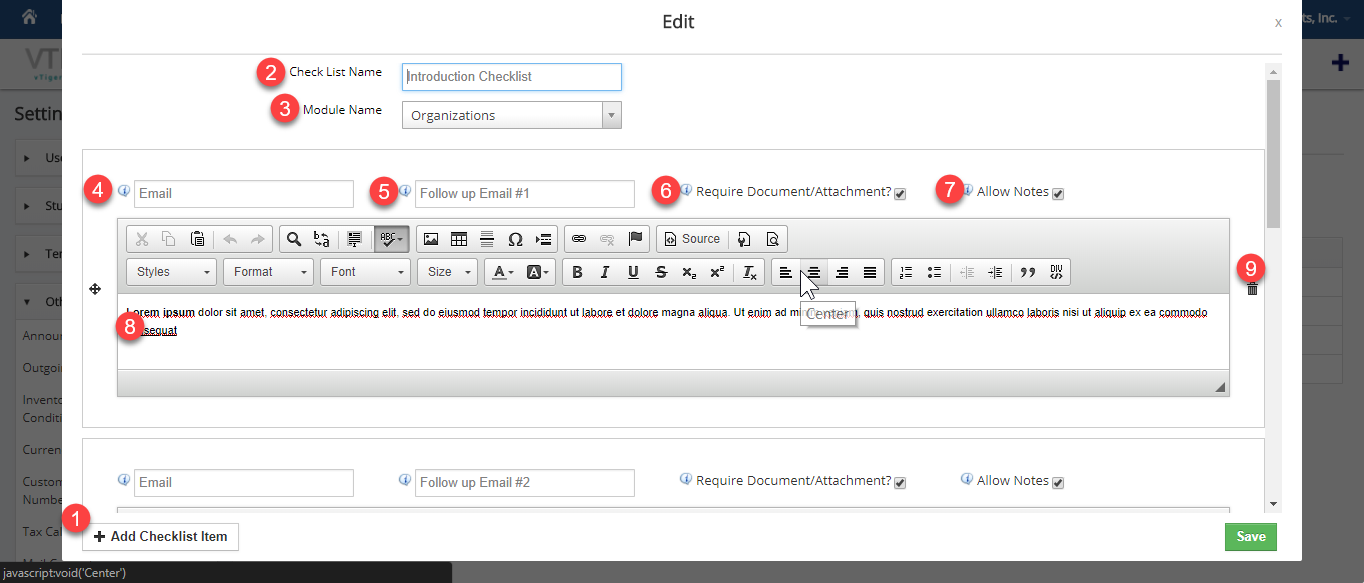
- +Add Checklist Item: click this button to add a new checklist item to the list. Once you do, you will see the specific set of options to configure your checklist
- Check List Name: assign a name to the configuration that will be shown on the record when you click the “Checklist” button (Checklists In Modules) on the records
- Module Name: select the module for which you are creating this checklist
- Category: the category of the checklist. This is how the item will be grouped on the checklists. You can configure different categories for each item and it will create new categories on the front end in records. However, if you want to group multiple items under same Category, just put in the same name of the category in that field and it will group the same name of categories together
- Title: title is the name of the checklist item
- Require Document/Attachment?: this is the checkbox that you can toggle to enable or disable uploading a document or file for a specific checklist item
- Allow Notes: check this option if you want to allow users to add multiple notes or comments option to the checklist item
- Rich Text Field: the text you enter to the checklist item is configured here. Instead of plain text, this is a Rich Text editor to make the checklist text more versatile
- Delete a Checklist Item: if you notice, there’s a trash bin or delete icon at the right side of the RTF box. You can delete a checklist item with it, if needed
B. List of Configured Checklists
Below the button “+Add More”, you can see the list of all the configured checklists. The list shows the names, modules linked to, created time and date, and statuses of each checklist configured.
You can perform several actions with this list:
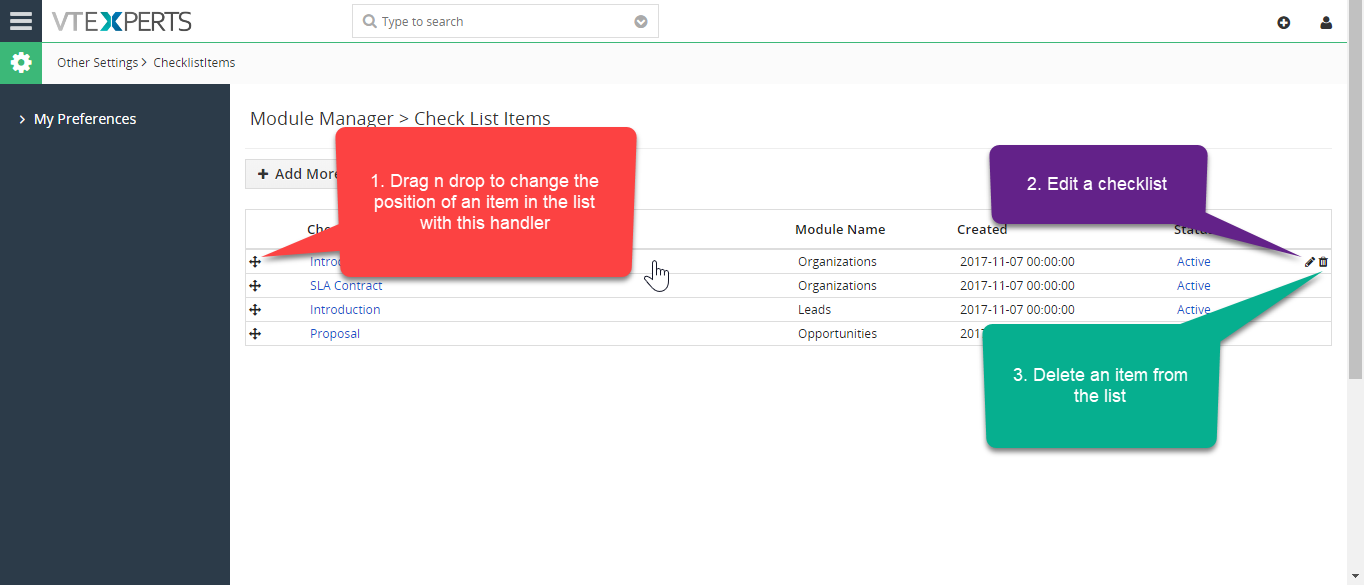
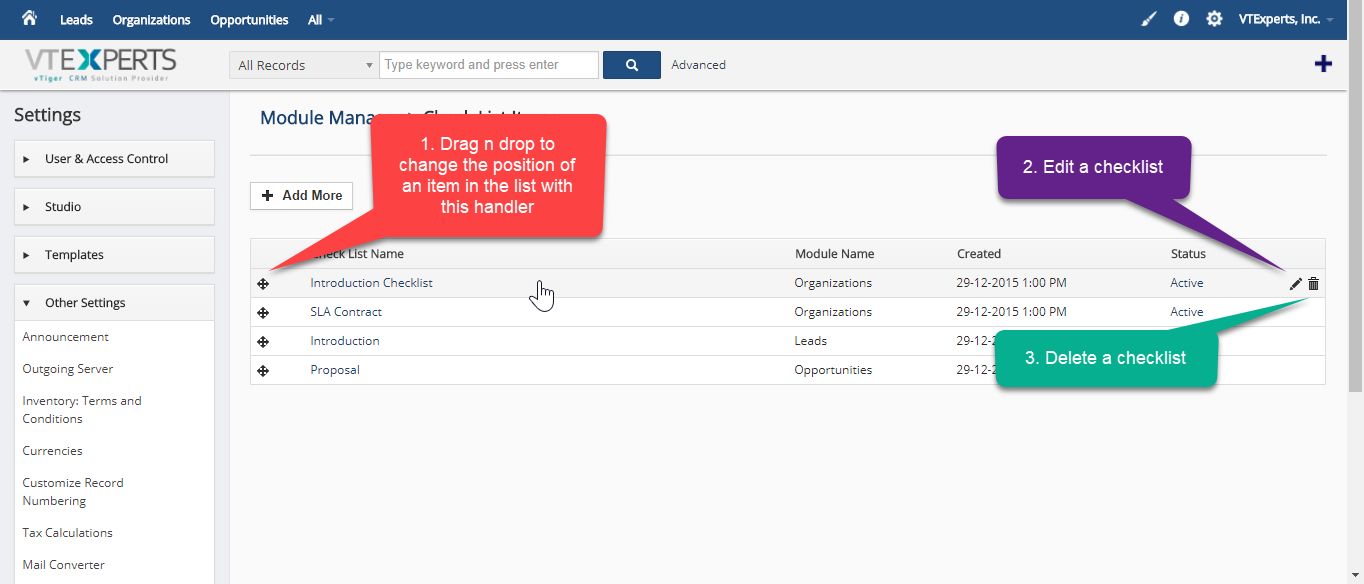
- Changing the position of checklists: at the very left of each configured checklist, you can see a drag n drop handler which you can use to move a checklist up or down in the list. The position of a checklist here defines how each checklist is going to show on the records
- Edit: you can edit a checklist by clicking on it, or hover your mouse over it and it will show an edit button
- Delete: to delete a checklist, move your mouse over the desired checklist. You will see the delete button at the extreme right of the screen on that list
Checklists In Modules
Now that we have gone through the process of configuring checklists, let’s see how are they going to work. To check, go to the module for which you created one and open a record. You will see the button saying “Checklists” besides “Edit” and “More.
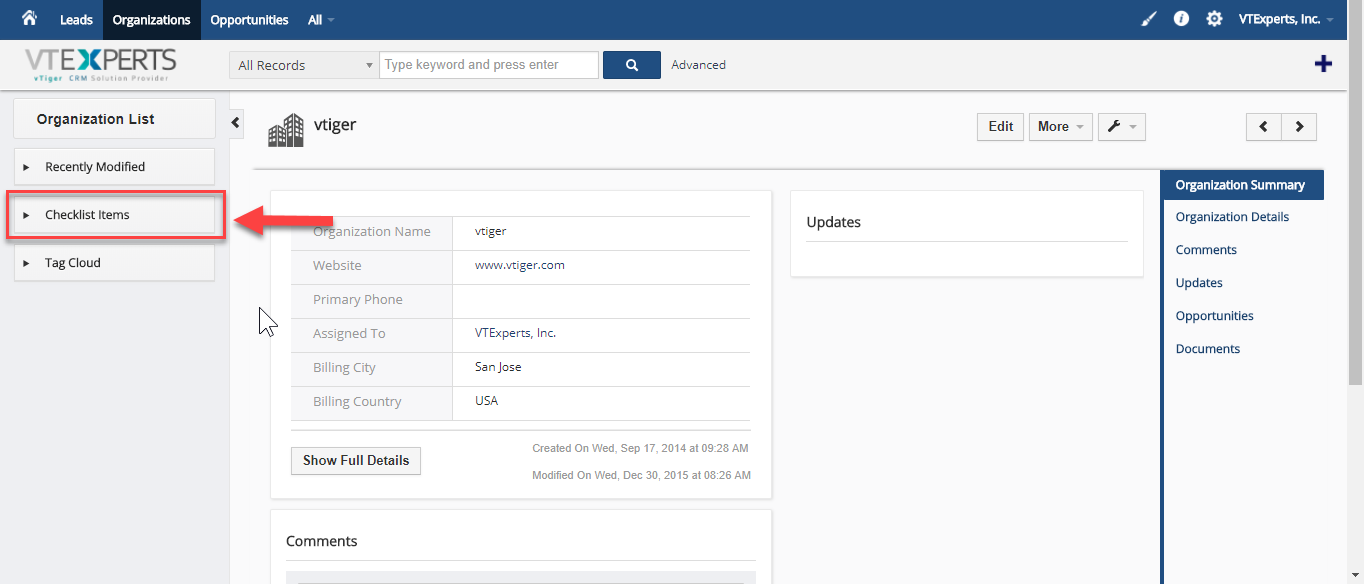
For VTiger 6, you can find the “Checklist Items” in the left bar as a drop down.
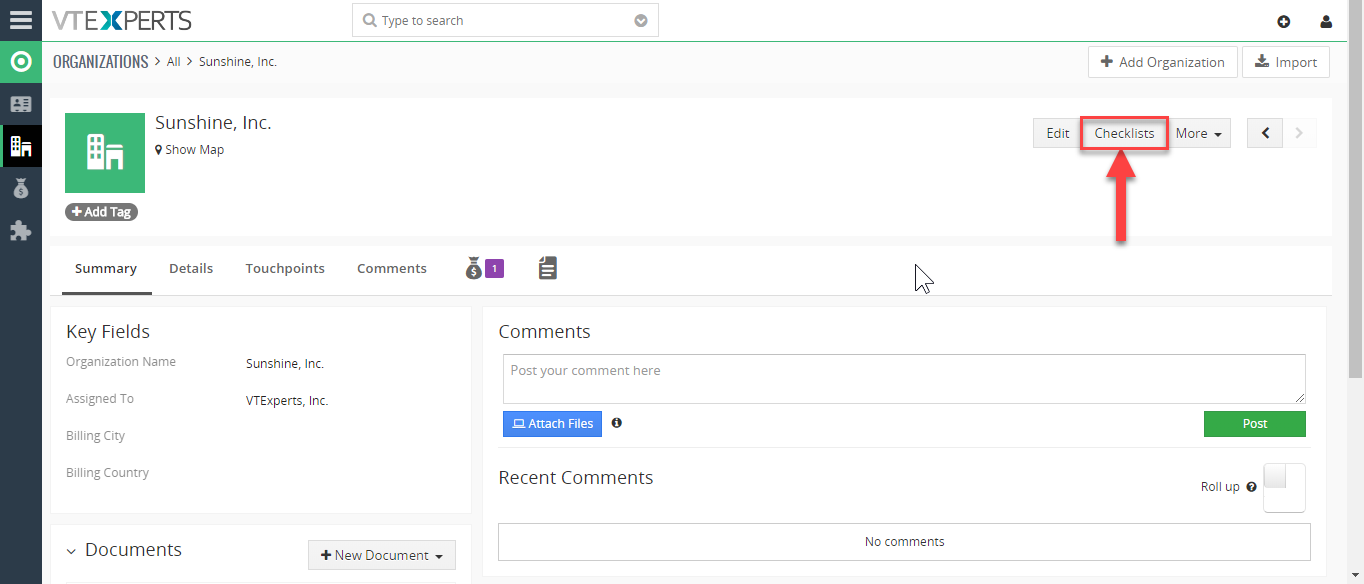
It opens a block that shows the list of all the configured checklists for the corresponding module.
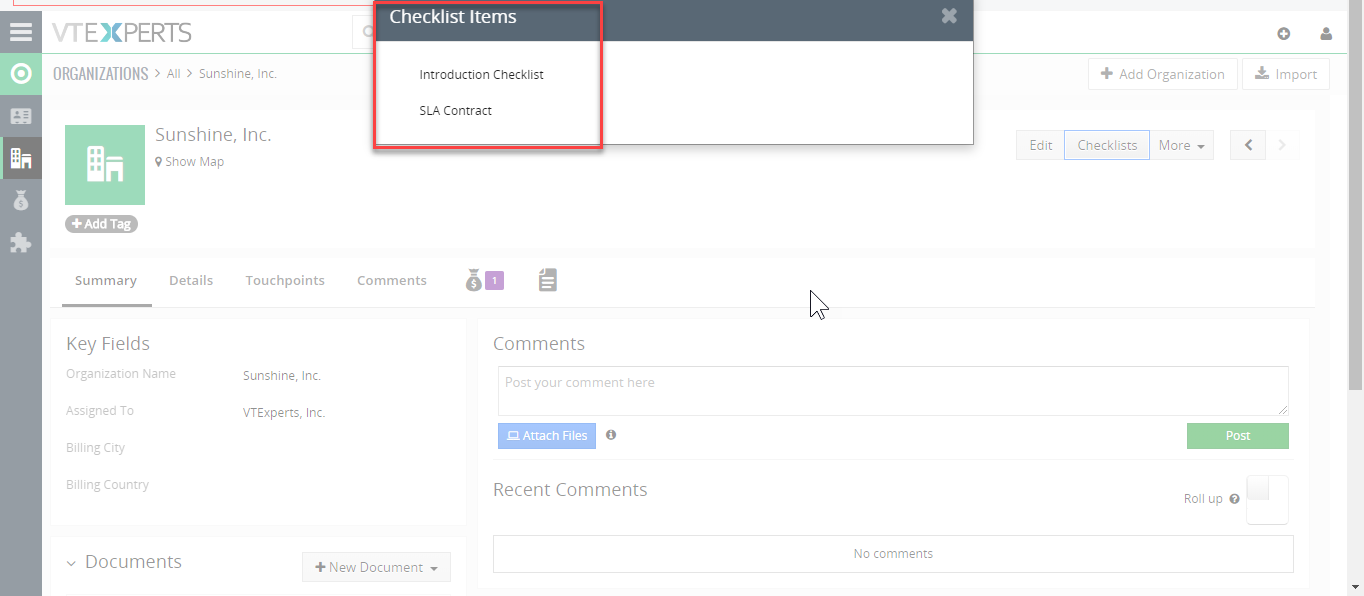

Let’s open a checklist and see how it looks:
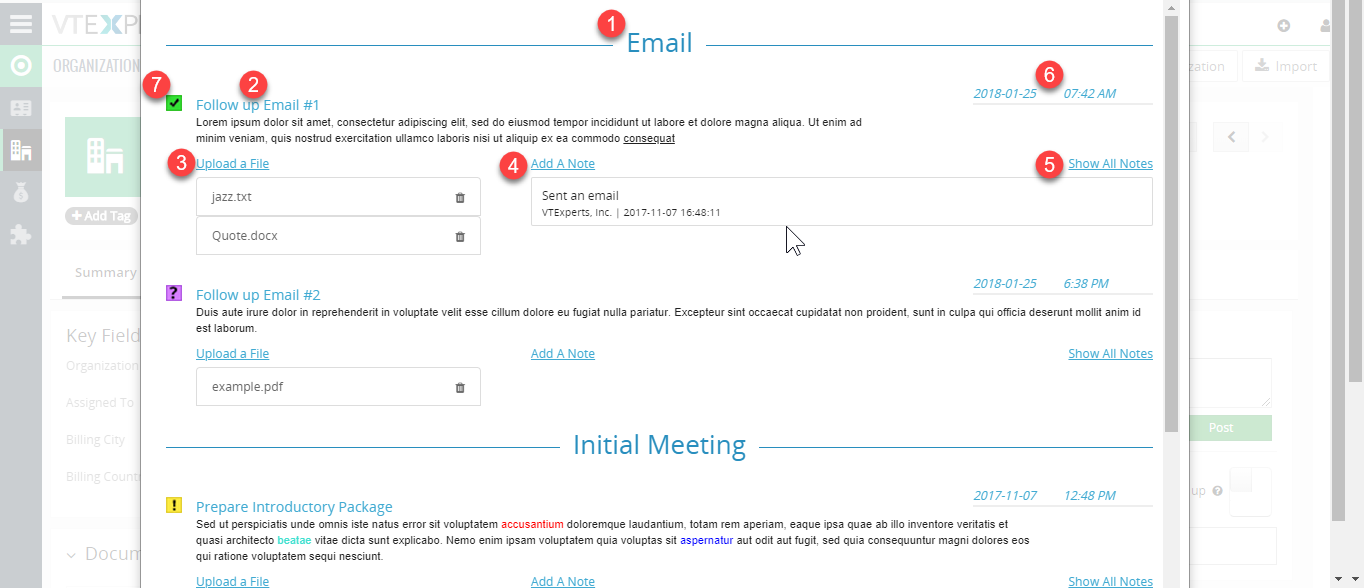
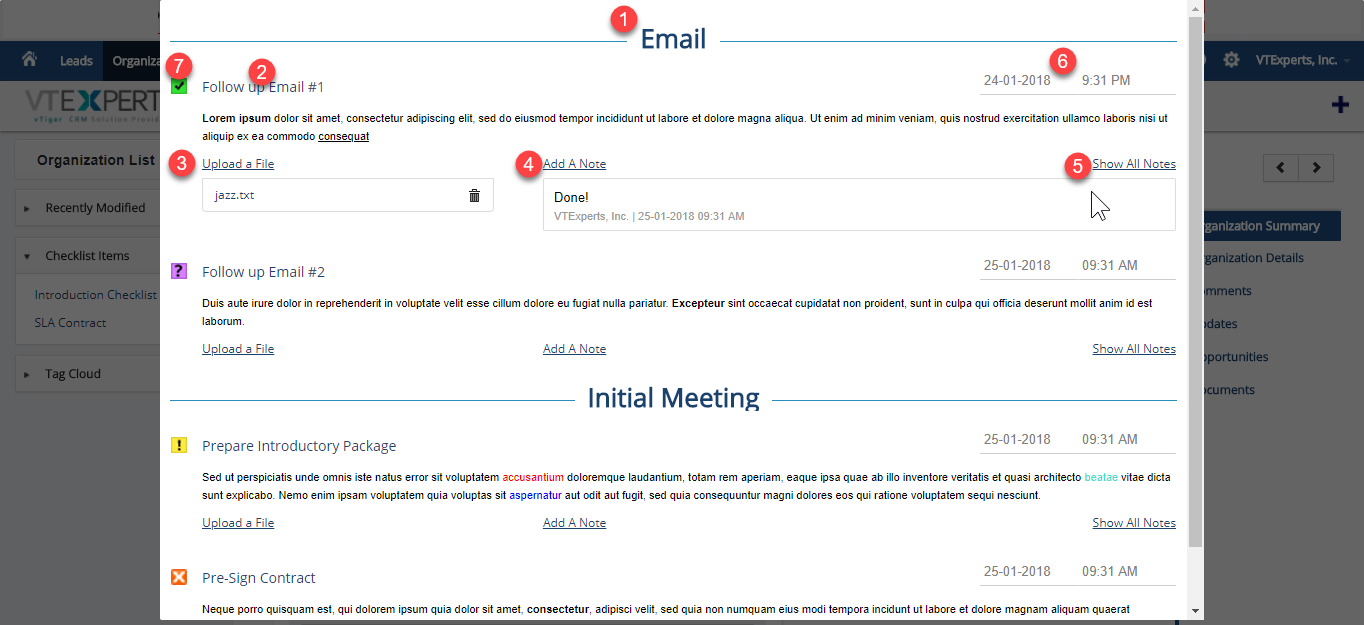
- Category: explained in the “Configuration”
- Title of the Checklist item: explained in the “Configuration”
- Upload a file: use this option to upload multiple files to the checklist item
- Add A Note: add as many notes or comments as needed. It also adds time and date for each comment with it
- Show All Notes: use this option to display all the notes added to this item
- Time & Date: the time and date shows when was the last time the checklist item was updated
- Status Icon: besides every item, you can see an icon which can be toggled per the status of item (manually)