VTiger Google Maps & Route Integration was built to give your staff the convenience to quickly see the customers (or any other module with an address) on the map as a pin. It is also capable of creating different types of routes (Walk, Drive) as well as printing them as “directions” with an option to include the map (Identical to Google Maps). In addition, the routes can be generated either automatically or manually.
It allows you to specify Map Center (User/Company Address or Zip Code), define Radius, select address to map (Billing/Shipping) as well as pin field. In addition, the route formation can be automated for the ease.
With VTiger Google Maps & Route Integration function you will be able reach even more customers than you could in the past and quick and easy access to the map. Map center and adjustable radius will help you to visualize & print your schedule.
Configuration at Interface
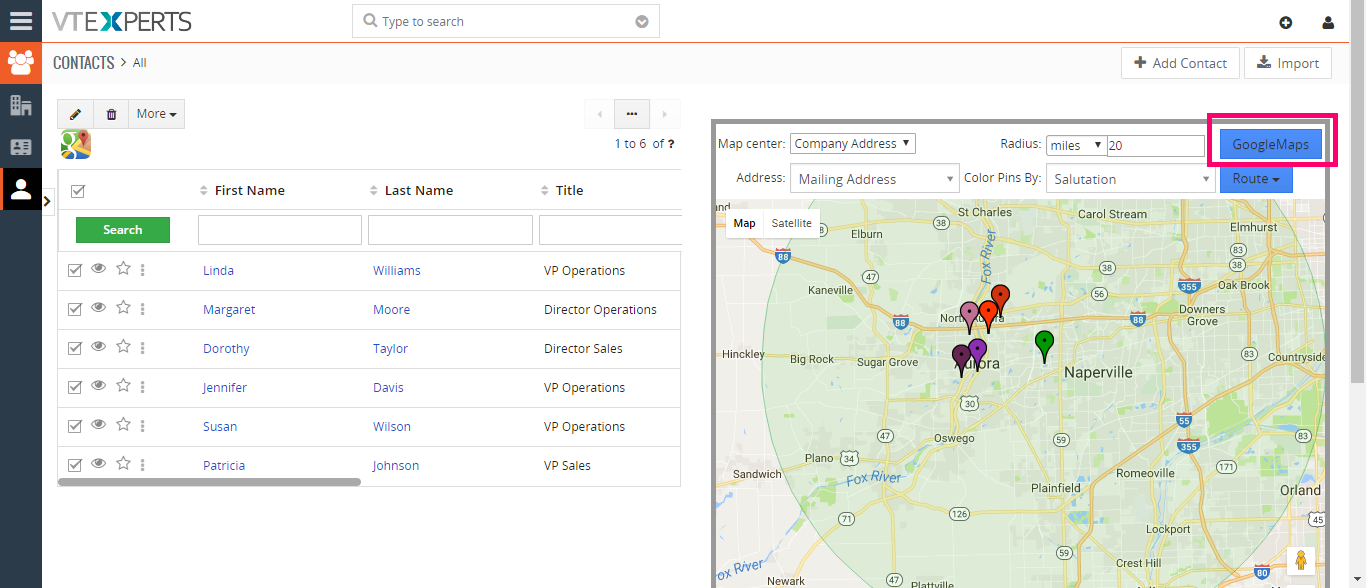
Go to any Record’s listview with an address and click ‘Google Maps’ Icon. There are following settings you can configure for the extension:
Map Center: the center of the location from where the radius will be calculated
* Company Address – set your Company’s address as the center of the map
* User Address – set a user’s address as the center of the map
* Current Location – set the current location as the center of the map
* Zip Code – add a zip code (or post code for EU countries) as the center of the map
Radius (miles): enter a value to specify how wide the system should look for records on the map – i.e. the area covered
Address: the address of the subject. You can choose which address the system should take into account and show on the map, either “Mailing Address” or “Other Address”
Color Pins: choose the details of records to be displayed when the corresponding pin is clicked
Route: configure what kind of routes you want to get i.e. Line, Text, or Print
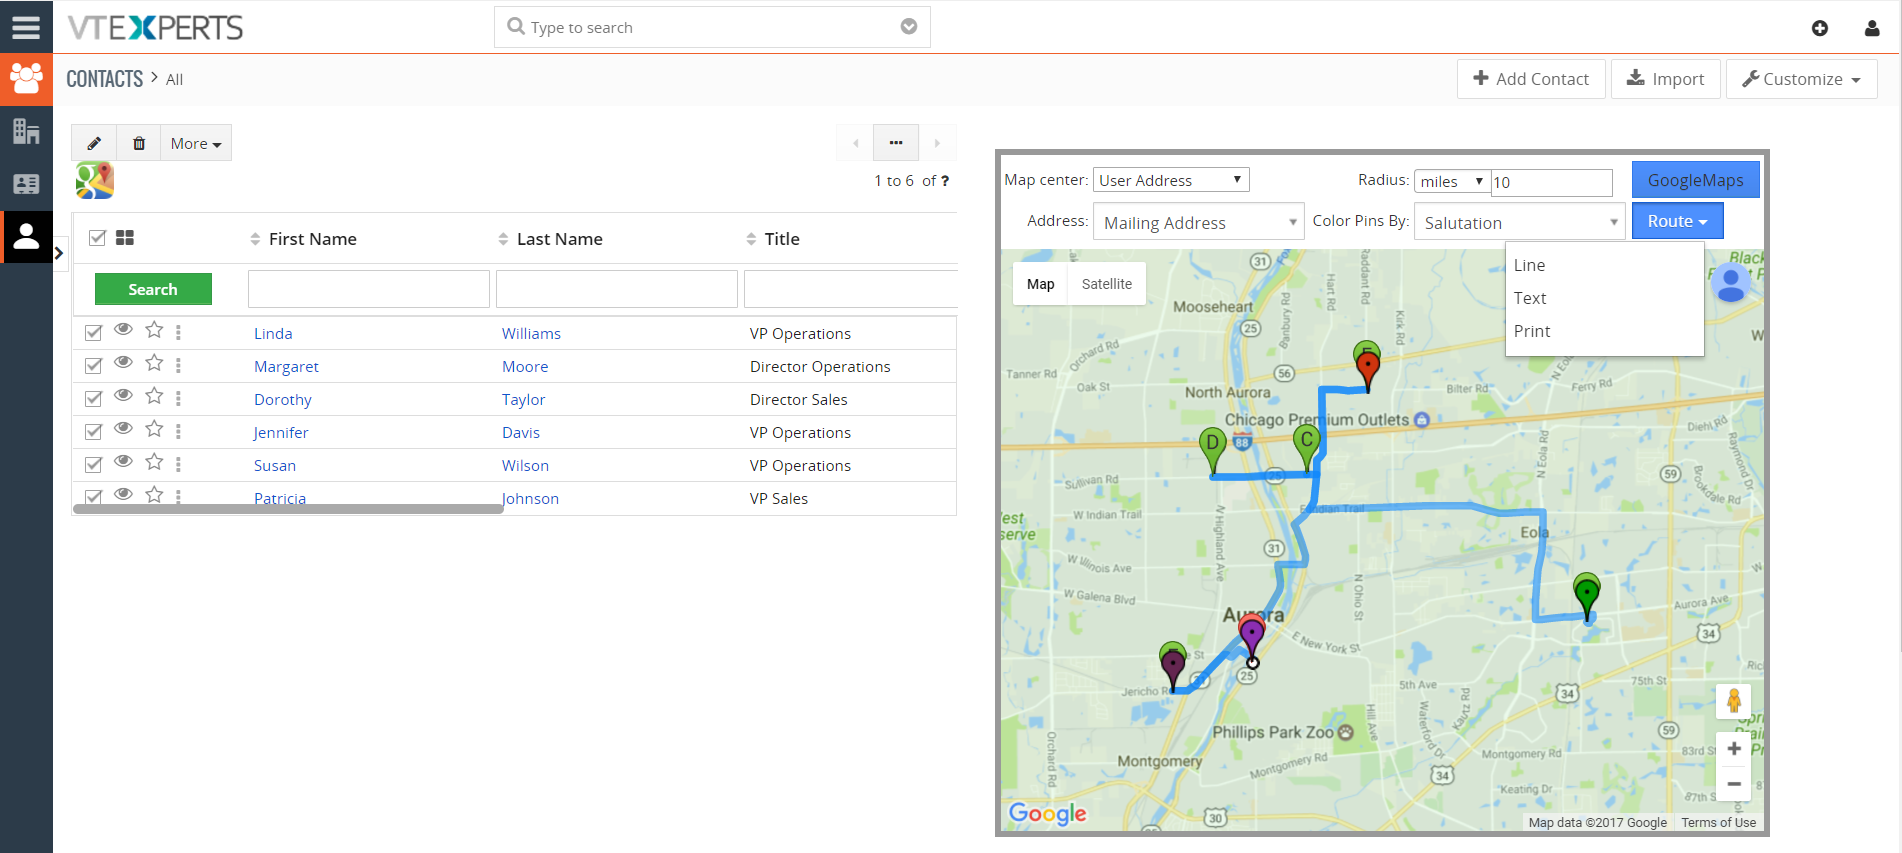
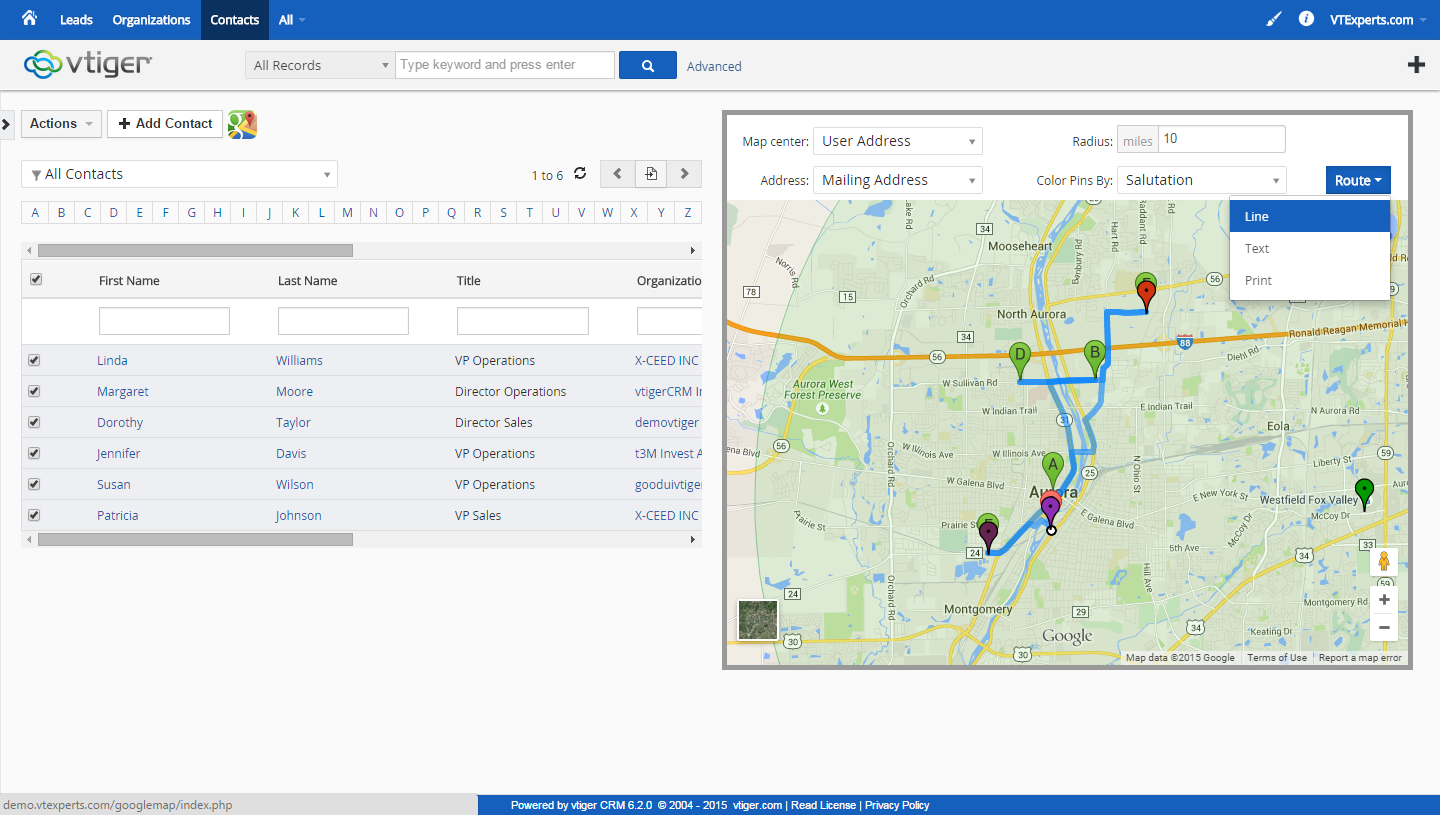
Then further select the routes either manually or automatically. You will get options according to the selected route and type of execution of the path creation. Then select records from the module to see their addresses and other info on the map.
Configuration Panel
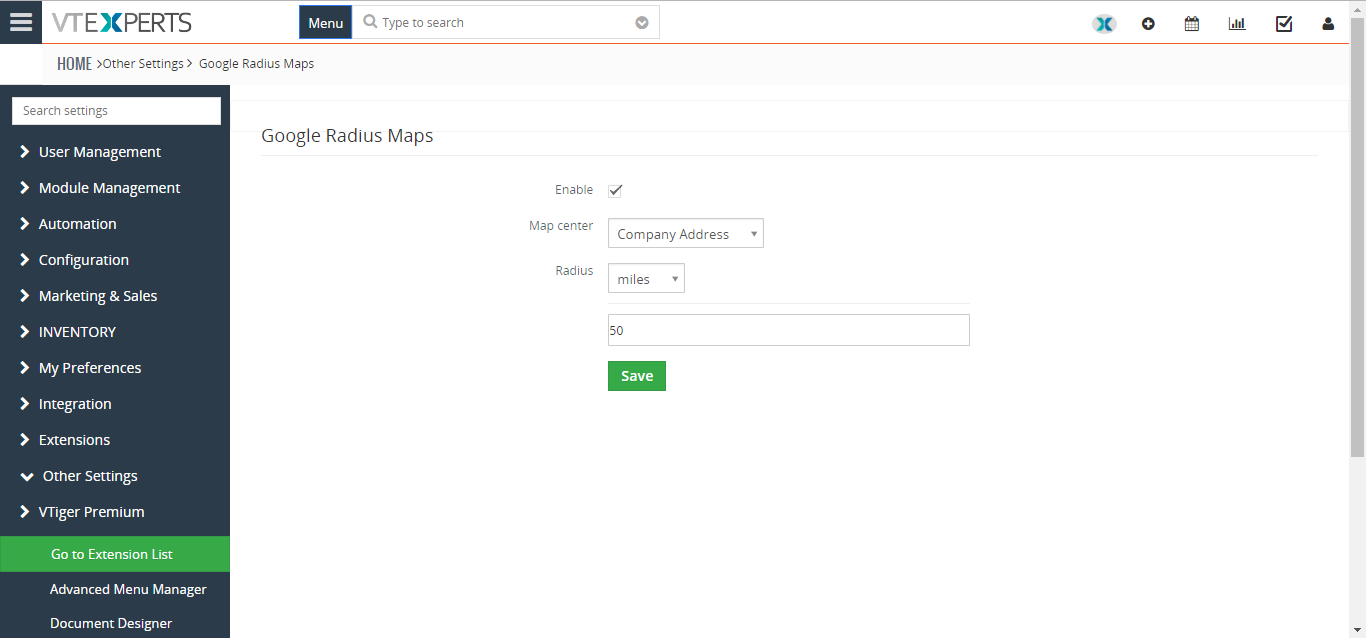
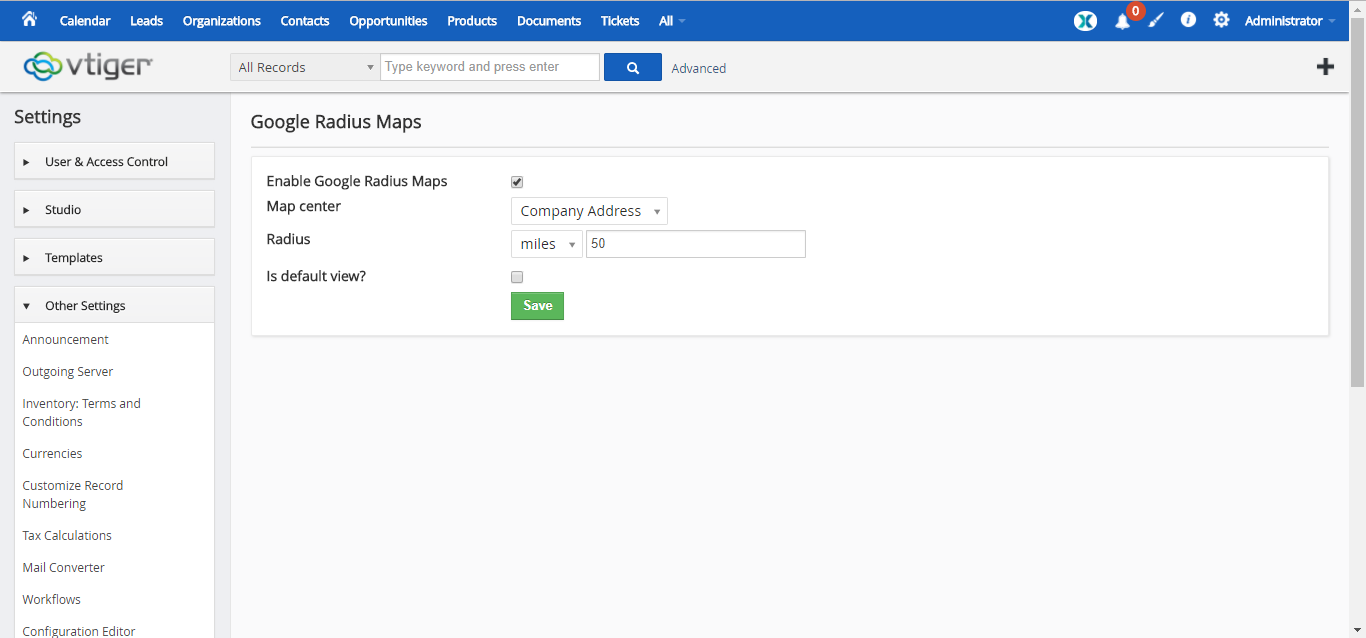
The configuration can be made at the backend of the extension. These settings can be accessed by going to CRM Settings > Other Settings > Google Radius Maps. The settings saved here become default settings of the extension and show as startup settings when the Google Maps button is clicked.
Enable Google Radius Maps: enable or disable the Google Radius Maps by switching the checkbox as ticked or non-ticked
Map Center: the center of the location from where the radius will be calculated (see “Configuration at Frontend” section of this guide for more info)
Radius: specify how wide the system should look for records on the map – i.e. the area covered. You can switch between ‘Miles’ and ‘Kilometers’ as the measuring unit of the extension. In the next field, enter a numeric value to look for the addresses on the Map
Is default view?: select this option if you want to make the Google Maps Radius as default view in your CRM
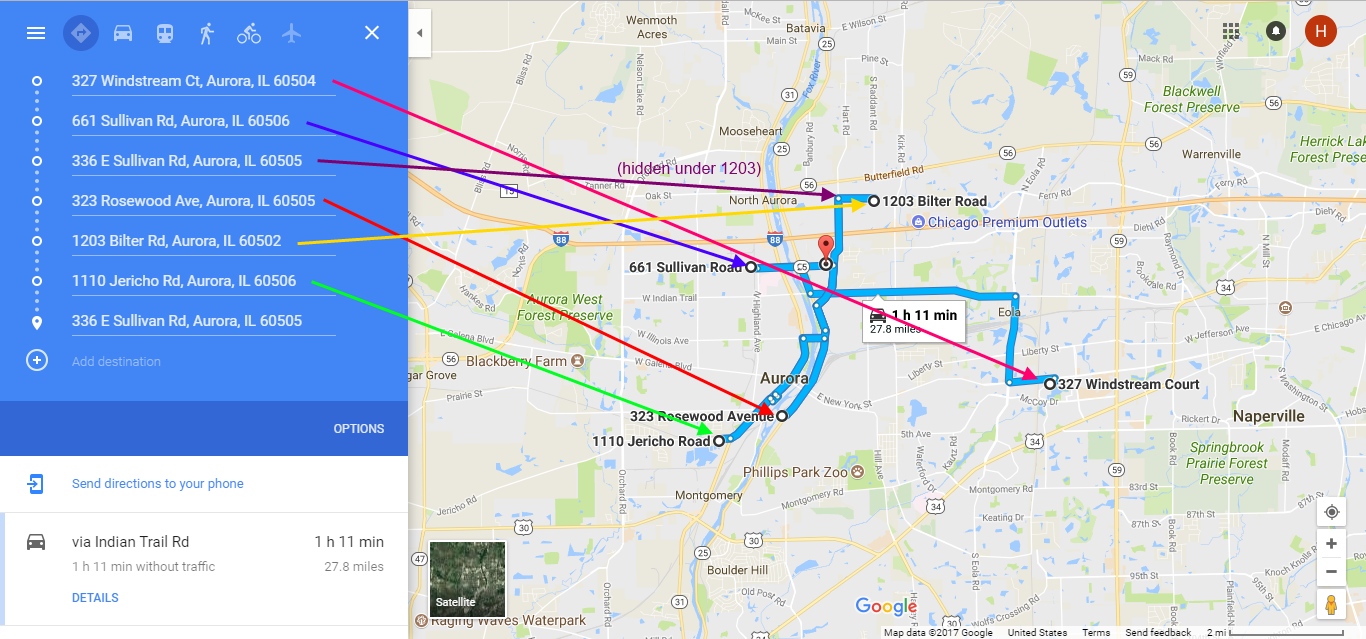
Open Addresses in Google Maps (web)
In Google Maps & Route Integration, there is also an option to make a route in a radius of configured center and switch it the web version of Google maps. This feature is extremely helpful as it allows you to:
* Select addresses and then get a route suggestion on the full version of Google Maps
* Avail all the features of the full version of Google Maps on your desired platform
* Also works on mobile devices and tables/iPads, makes it easier for reps to reach the destinations