Roll-up VTiger Extension was designed to calculate/rollup fields from related to primary module. One of the most commonly used example is being able to see total amount for all the invoices on the Organization record, or better yet – total balance (unpaid invoices). This extension allows the system admin to create workflows that will roll-up the information from one module to another.
It supports functions such as SUM,MIN,MAX,AVG,COUNT and integrates directly into VTiger standard workflows, meaning that you will be using workflows to create a roll-up. It’s compatible with all standard and custom modules and unlimited rollups can be created e.g Unpaid balance of all invoices on the organization, total time spent on tickets for last month, etc..
Configuration
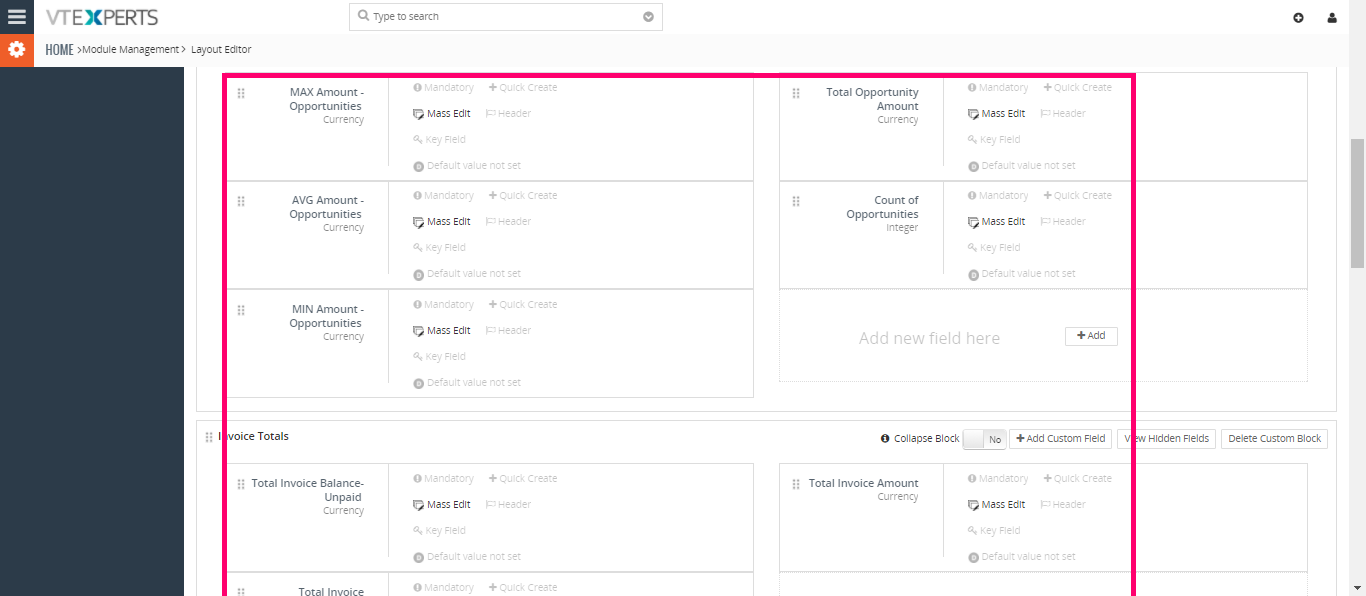
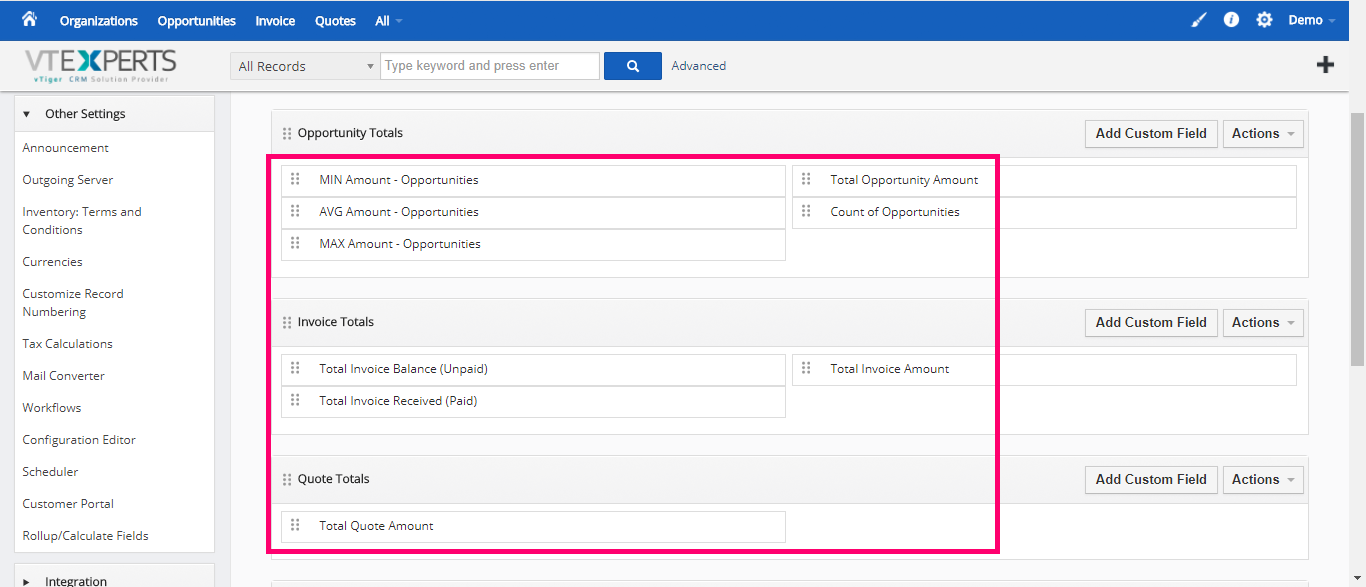
1. Creating Custom Fields
The first step to configure Rollup fields is to have the fields on the desired module. Those fields will contain the calculated info from the select standard or custom fields from any other standard or custom module. For the demo purpose, we added the following custom fields. Let’s check some of them how they work.
2. Setting up Workflow for Calculations
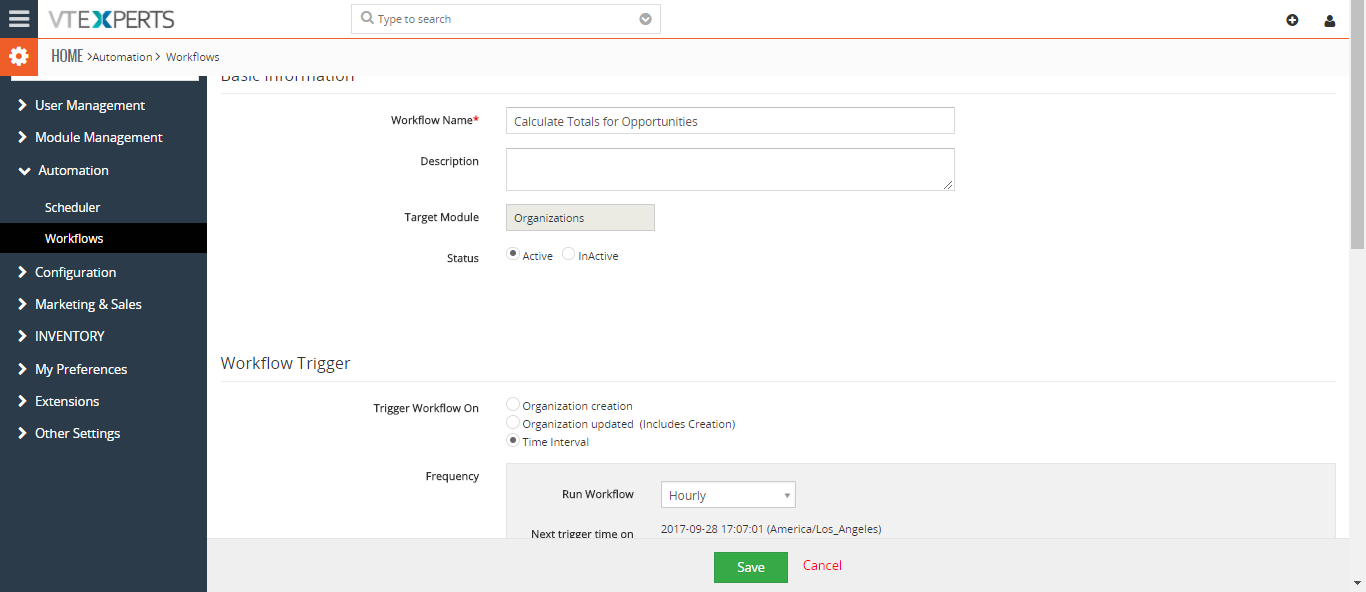
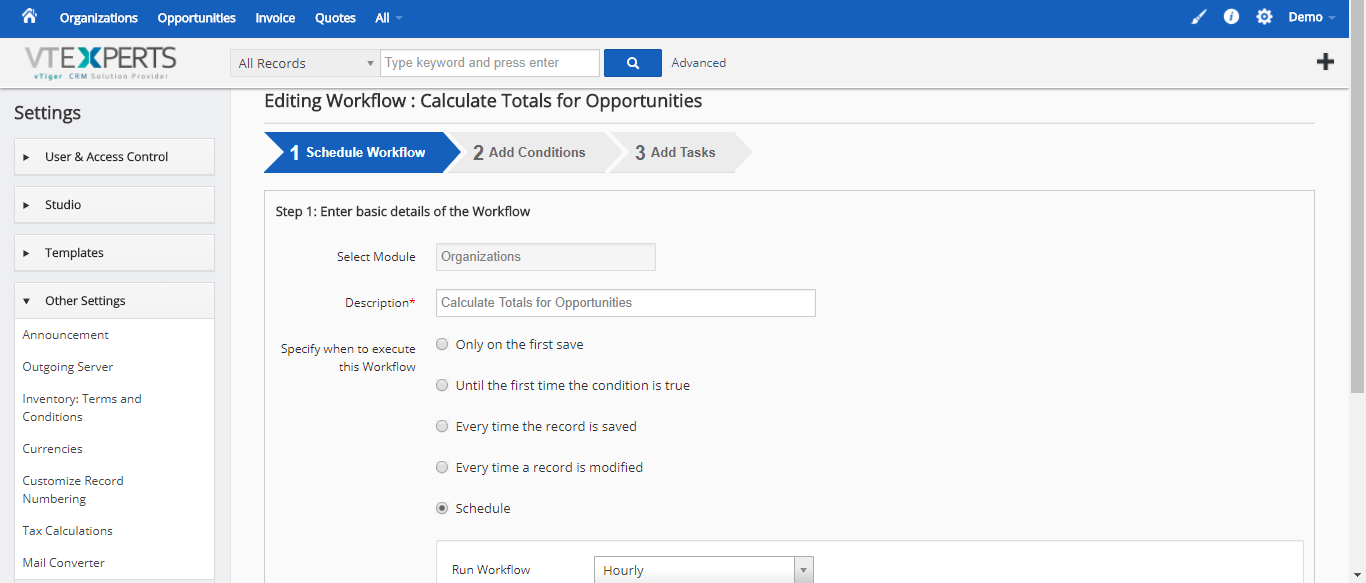
As the calculations are done with Workflows, we need to setup one for each of the modules. Go to the CRM Settings > Other Settings > Workflows for VTiger 6, or CRM Settings > Automation > Workflows for VTiger 7. Then add a new Workflow and configure it as following:
i. Schedule Workflow
Select Module/Target Module: choose the module to which you need to add the Rollup fields
Workflow Name/Description: Enter a brief description and a title of the Workflow
Workflow Trigger/Specify when to execute this Workflow: it is recommended to set “Schedule” as the configuration and run the Workflow every hour
Click “Next” for VTiger 6 or scroll down for further settings in VTiger 7.
ii. Add Tasks/Workflow Actions
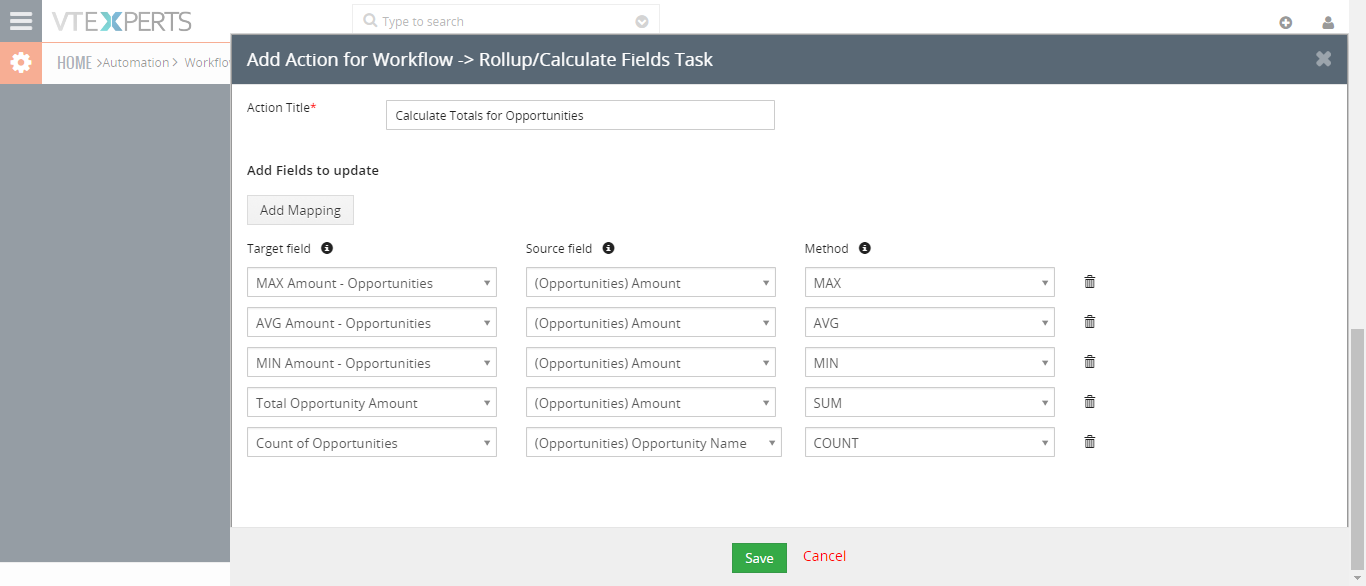
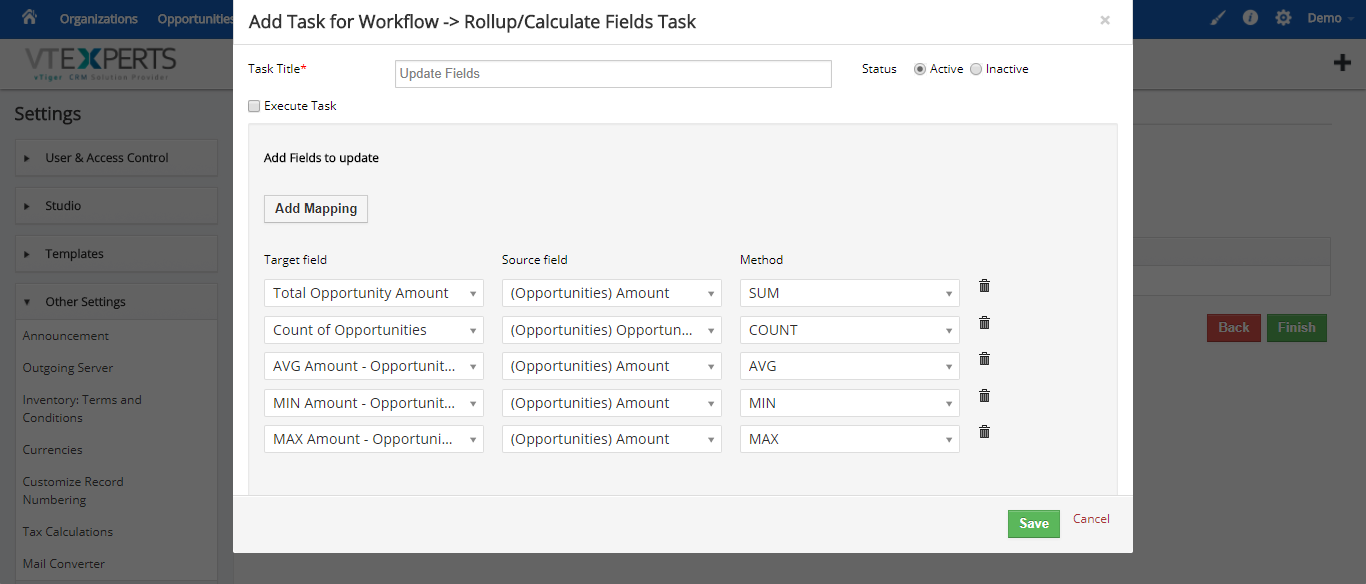
Add To Do/Add Action: you need to select the option “Rollup/Calculate Fields Task” from the list
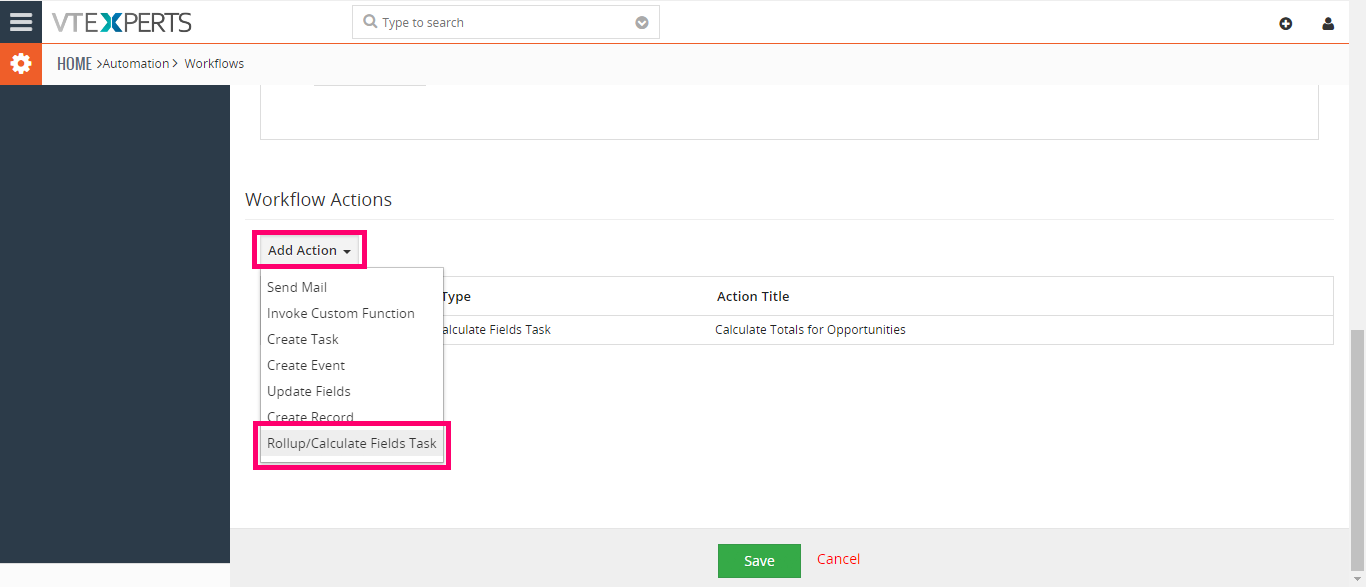
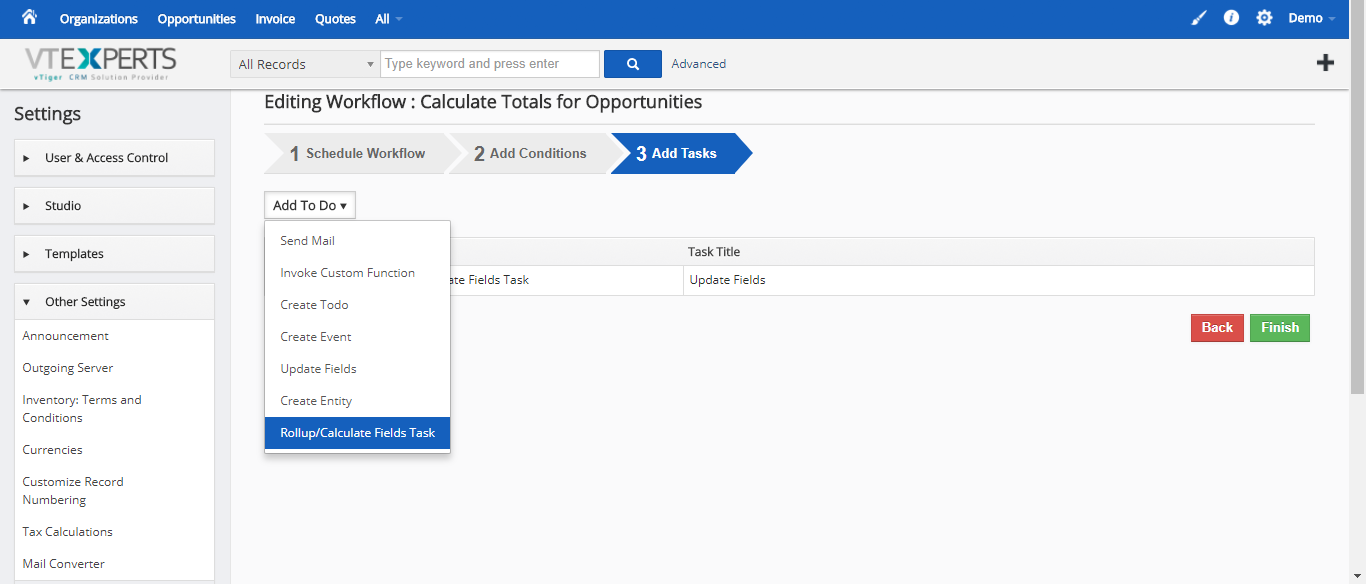
Then in the follow-up pop-up, configure the task settings as below:
Task Title/Action Title: enter a name of the task
Status: set “Active”. “Inactive” option will help in case you want the calculations to stop
Add Fields to update: this section will contain all the fields, mapping, and the nature of calculation to be made
Add Mapping: use this button to add a new mapping and configure it. Once you do, it will give you following 3 picklists:
a) Target Field: select the custom field (created in the “Step 1. Creating Custom Fields”) to which you want the rollup to be inserted
b) Source Field: select the desired source field and the module. This field will be one from which the calculation will be made
c) Method: select the method/nature of the calculation. You can select from SUM (total), AVG (average), MIN (lowest value), MAX (highest value), COUNT (total number of the records)
How it Works?
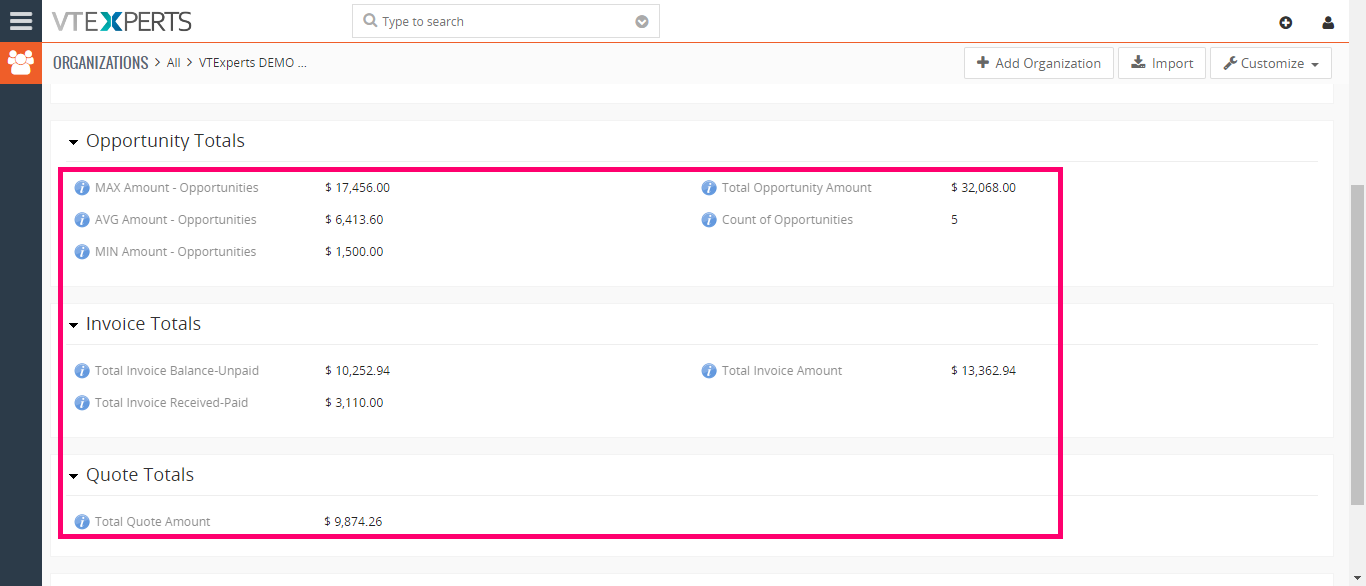
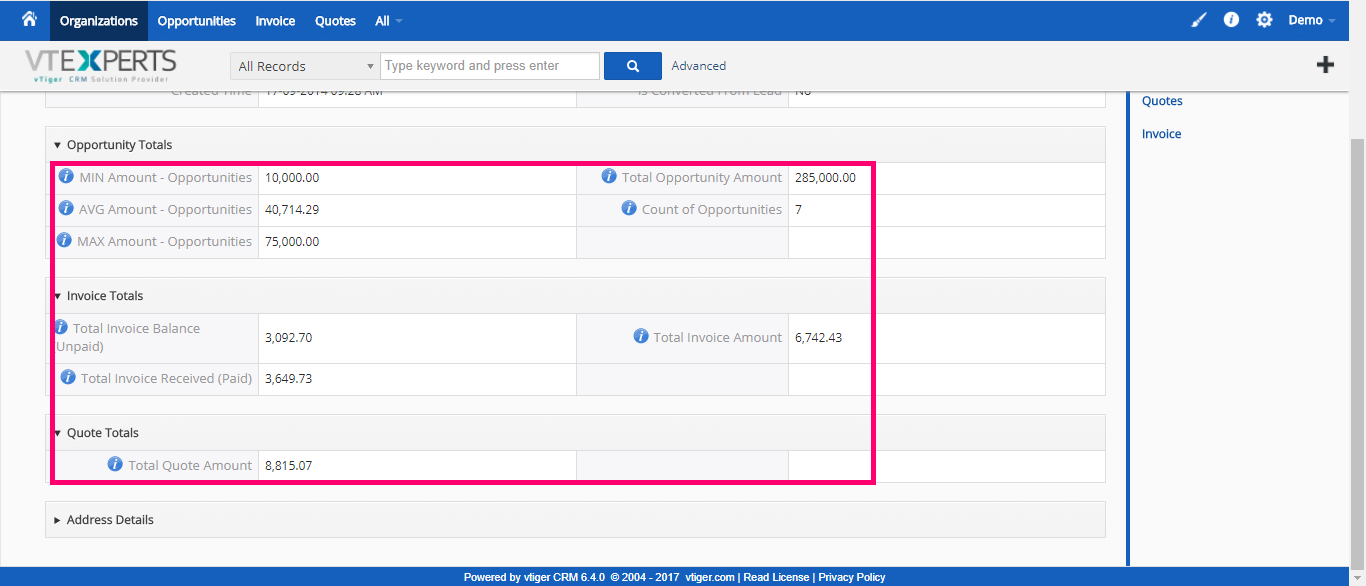
Once you configure the Custom Fields and Workflows, opening the configured module and then any record will show you the results based on the configuration. For example, if you mapped “Amount” field’s average from the “Opportunities” module to the “Organizations”, into a custom field (let’s call it “AVG Amount – Opportunities” according to the illustration below), it will show the average of the amount of all the opportunities linked to that organization.
In the below screenshot, all of the fields shown are Rollup/Calculated fields.