An exceptional VTiger Extension that can allow each user to have his/her own Outgoing Email Server (SMTP). Email server settings can be configured by admin, or each user can do it for him/herself. It supports IMAP function, meaning that every email sent will also be stored in user’s “Sent” folder on webmail/email server.
It’s crucial for businesses that send a lot of emails to keep the delivery rate as high as possible. Also, if you want to be able to send from the user’s email account, VTiger Outgoing Email Server will definitely help to achieve that.
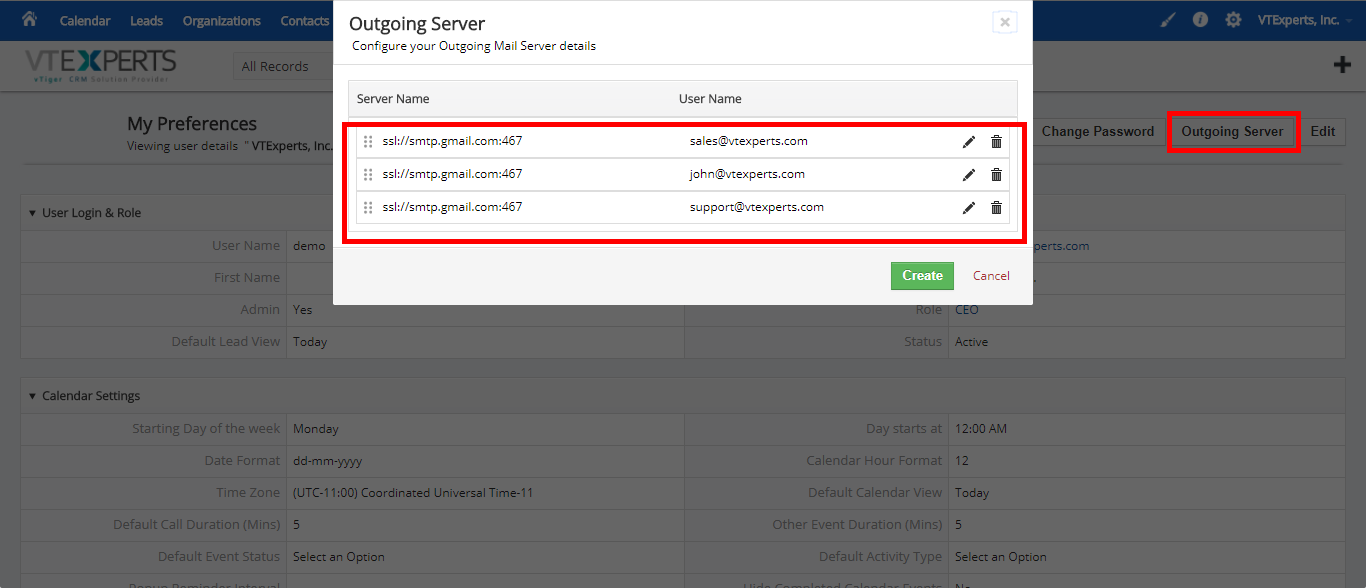
Configuration
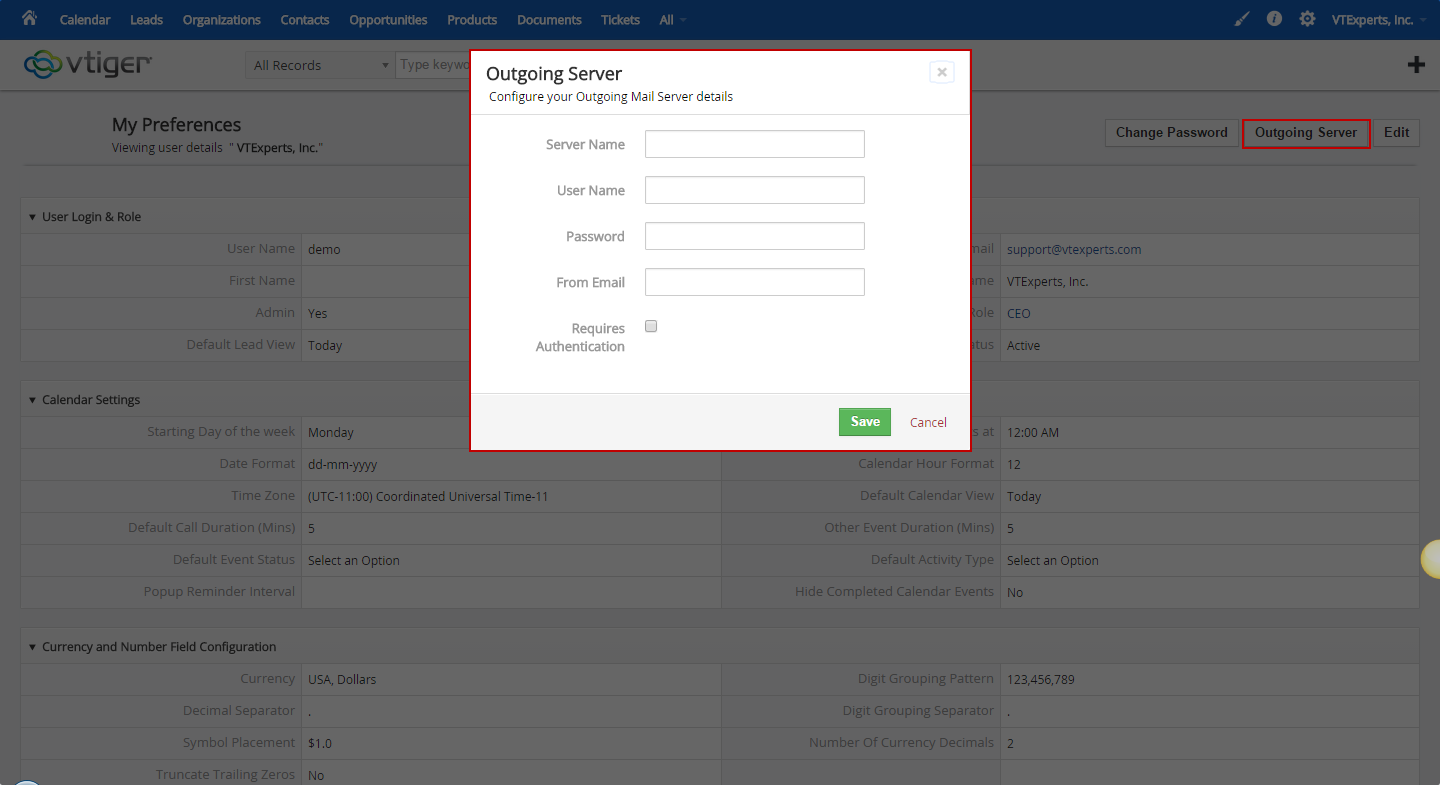
The module “Outgoing Server” can be configured by going to the “My Preferences” of the user. A user will need to provide following information to configure Outgoing Email Server:
Server Name: Name/ip of the email server. (If you are using SSL or TLS and CUSTOM PORT, you need to put in e.g ssl://smtp.gmail.com:465 or tls://smtp.office365.com:587)
User Name: Email user name (95% of the time it’s your email address).
Password: Your email password.
From Email: use the email ID from which you need to send the emails
Requires Authentication: checkbox to specify the authentication type.

Adding Multiple Outgoing Servers
As the extension allows to add multiple outgoing servers and use different sending email addresses for same user, we need to take a look at how it’s done. For that, go to My Preferences > Outgoing Server and click “Create” button. Even if you have configured a server already, the extension will allow you to add more servers.
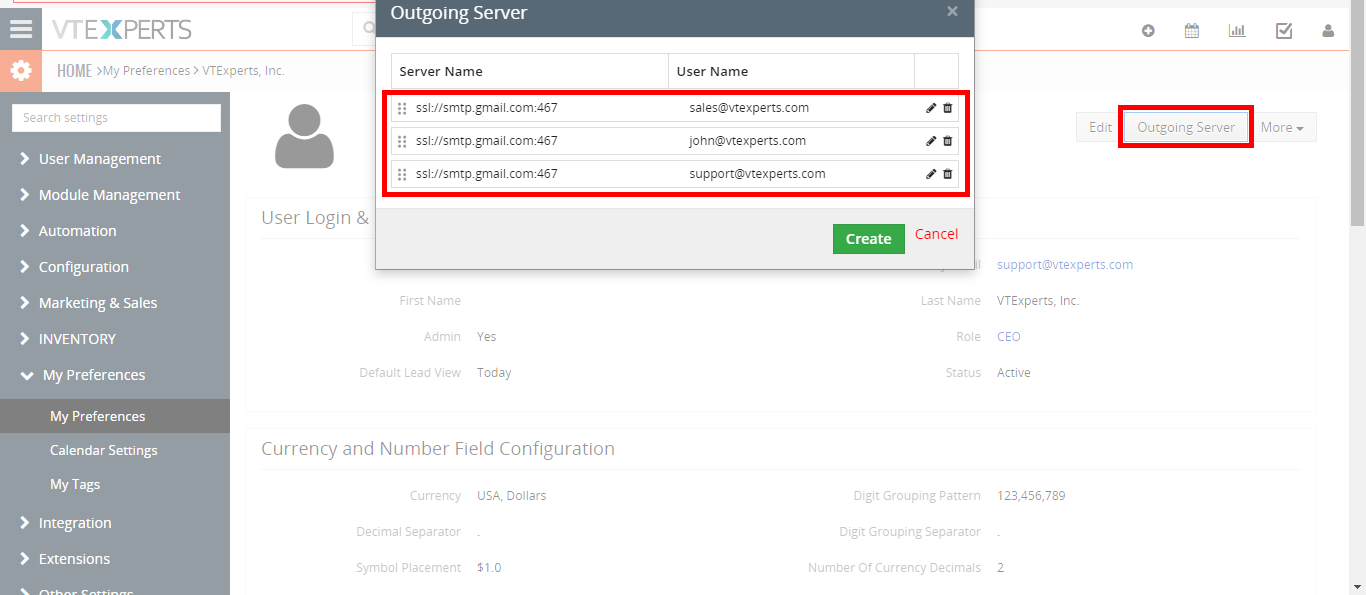
Then you need to do the settings as explained in the “Configuration” section above. Hit “Save” and you will have multiple outgoing email servers.
Using Multiple Servers
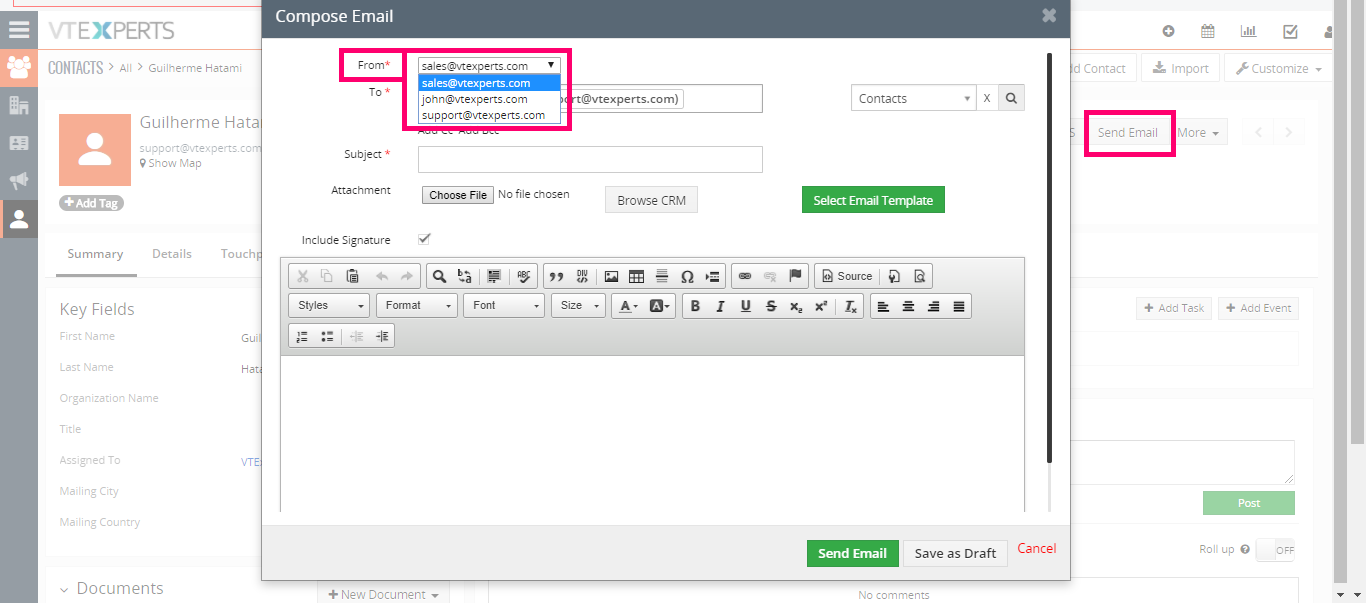
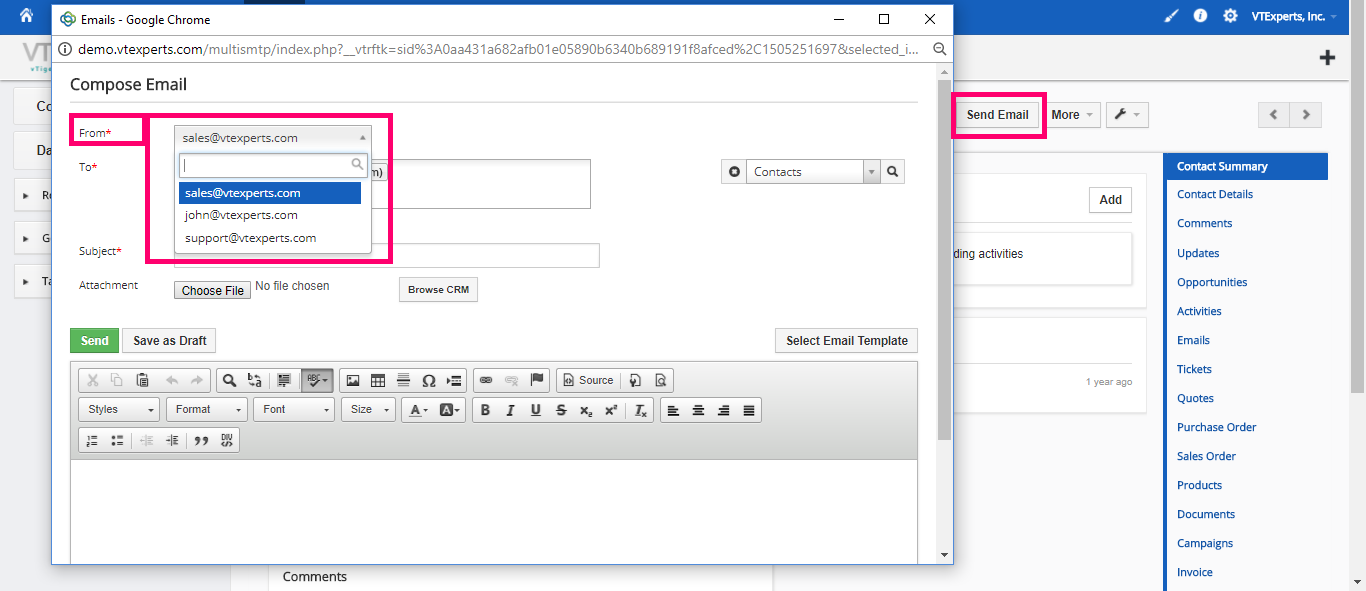
Once you save all the outgoing mail servers, you can send the emails from any of them. They will simply be available in the “From” section of the “Send Email“. For example:
1. Go to Contacts and open a record
2. Click “Send Email” button
3. Click the “From” picklist. It will show all of the configured outgoing servers. Choose the one you want to send the email from