

Custom Expenses Extension for VTiger was designed to track and automate expense billing. It supports all modules, meaning that you can convert anything into an expense. The expenses can then be added to the invoice with just few clicks.
For example, if your staff travels a lot and you want to track all the expenses (flight, hotel, etc..), you could do that by simply creating a custom “Travel Expenses” module (using Module Builder), configure Travel Expenses module fields i.e cost, quantity, description and map into the invoice item details. Finally, all the expenses logged would be visible on the invoice and available for you to include them on the customer’s invoice.
Configuration
+ New Expenses/Bills: To add and configure a module as expense type.
List of the Expenses: All of the created expenses or bills modules are shown in this list.
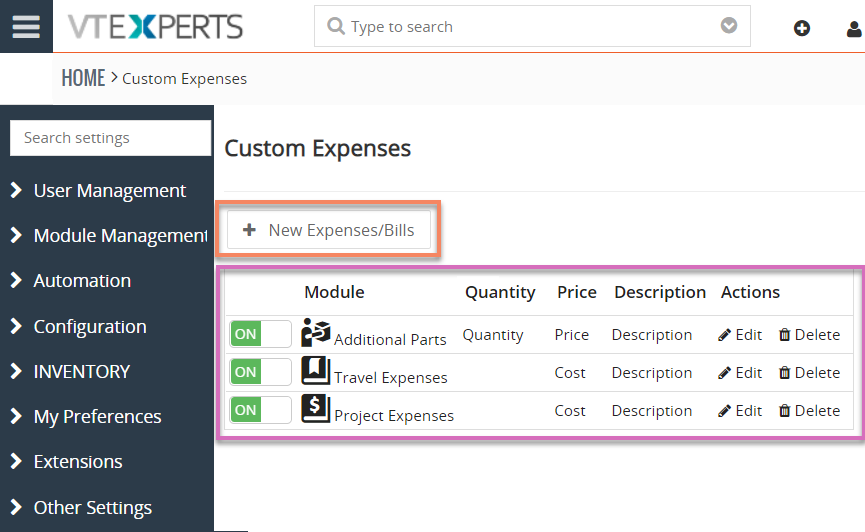
+ New Expenses/Bills
This allows you to add and setup a new custom expense for your CRM. There are several options you can use to categorize each custom expense differently.
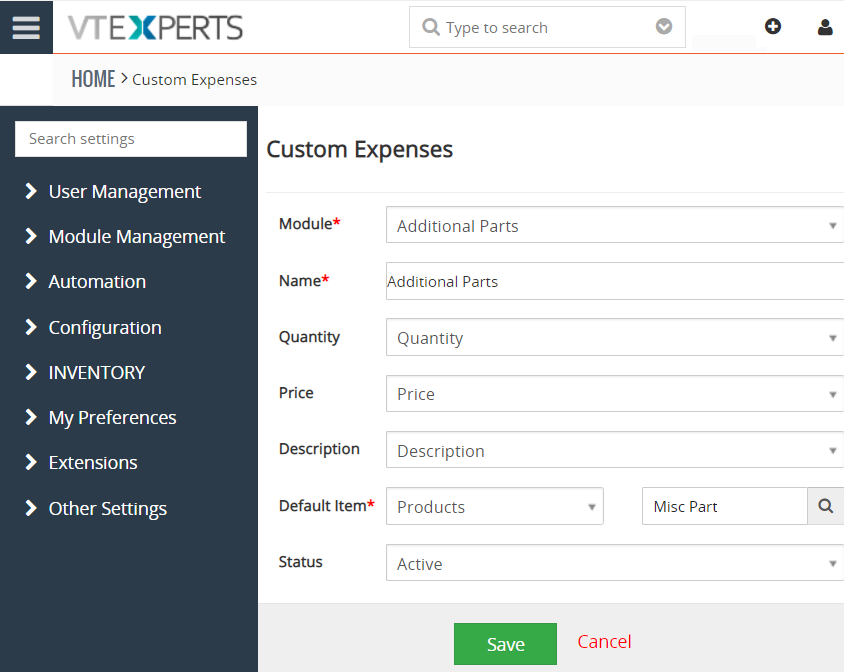
Module: Select the module here to be added as a “Custom Expense”. Any module can be configured to be a “Custom Expense”. Once the module is configured, it will show up on the in the “+ Add Custom Invoice” picklist on the Invoice.
Name: The name displayed in “+ Add Custom Expense” selection.
Quantity: Map item quantity field from selected module. (if left blank, the quantity will default to 1).
Price: Map item price field from selected module. (if left blank, the quantity will default to 0).
Description: Map item description from selected module.
Default Item: Can be a Product or a Service. This field is required.
Status: Turn expense on or off.
List of the Expenses
Once a new custom expense is created, it gets added to the list of all the available expenses. There are several options available as well as information about the expense.
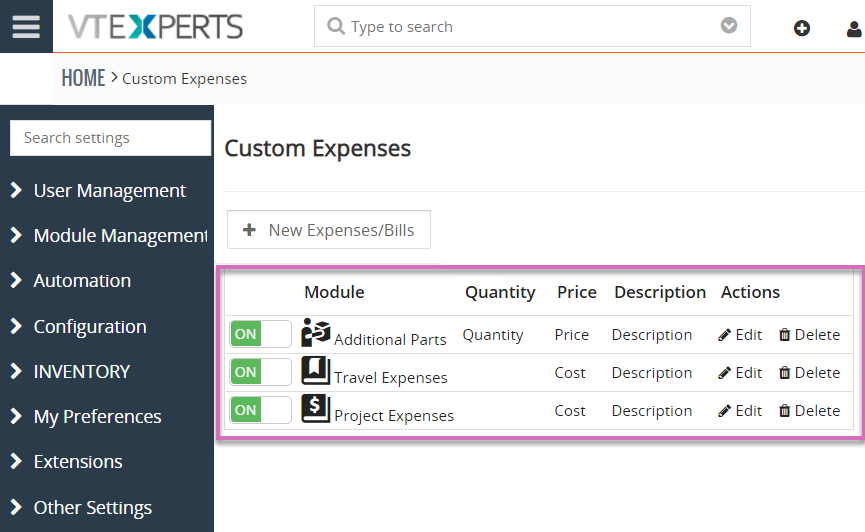
ON/OFF: Activate/Deactivate a custom expense right from the list.
Module: The Module which the Custom Expense is for.
Quantity: The “Quantity” field selected in the configuration is shown here, if any.
Price: The “Price” field selected in the configuration is shown here, if any.
Description: The “Description” field selected in the configuration is shown here, if any.
Actions: You can Edit or Delete a Custom Expense from the list.
How Do Custom Expenses Work in VTiger
Once you have added a module as Custom Expense, you need to go to a module where the expense needs to be managed. It is necessary that the expense module is its related module. You can add new modules as well as new relationships using Custom Module and Relationship Builder.
That means, once a module is converted to Custom Expense, it gets its own sets of fields required for this specific purpose. Let’s consider Organizations as primary module and Travel Expenses as the related custom expense module.
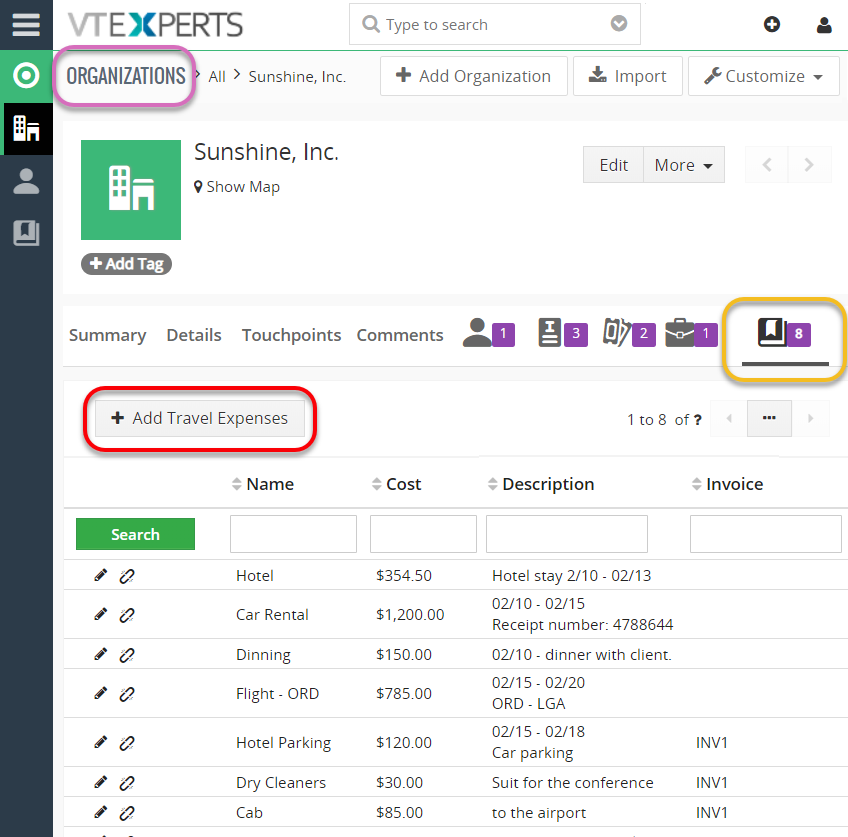
As you can see, the expense module behaves just like any other related module as well as allows to add a new related expense.
You can do the same for other related modules. For example, if there are open tickets for current Organizations, and you have added a custom expense to some of those tickets as well, they will show up under the same organization during billing. Here’s how you can bill:
To bill this organization, we need to add an invoice to it. On the new invoice page, you can see a new button “Add Custom Expense”. It contains all of the custom expense modules available.
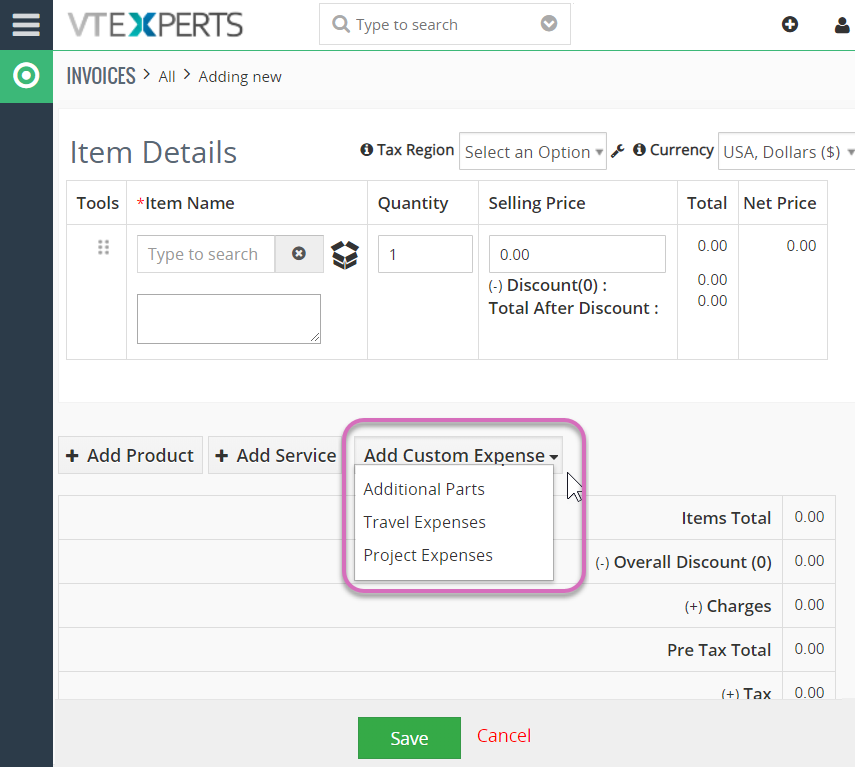
Simply click the module/category for which you need to bill this organization by this invoice. Clicking that will show all of the OUTSTANDING bills.
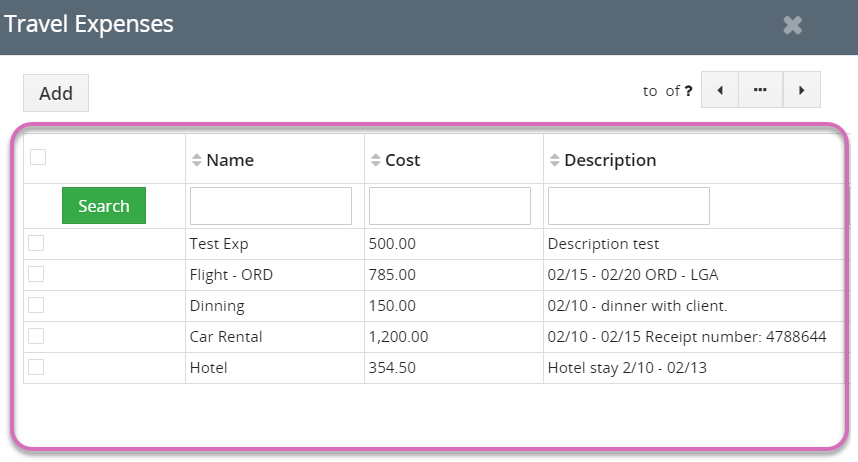
Once you select as many bills as required, they get added to the invoice with the quantity and selling prices filled as configured. And that’s it the invoice is ready to be sent.
