The Table Block Extension by VTExperts, addresses the need for managing structured and repeatable data directly within a single vTiger record . Its core function was to allow to embed configurable, tabular data structures, similar to a mini-spreadsheet, directly within a VTiger record, without creating a separate module and relationships. It allows recording of repetitive data, making it ideal for managing detailed line items, project cost breakdowns, or extensive itemized lists.
Configuration
Creating Fields
First step is to create the BLOCK and FIELDS to be used in the TABLE BLOCK
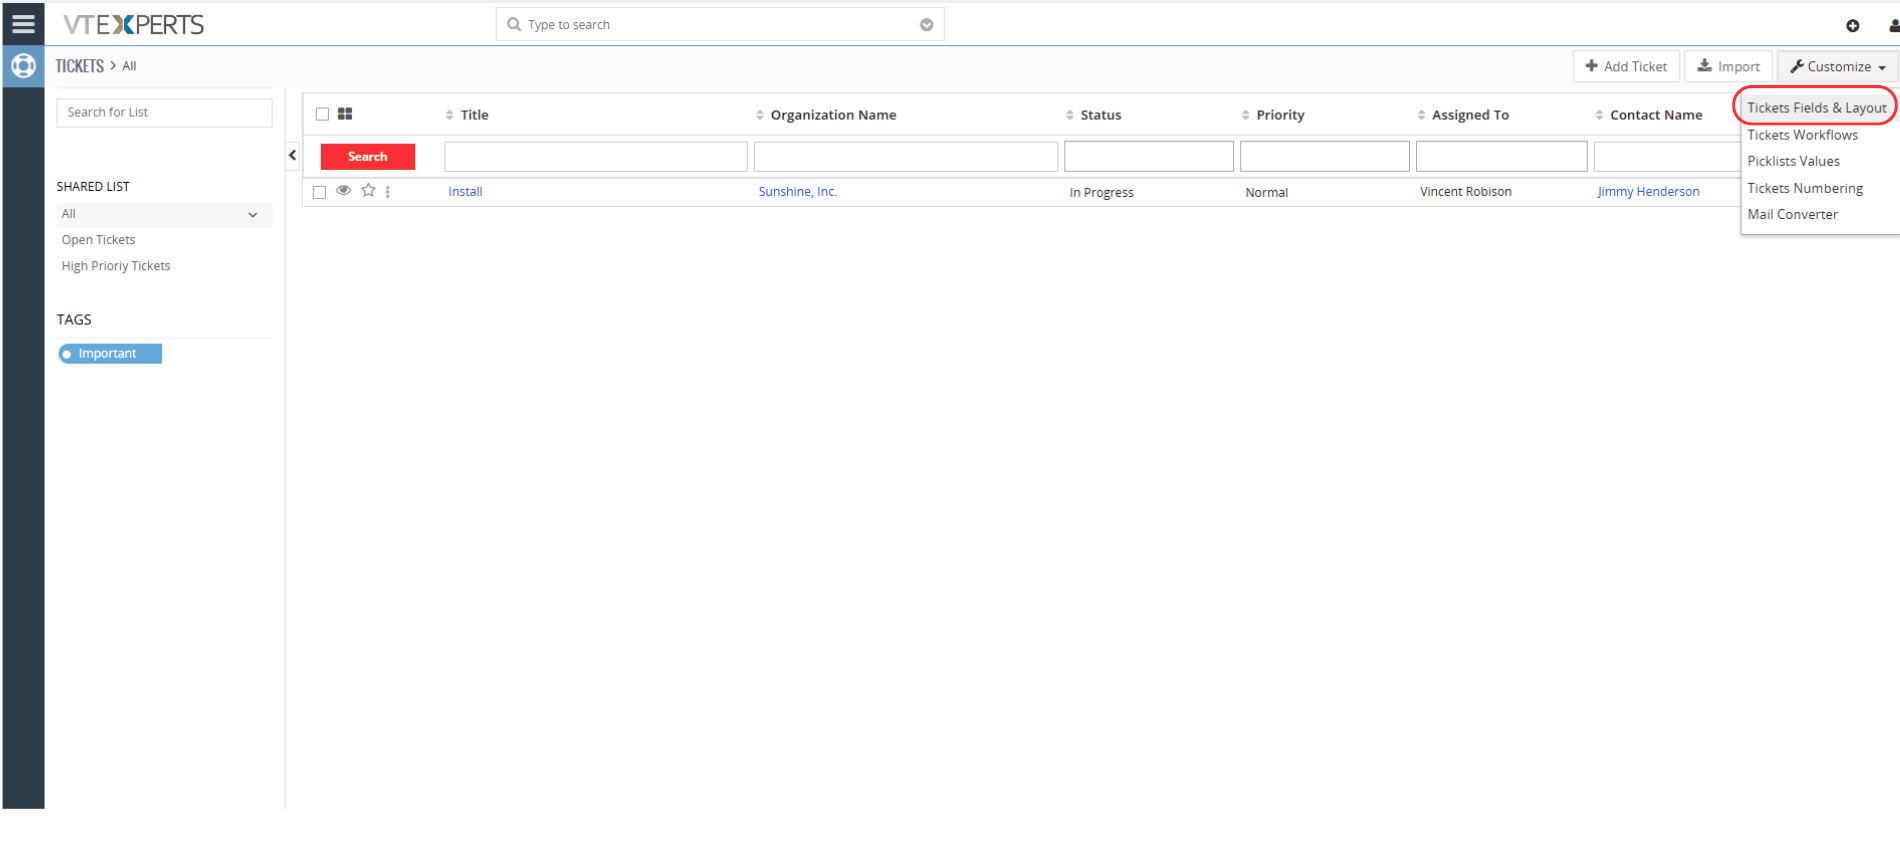
- Go to field and Layout
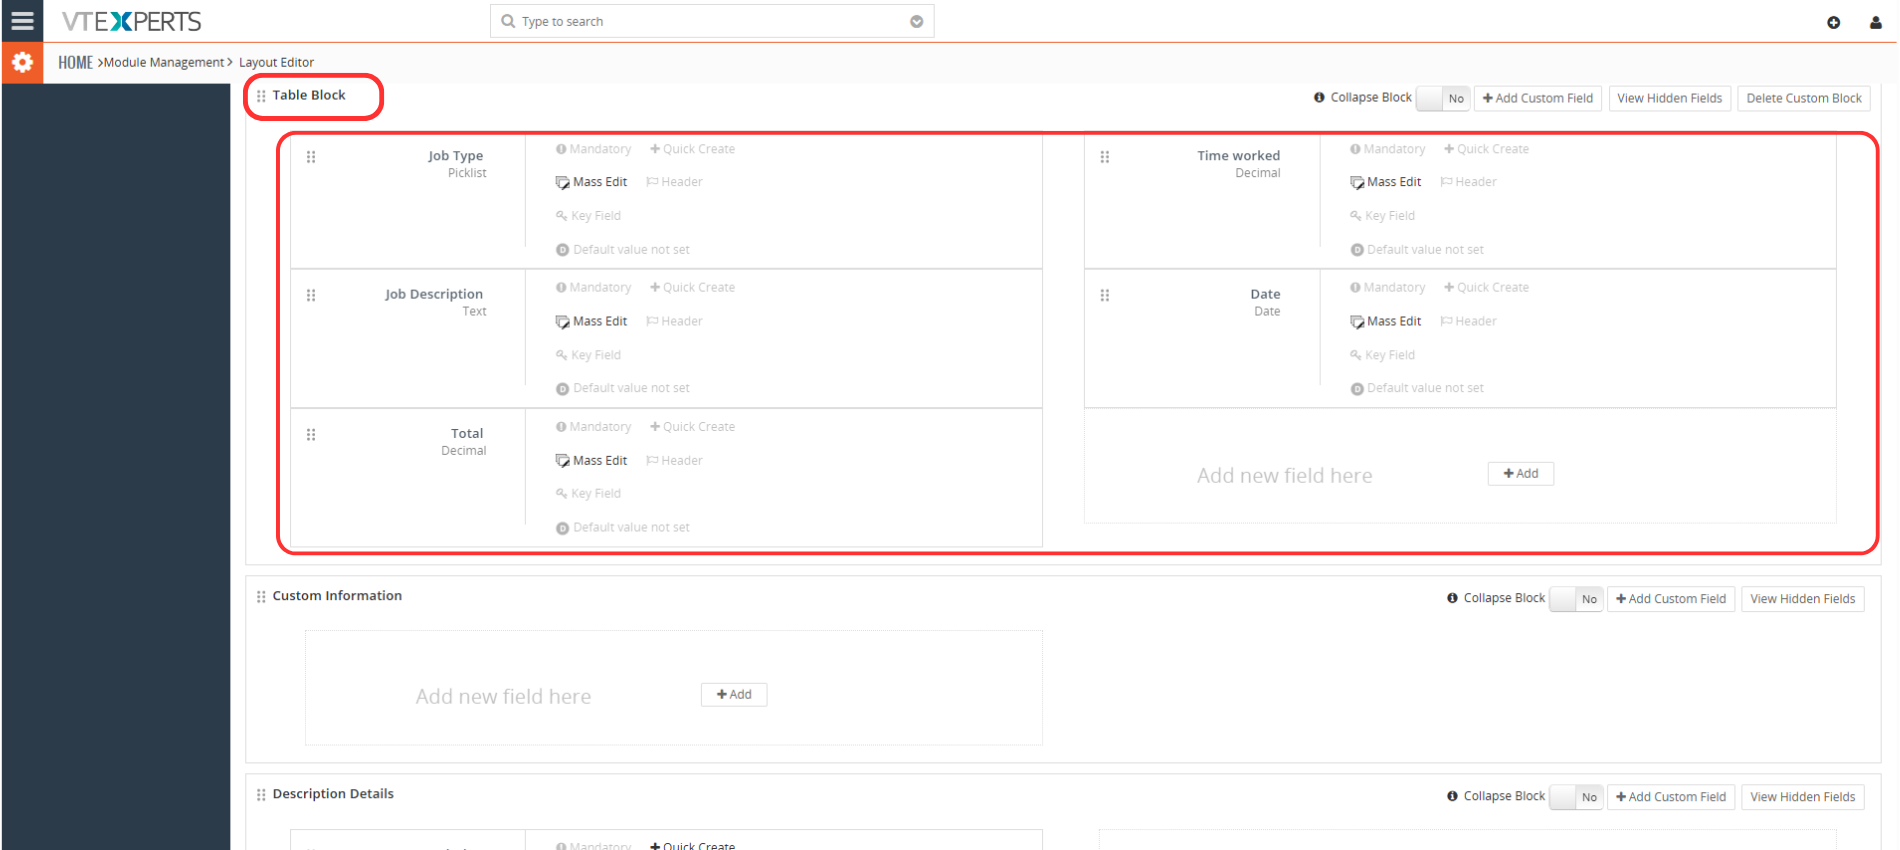
Create Block and add fields to be used in it
Adding Table Block
Now go to Advance table block configurations and click on Add Table Block

Add table block details
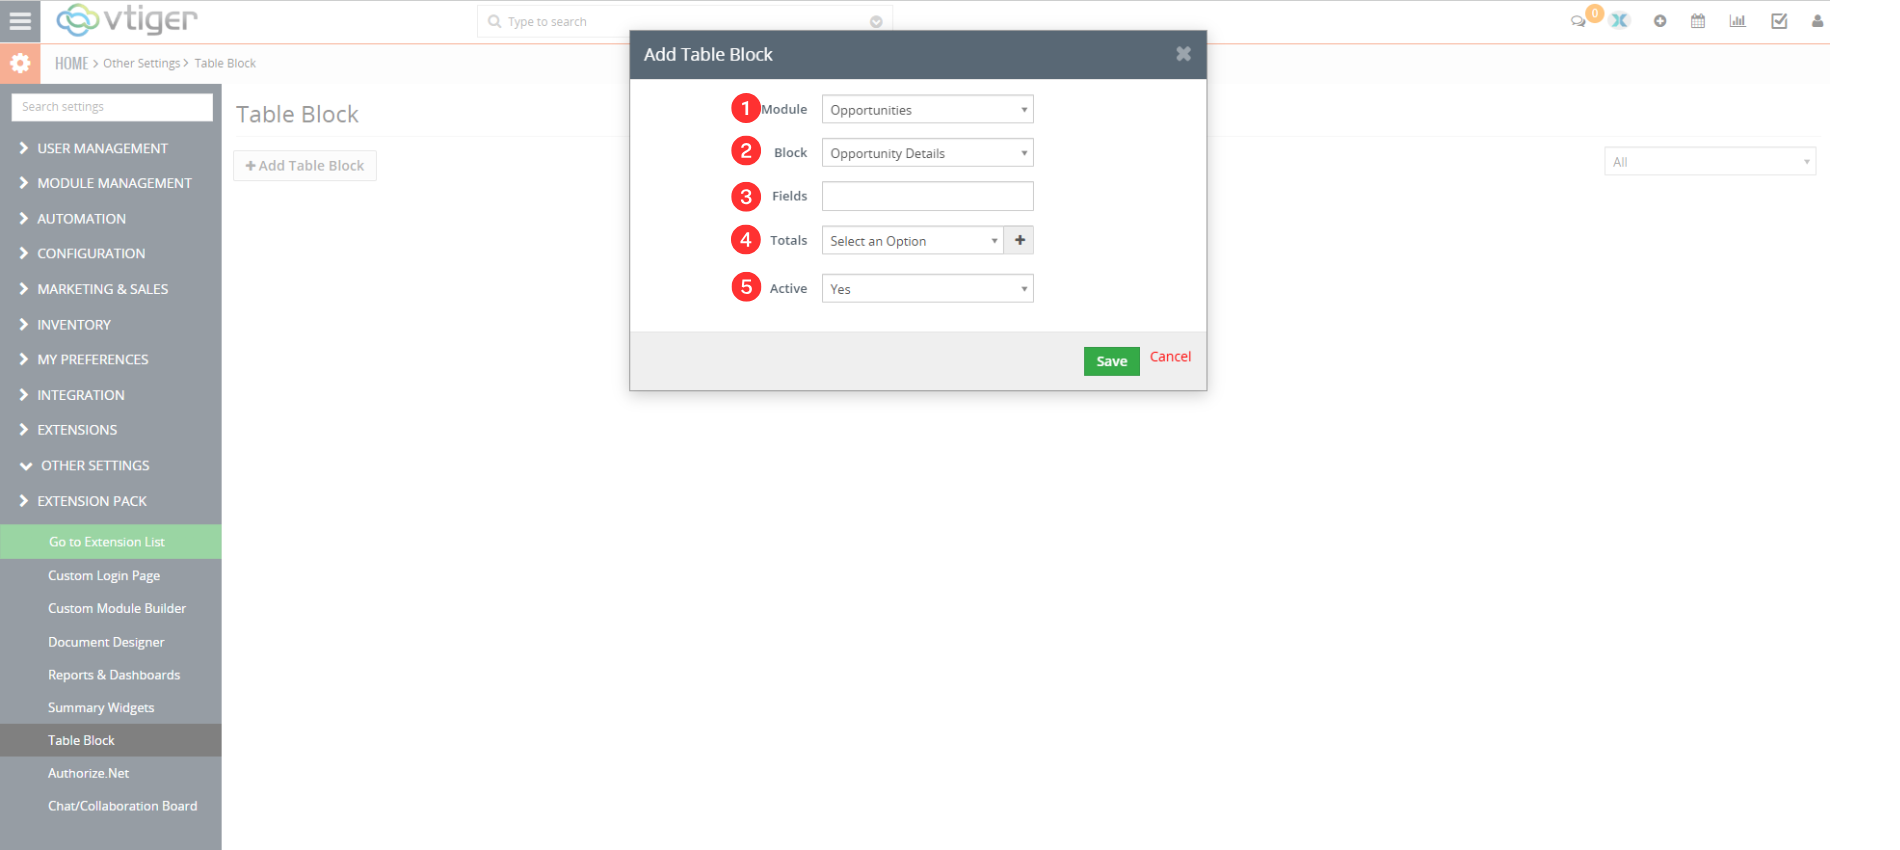
- Module: Select the module in which you are using the TABLE BLOCK
- Block: Select the Block
- Fields: Add the fields to be appeared in the Table Block
Note: Do not mention field in which you want to calculate Totals here - Totals: Mention the field TOTALS Field here
- Active: Enable or disable the TABLE BLOCK
Save TABLE BLOCK
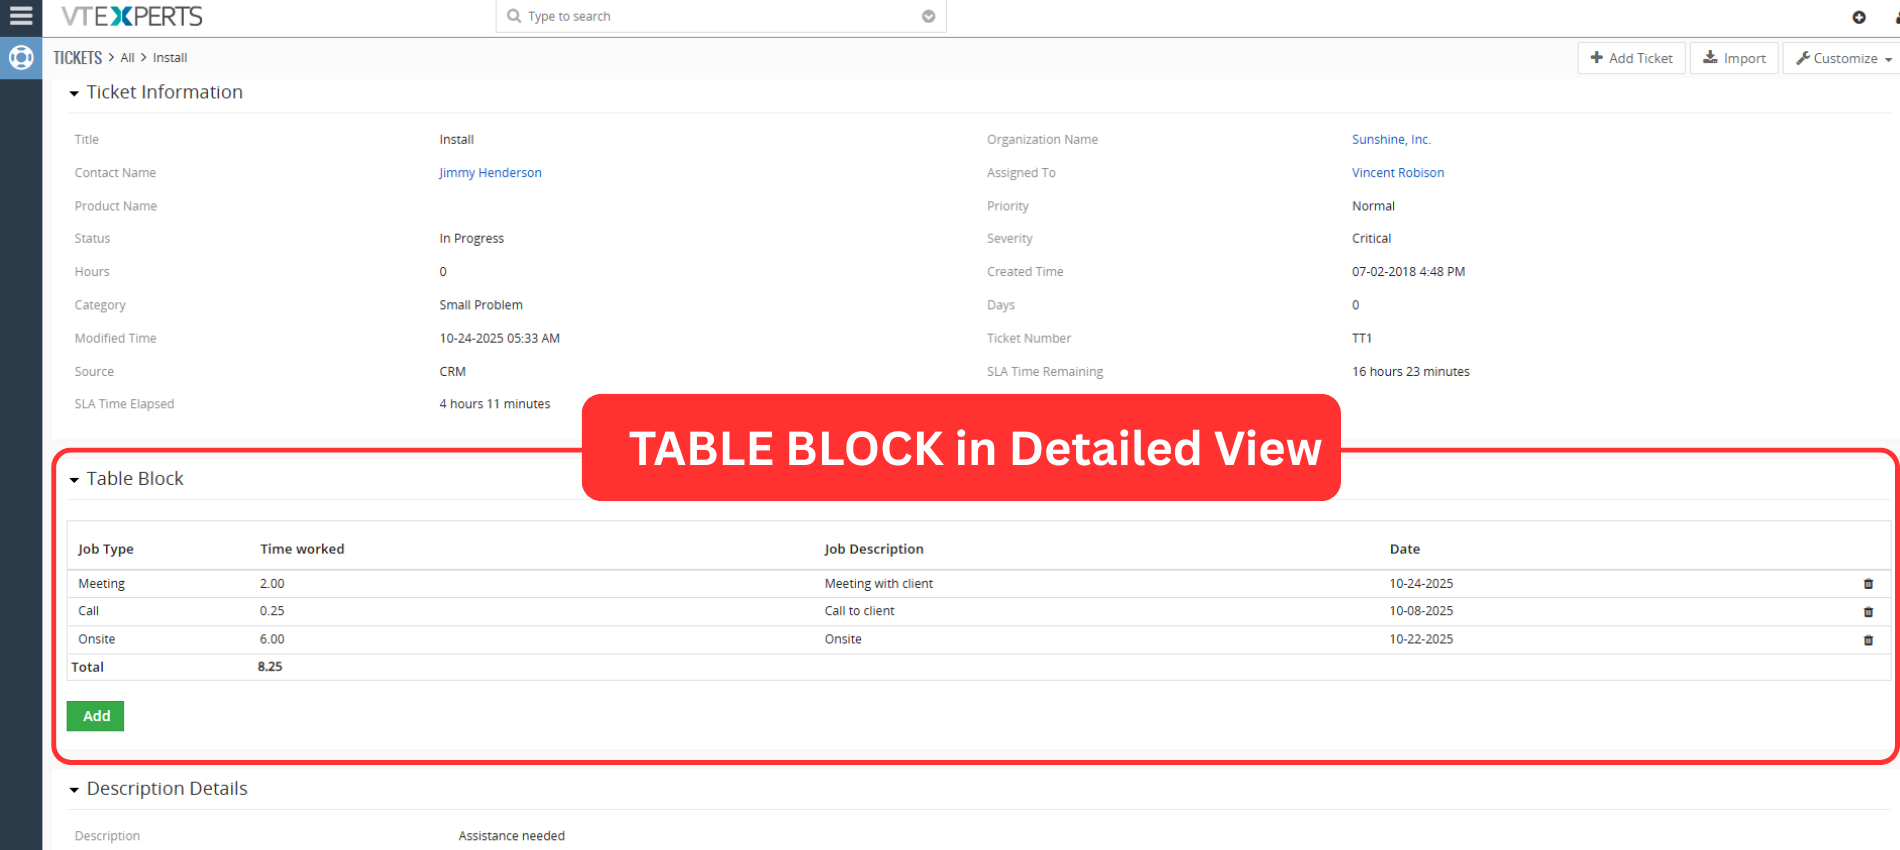
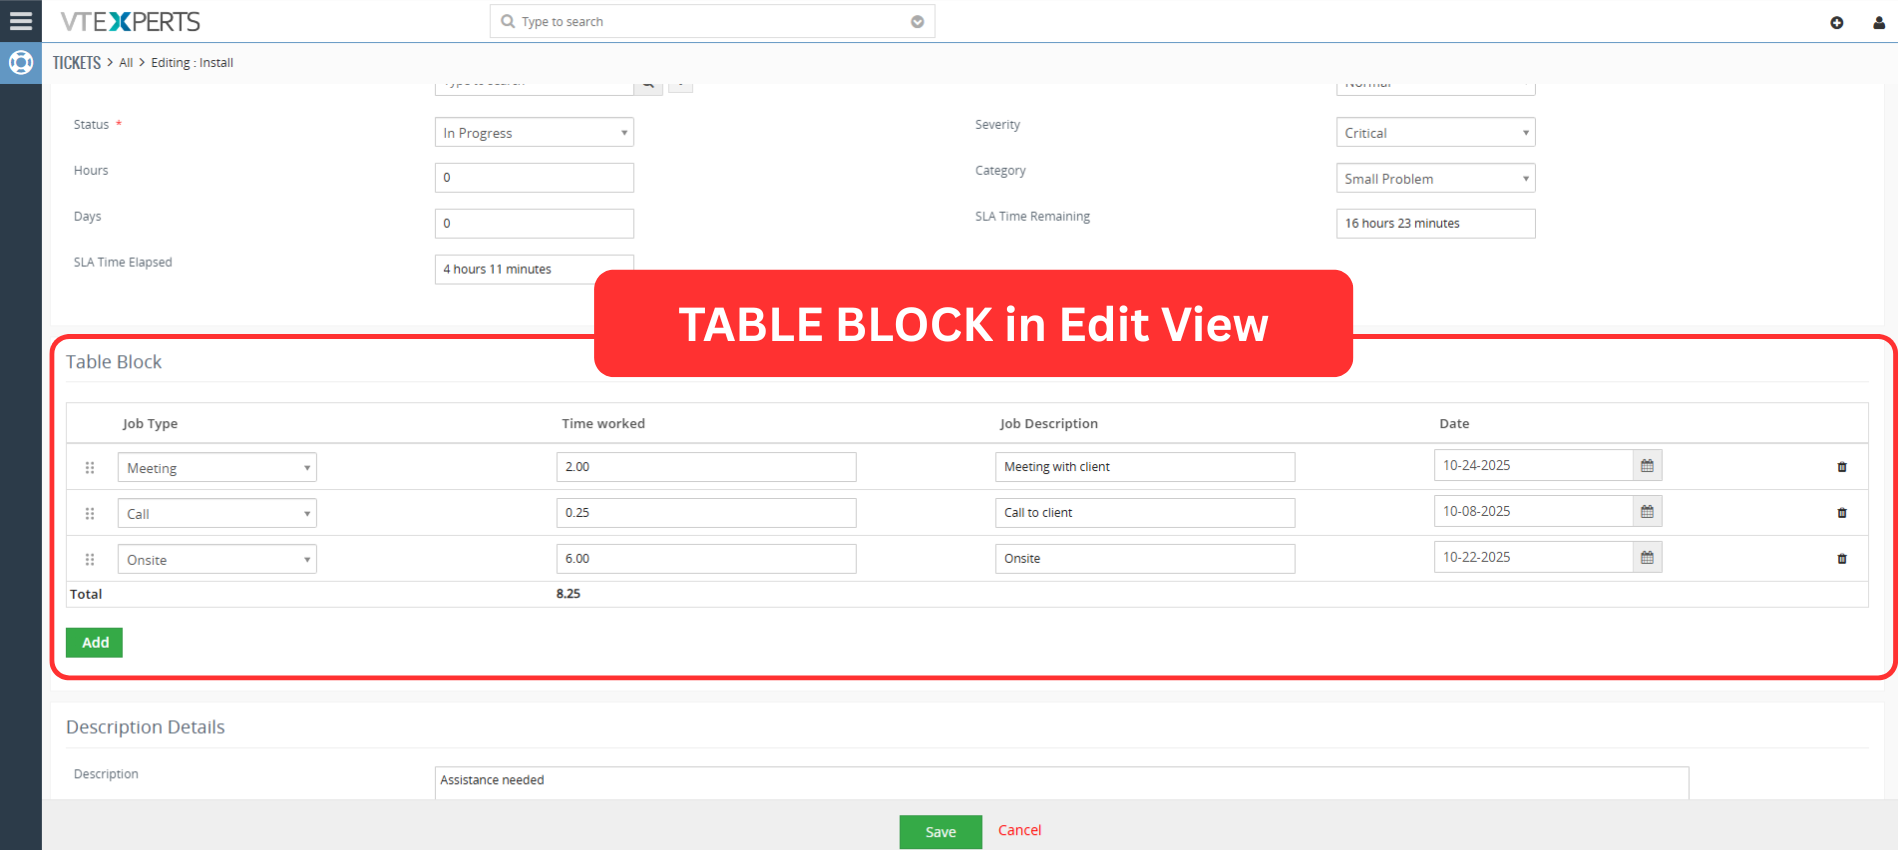
TABLE BLOCK in record/module
Now the table Block will start appearing in the module and it can be used both in Detailed and Edit view
How it works
User wants to tracking job records right within the Ticket module using a TABLE BLOCK. It saves the complexity of creating a new custom module. In this example, the Job consists of the following fields
Setting up TABLE BLOCK fields
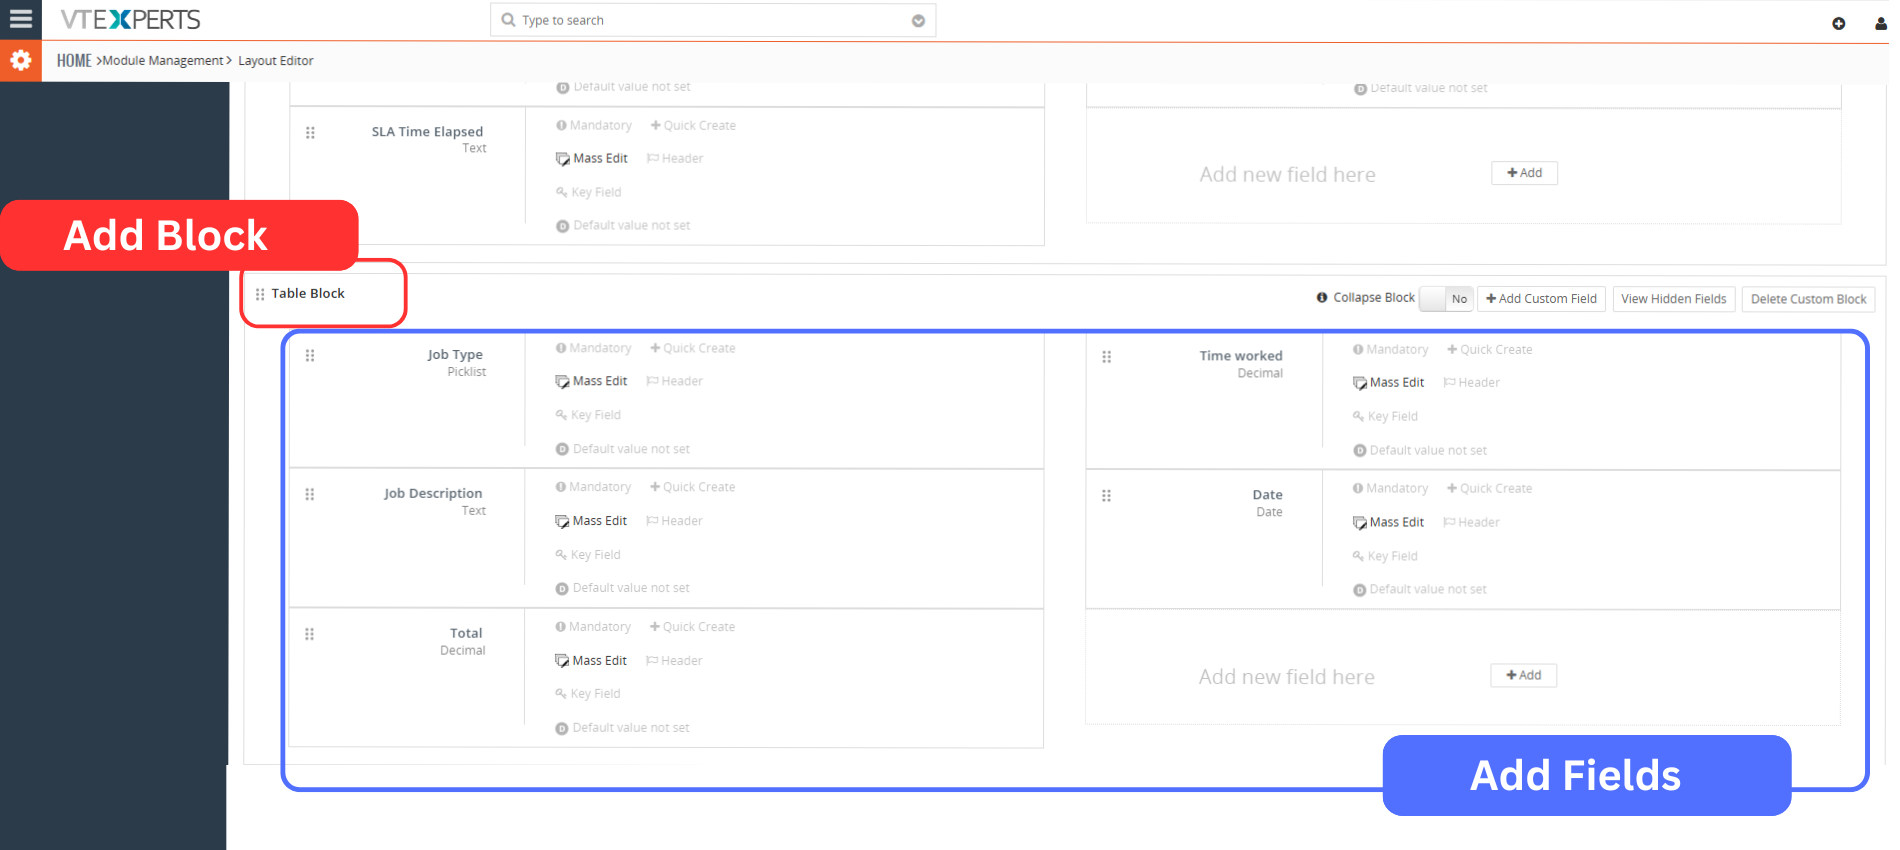
Use the Module Layouts and Fields section to add TABLE BLOCK
Then create the custom fields that will form the columns of TABLE BLOCK. These fields will be shown within the TABLE BLOCK itself.
Configure the TABLE BLOCK for Tickets
Then go to TABLE BLOCK configuration and configure TABLE BLOCK for tickets
+ADD TABLE BLOCK
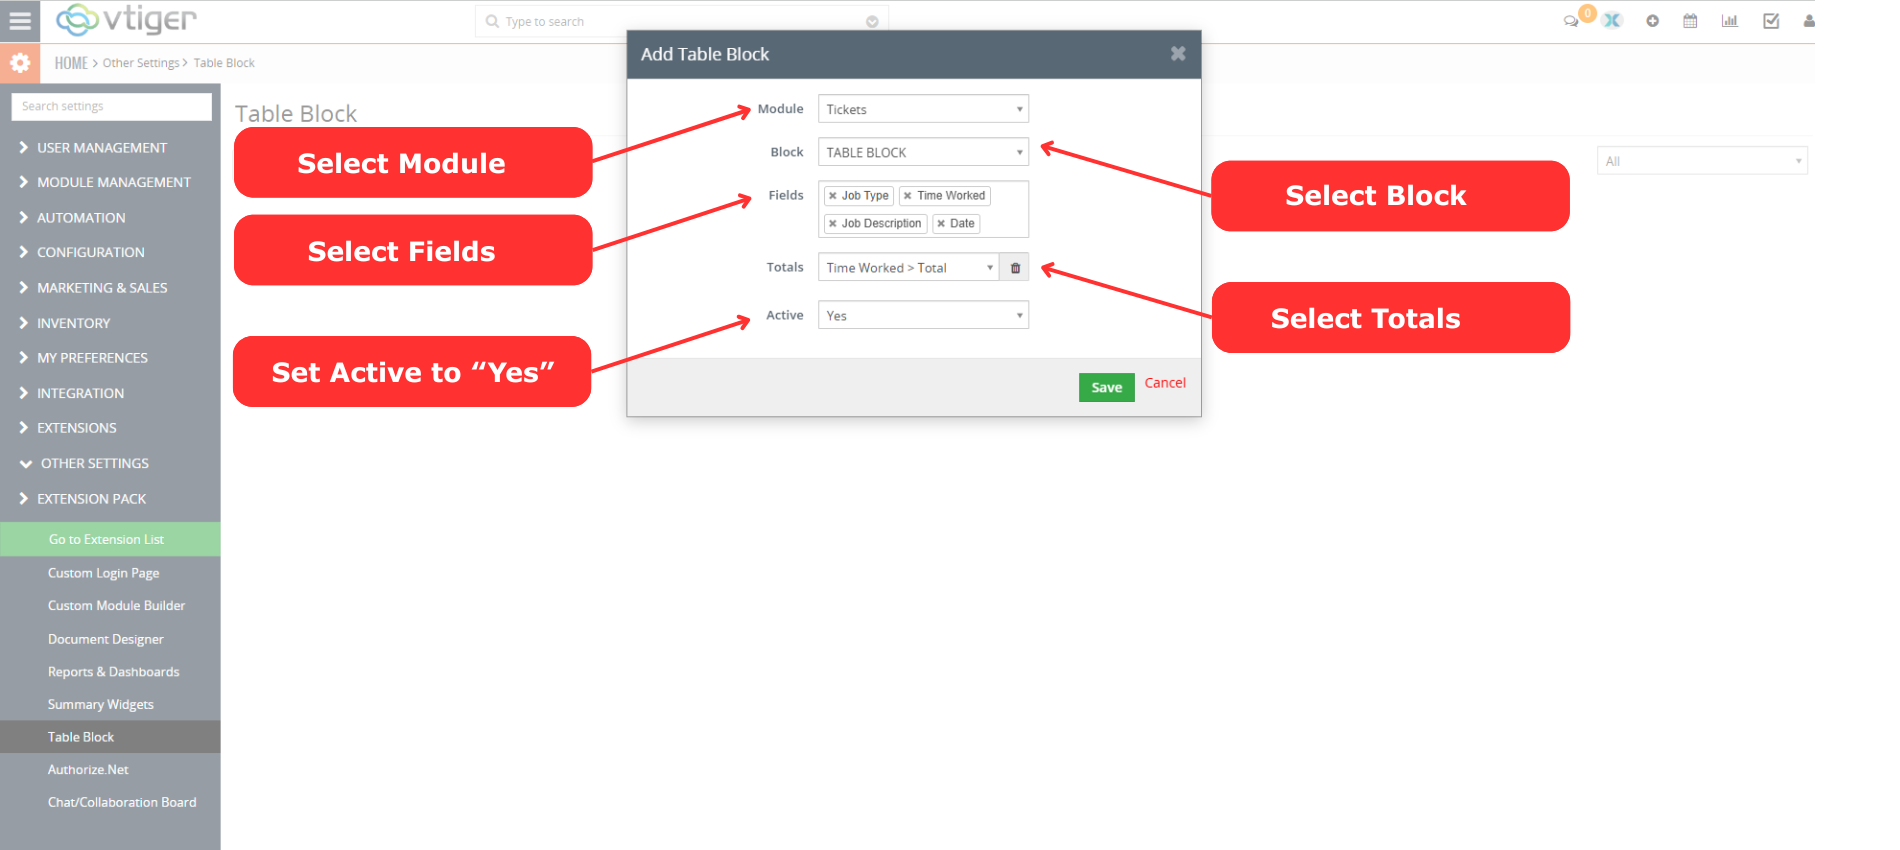
- Select Module > Tickets
- Select Block > TABLE BLOCK
- Select fields to be displayed in TABLE BLOCK, i.e. Job Type (Which is a picklist), Time worked (time spent on the job), Job description, Date
- In this example, the goal is to calculate the total time spent on all jobs linked to a ticket. To do this, configure the Totals option so that it sums up Time Worked > Total.
- Set Active to Yes to enable this TABLE BLOCK
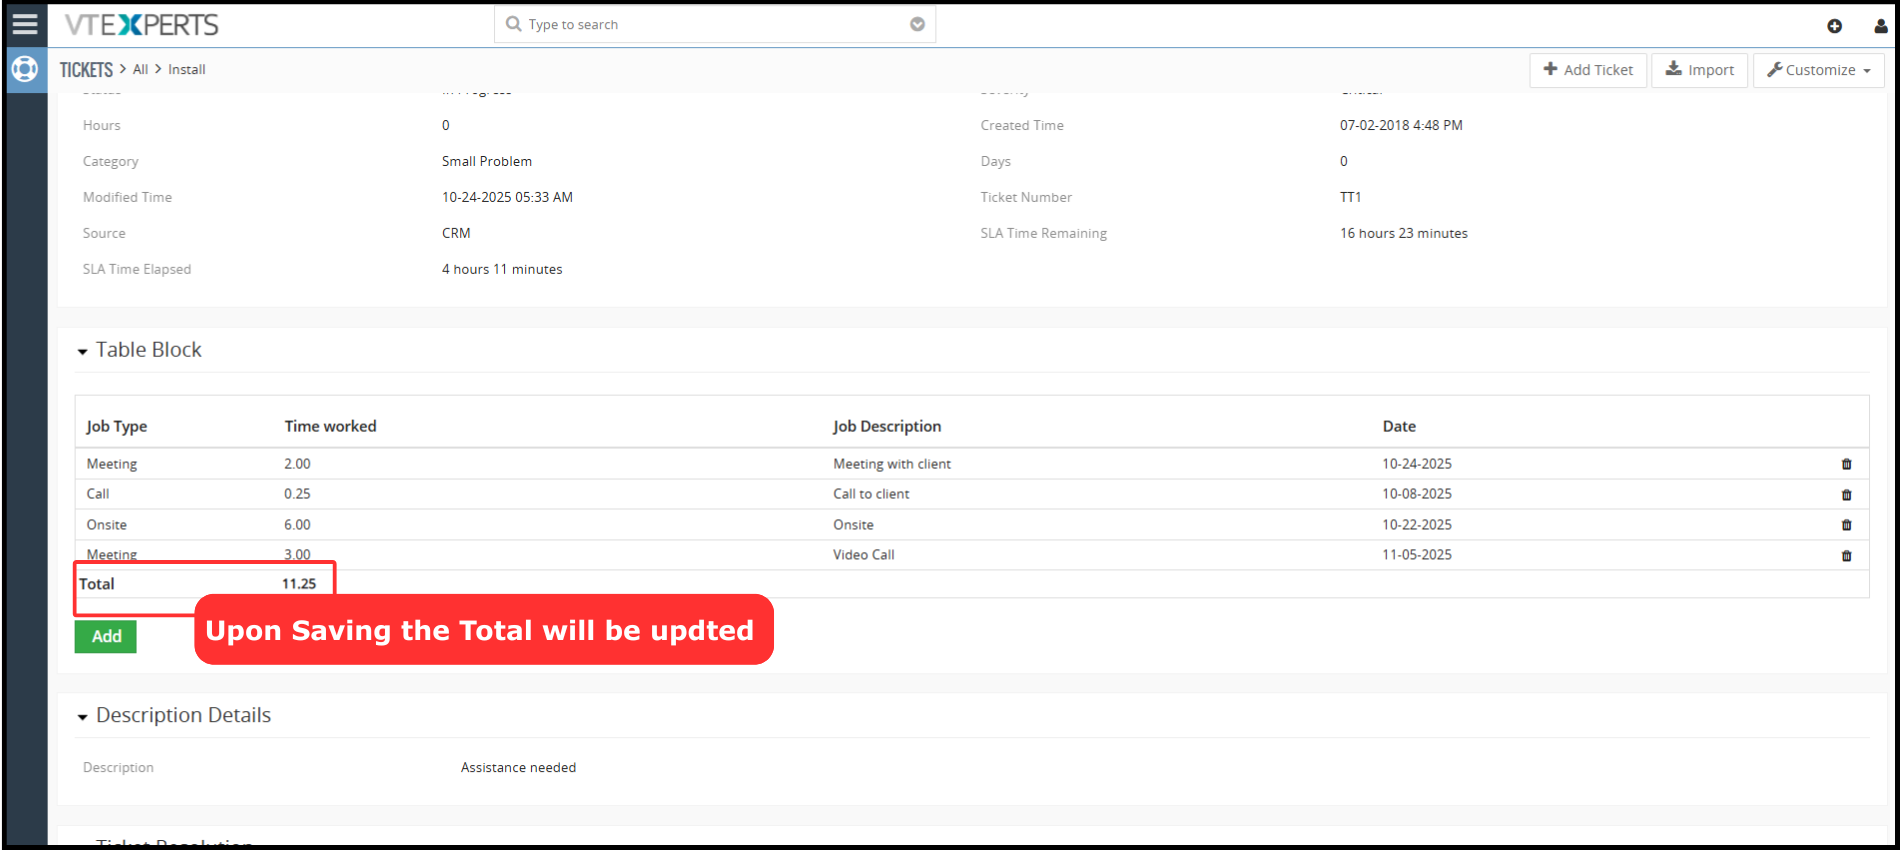
Working
Now that the setup is complete, you can start logging jobs directly on any ticket record.
- Go to the Tickets Module and open a specific ticket (or create a new one). Scroll down to find the new TABLE BLOCK you configured
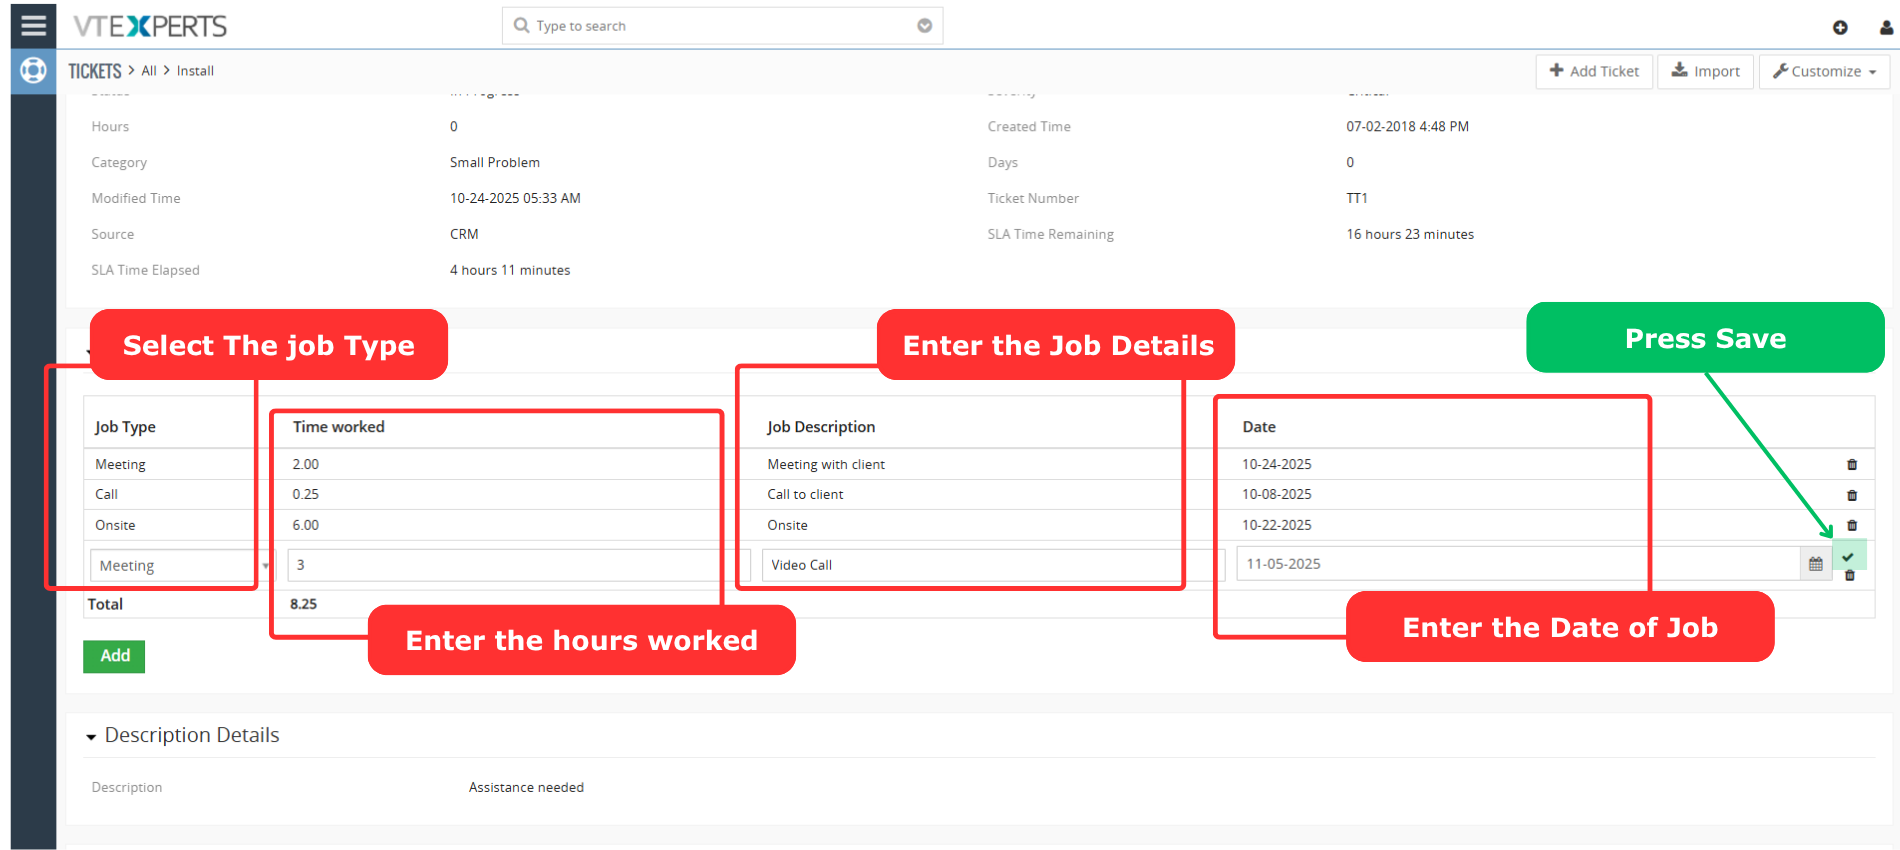
Add a New Job Entry:
- Click on the button or link to add a new record within the table block.
- Select the Job Type, for example, Meeting.
- Enter the Time Worked, for example, 3 hours.
- Add a Job Description, for example, Video Call to discuss requirements.
- Select the Date, for example, 11-05-2025.
- Save the entry (usually by pressing a checkmark or save icon)
View the Total: