

In this guide, we will check how to install vTiger CRM system (Open Source) on Debian 11 server. We will be using LAMP Stack for the installation.
For installing the vTiger CRM system (Open source) you need to fulfill the following specs
- Linux server Debian 11
- A user with root privileges
- Domain name pointed to your server
Step 1: Installing LAMP Stack
The very first step in installing vTiger CRM system is to install the LAMP Stack on Debian server
-
First, make sure that your Debian repository is updated by executing the following command
sudo apt update
-
Once done, now install some packages and LAMP Stack using the following command
sudo apt install apache2 mariadb-server php libapache2-mod-php php-common php-sqlite3 php-json php-curl php-intl php-mbstring php-xmlrpc php-mysql php-gd php-xml php-cli php-zip php-soap php-imap php-bcmath wget unzip -y
-
After the installation of LAMP Stack and some other packages, execute the following command to check the Apache2 and MariaDB status
sudo systemctl status apache2
sudo systemctl status mariadb
Make sure, that it shows the status of Apache2 and MariaDB as “Active”
Step 2: Configuring MariaDB Server
The second step encompasses configuring and setting up he MariaDB server
-
Use nano editor to make changes in the MariaDB configurations
sudo nano /etc/mysql/mariadb.conf.d/50-server.cnf
Make the following changes in the mysqld section
sql_mode = “”
Save the changes in the file and restart the MariaDB by executing the following command, so that the new changes can take effect
sudo systemctl restart mariadb
-
Afterwards we have to secure the Maria DB server, for that use the following commands, it will help in making it secure
sudo mysql_secure_installation
Set MariaDB configuration as below
Enter current password for root (enter for none): Just press the Enter
Set root password? [Y/n]: Y
New password:
Re-enter new password:
Remove anonymous users? [Y/n]: Y
Disallow root login remotely? [Y/n]: Y
Remove test database and access to it? [Y/n]: Y
Reload privilege tables now? [Y/n]: Y
Step 3: Setting Up PHP
In third step, PHP configurations will be done
-
Use the nano editor to make changes in /etc/php/7.4/apache2/php.ini file
Make the following changes in the default configurations
memory_limit = 512M<br />
upload_max_file_size = 100M<br />
log_errors = Off<br />
max_execution_time = 100<br />
date.timezone =
Save the changes by pressing CTRL+X and then Y
-
Now restart the the Apache2 using following command
sudo systemctl restart apache2
Step 4: Creating Database for vTiger
In this step we will be creating Vtiger CRM database, vTiger user and vTiger password
-
- First access the database server (Maria DB), for the password use the password that you have configured in step 2
sudo mysql -u root -p
- To create a database, user and vtiger password using following command
CREATE DATABASE vtigerdb;</ul>
</li>
<li style="list-style-type: none;">
<ul>CREATE USER vtiger@localhost IDENTIFIED BY 'vtigerpassword';</ul>
</li>
<li style="list-style-type: none;">
<ul>GRANT ALL ON vtigerdb.* TO vtiger@localhost WITH GRANT OPTION;</ul>
</li>
</ul>
</li>
</ul>
<p>FLUSH PRIVILEGES;
- Once done exit the MariaDB shell
Step 5: Download vTiger and install it
Next step is to download and install the vTiger CRM (open source) on the server. Here, we will be downloading the vTiger CRM 7.4.0, as it is the latest version of the Vtiger
- Use the command wget to download the vTiger CRM
cd /var/www/<br />
wget https://onboardcloud.dl.sourceforge.net/project/vtigercrm/vtiger%20CRM%207.4.0/Core%20Product/vtigercrm7.4.0.tar.gz
- Once the download is completed, now extract the vTiger open source by executing the below command
tar -xzvf vtigercrm7.4.0.tar.gz
- Once done, set the correct permissions for the files. it will help in changing the ownership of the directory vtigercrm. It will make sure that the source codes can be read by the Apache2
sudo chown -R www-data:www-data vtigercrm
- In next step, we have to include the DocumentRoot directory to the Virtual Host configurations. As of now, DocumentRoot directory for the installtion of vtiegr CRM is /var/www/vtigercrm.
Step 6: Configure Apache2 for Virtual host
Now, we will configure the apache for virtual host
-
First make sure to execute the following command before configuring the virtual host, in order to to enable required modules for the vTiger CRM
sudo a2enmod ssl rewrite headers
-
Create a new configuration file by the name of vtigercrm.conf, for Vtiger crm using the following command
sudo nano /etc/apache2/sites-available/vtigercrm.conf
-
Configure the following conditions in the config file. Make sure to change SSL certificate paths and domain name
<VirtualHost *:80>
ServerName example.io
Redirect permanent / https://example.io/
</VirtualHost><VirtualHost *:443>
ServerAdmin [email protected]
DocumentRoot /var/www/vtigercrm
ServerName example.ioProtocols h2 http/1.1
SSLEngine On
SSLCertificateFile /etc/letsencrypt/live/example.io/fullchain.pem
SSLCertificateKeyFile /etc/letsencrypt/live/example.io/privkey.pem<Directory /var/www/vtigercrm/>
Options +FollowSymlinks
AllowOverride All
Require all granted
</Directory>ErrorLog /var/log/apache2/vtigercrm_error.log
CustomLog /var/log/apache2/vtigercrm_access.log combined
</VirtualHost> - Save and exit from configuration editor.
-
After that, run the below provided command to enable the virtual hosts
sudo a2ensite vtigercrm.conf<br />
sudo apachectl configtest
- A “Syntax Ok” message will be shown on the window, affirming that Apace2 configuration are correct.
-
Restart the Apace2 service
sudo systemctl restart apache2
Step 6: vTiger CRM installation
In this step, we will be finalizing the vTiger CRM installation
- Go to your domain (that you have configured in previous steps) and the CRM installation will be accessible from there
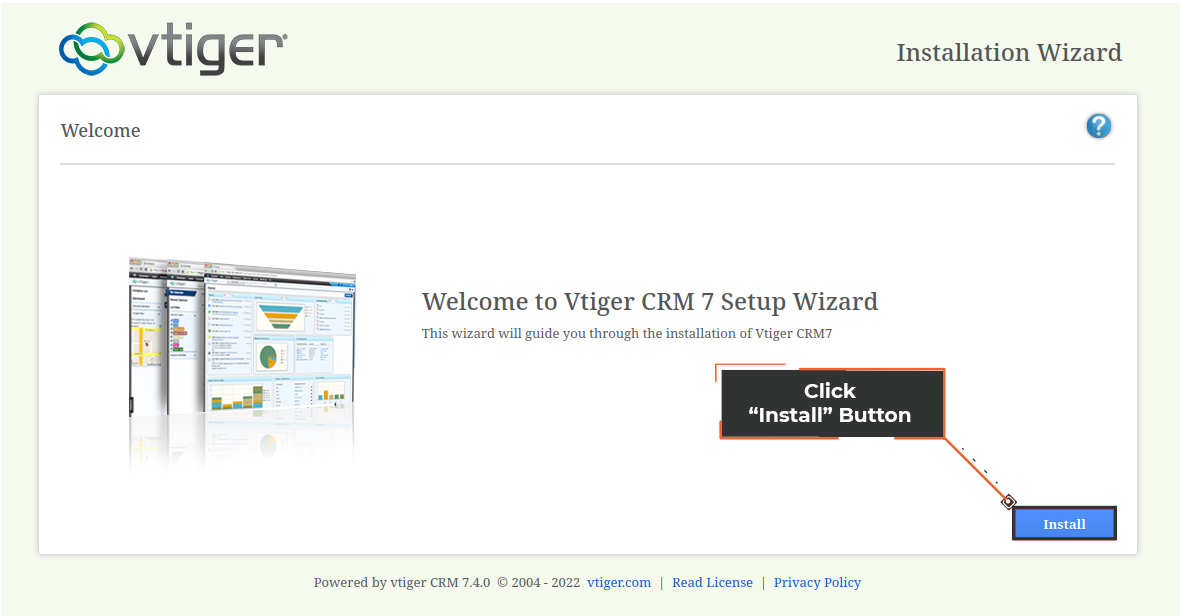
- An installation wizard will be opened. Click on the install button
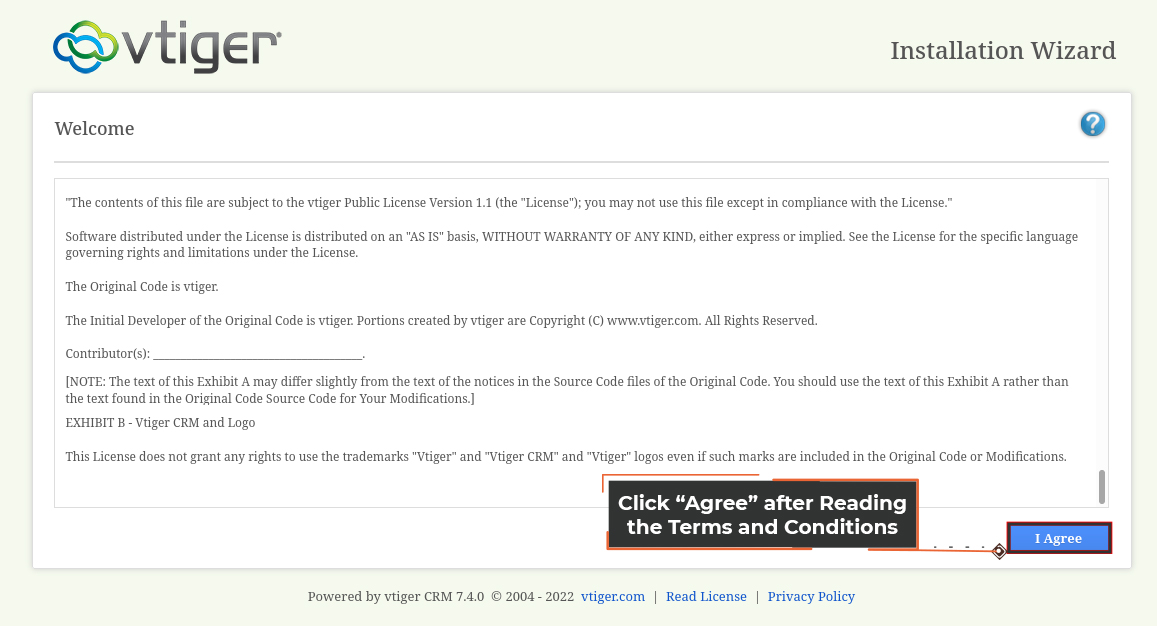
- Read the terms and conditions and click on the “I Agree” to proceed
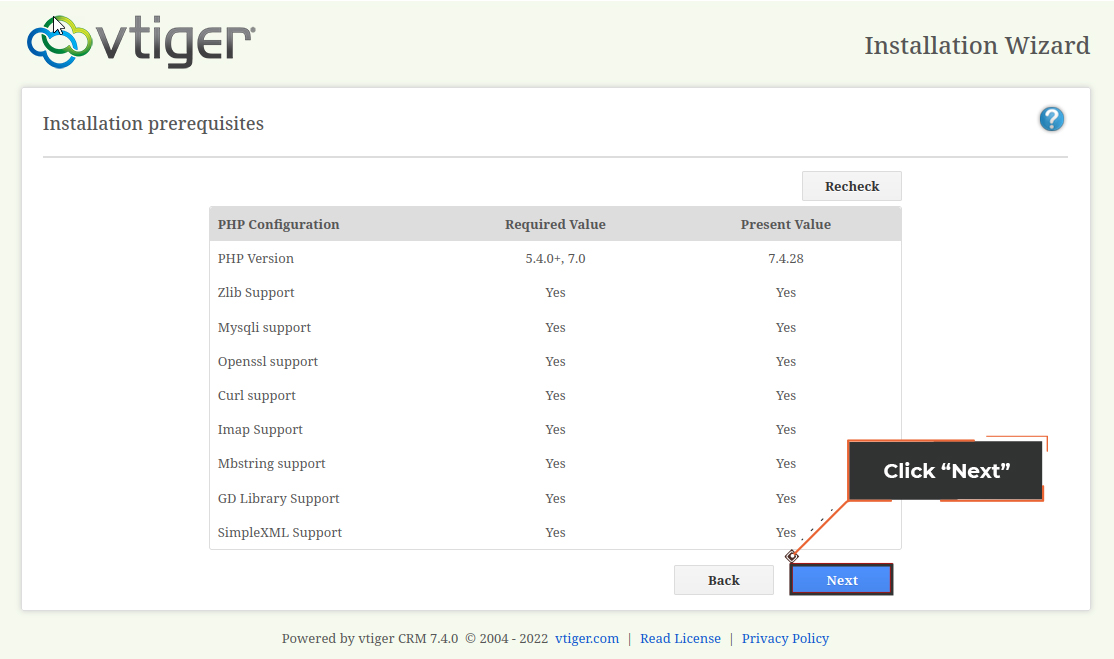
- Click “Next”, if all the requirements are fulfilled
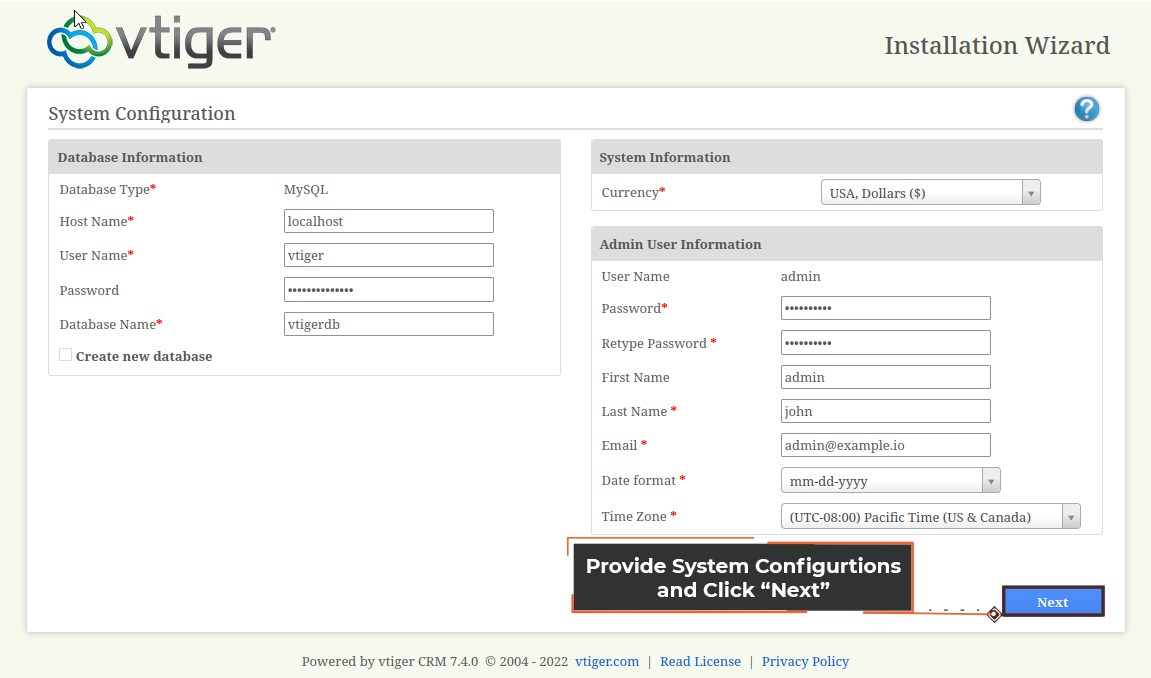
- Provide the system configurations. Provide details like host name, username, password, currency etc.
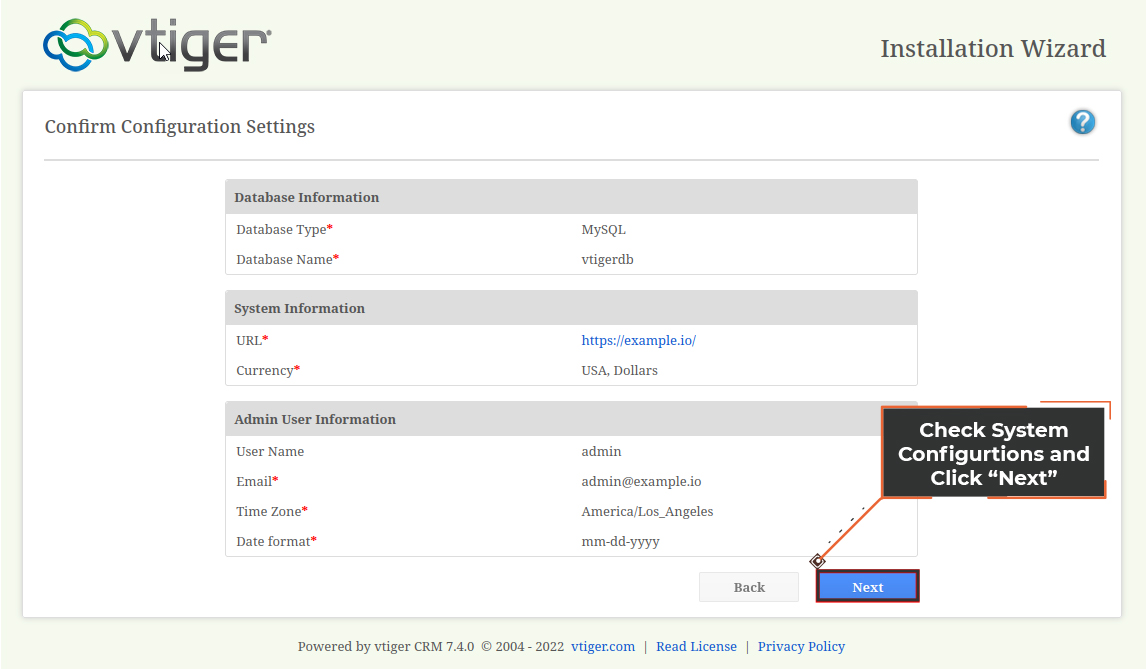
- Double check the installation settings and click “Next”
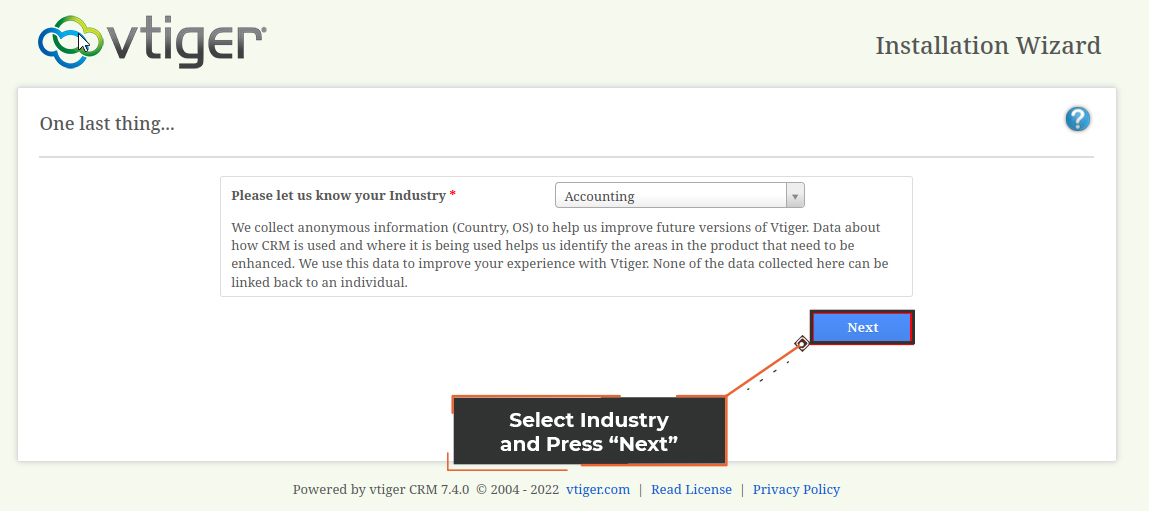
- Select the industry for which you are implementing the vTiger CRM system
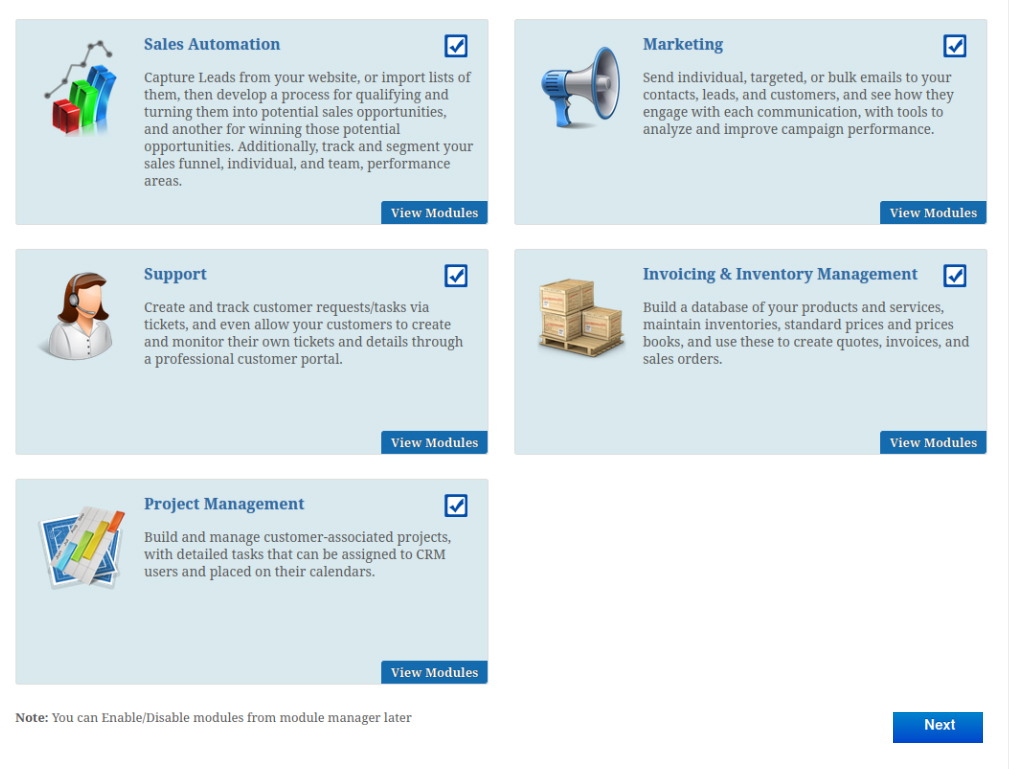
- CRM installation wizard will start showing the installation progressIn next screen, make sure to select the modules that you are going to use
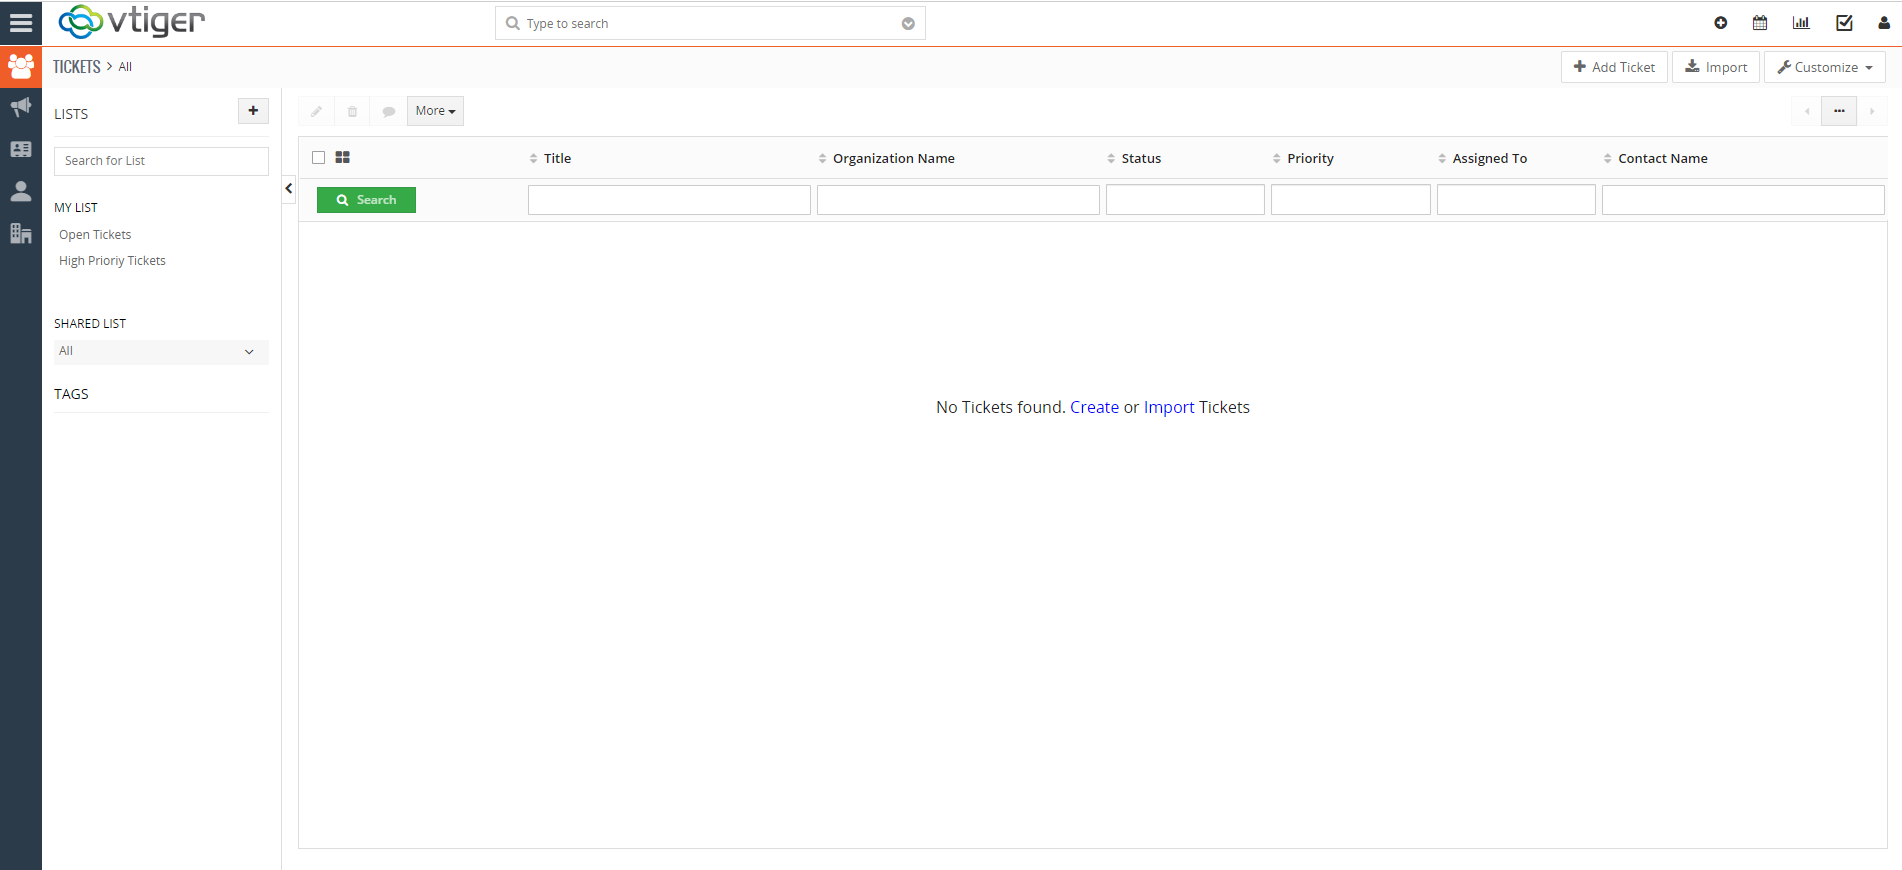
- System dashboard will be shown, on installation completion
 vTiger CRM 7.5 .0 has been released, you can check details Here
- First access the database server (Maria DB), for the password use the password that you have configured in step 2



1 Comment
HI,
we have freepbx setup on 1 vm and vtiger 7.4 on another
both are on local lan
need someone to get the following for us
1. integration between the 2
2. call recordings, call popup and all call center features to work
3. preferably we would want to us IP phone (hardware) for calling and not any softphone
let me know the possibility and you service cost for the same
just to let you know freepbx and vtiger are working independently with no issues and there use to be an extension from vtiger called as ‘phone connector’ – which is no loner in use and some Russian guy had made some patch and that is what is being used
its called the Jaime’s patch