VTiger Customer Portal Is A Vastly Customizable Platform For Remote Solutions
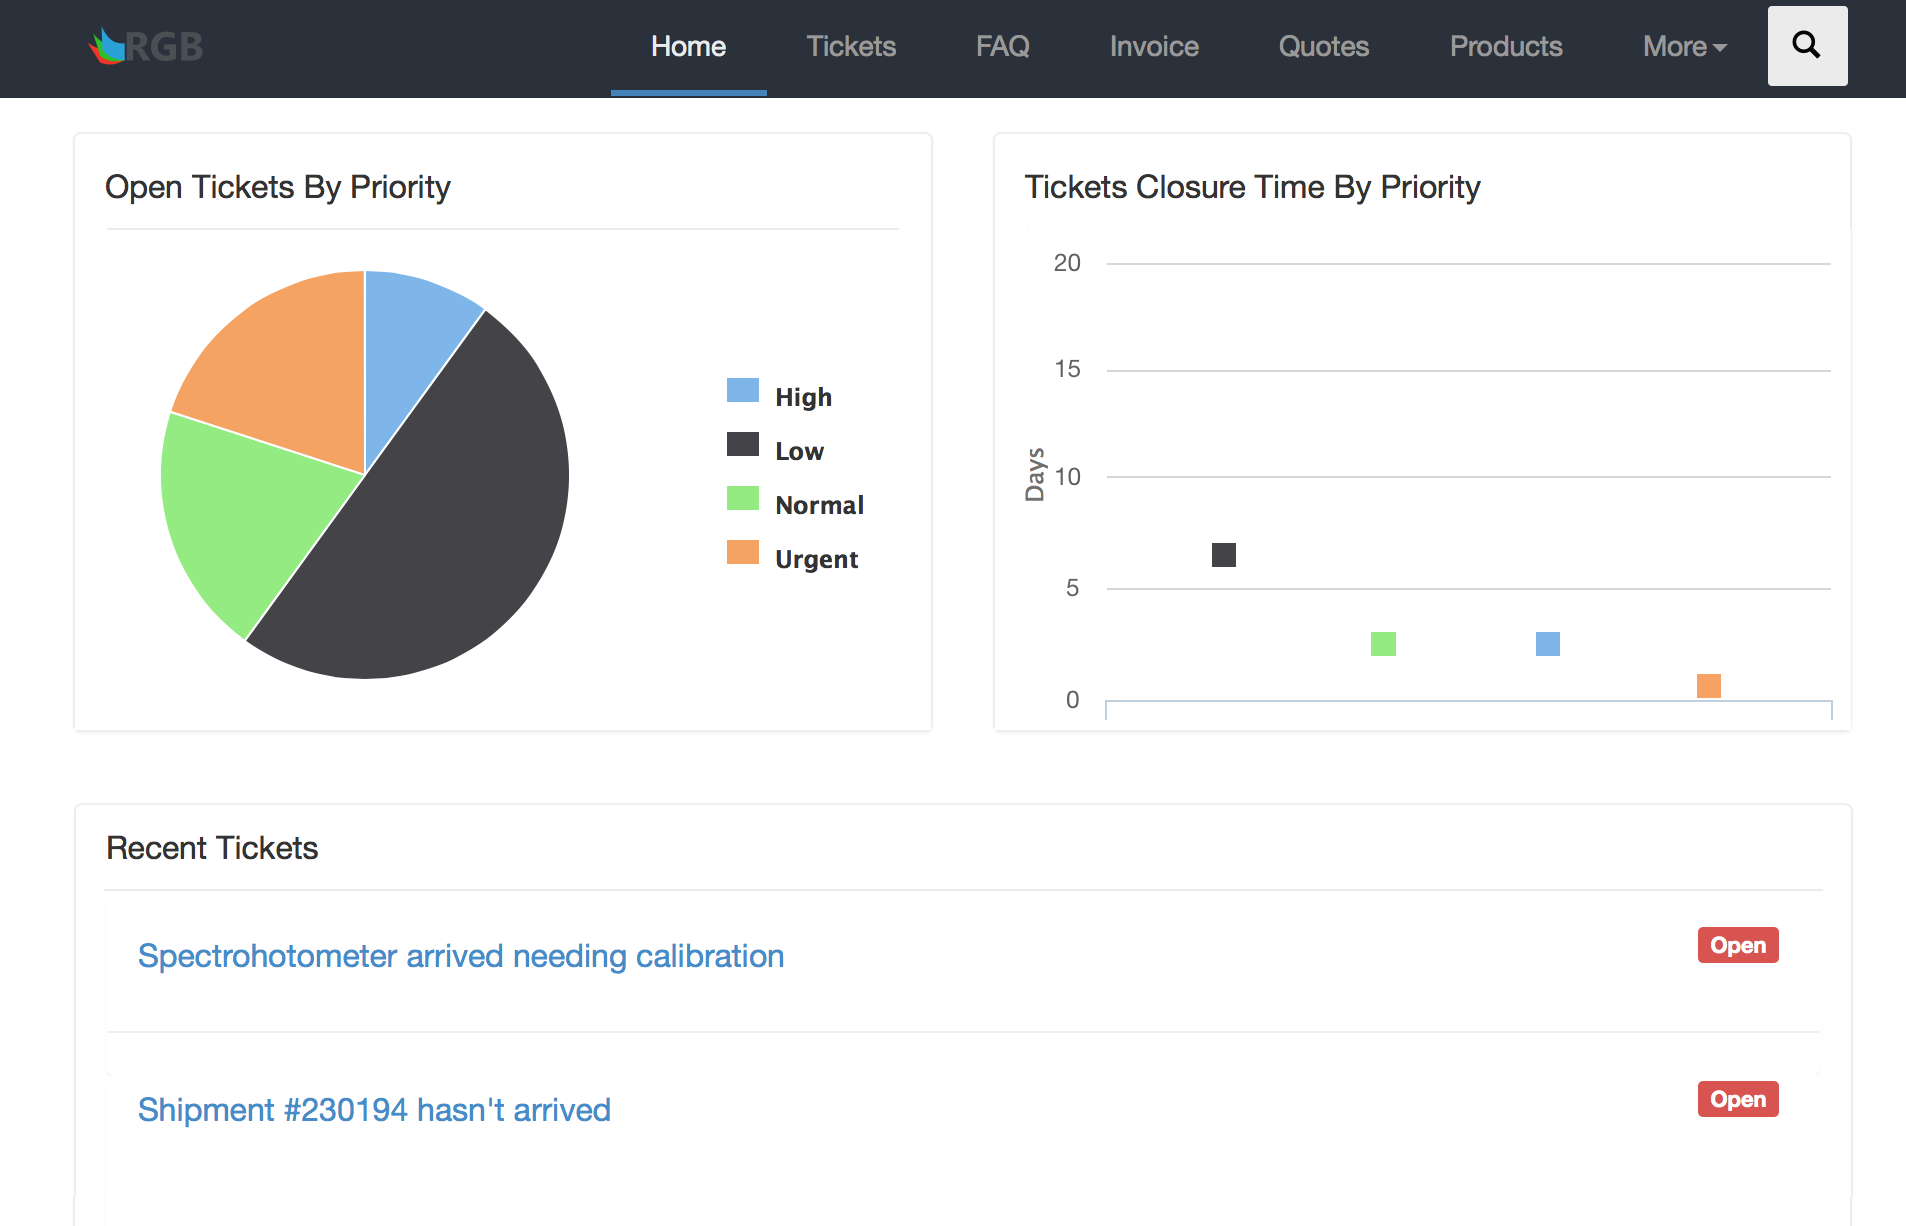
There is a platform in Vtiger 7, Customer Portal, where users can get solutions for most of the problems and issues distantly. To reach the customer portal, no help from the customer care is required, which boosts the resolution system. This platform can also be termed as Customer Self-Service Portal, as users can report cases, view Knowledge Base (FAQs), Invoices, Quotes, Products, Services, Documents, Contacts, Accounts, Assets, and Projects related to them and their organizations if any, all without any assistance of a support officer.
Note! Customer Portal is available for Support Professional and Ultimate Edition users only
The arrangement of the fields and categories of Customer Portal is governed and regulated by the Administrator. Sequence of the tabs and showing/hiding them from the portal is controllable. The ability of a customer to reach modules, fields and their data can also be granted or denied. Moreover, a default assignee to watch over cases and solutions can also be entitled. The tickets generated from the Portal will be provided to the designated member. All of the above mentioned features can be availed by setting up the Customer Portal accordingly.
Customer Portal Setup and Configuration
Customizing the Customer Portal for the best of your company can be done by the following method:
- Start by going into the Menu
- Look for the Settings section
- Click Configuration
- Then select Customer Portal
- Here you can assemble the Customer Portal according to your Company’s demands

- Use theSave button at the bottom to save and exit.
Portal Fields
| No. | Field Name | Description |
| 1. | Portal URL | This will be the link for the customers to login and access the Customer Portal |
| 2. | Default Assignee | Assign a user to consequently allot tickets made by your clients through the Portal |
| 3. | Contact Support Notification | A reminder regarding the Support contract renewal will be sent to your client depending upon the number of days specified here. E.g. if the support end date is 22-04-2016 and the notification is set 60 Days Before, then the notification will be displayed 60 days prior to support end date on the Portal. |
| 4. | Home – Portal Home Layout | The complete section of Portal Home Layout (number 4 in the picture) displays the fields that will be shown on Customer Portal Dashboard. You can customize the fields to enable or disable from the Dashboard screen. |
| 5. | Module Lists | Same goes for Modules list on the left. Just tick-mark the module you want to be available to the customers. |
Portal Home Layout
This block of the Portal characterizes the Dashboard. The framework of this tab will define how the home page of your portal will look like and what options would it manifest. You can organize the frontend functions and feel of the Portal by enabling the widgets and charts check-boxes.
- Announcement Widget: As the name depicts, this widget on your homepage will act as a message board. You can post topics of interest for portal users. If the field is left blank, the widget would not appear on the dashboard.
- Charts Widget: If you want to display charts on your dashboard, Charts Widget is your option. These are the two charts Open Cases By Priorityand Cases Resolution Time By Priority that will be shown on the Customer Portal dashboard in Vtiger 7.
- Open Cases By Priority – Plots Priority vs Count Pie chart. If the priority is not mentioned then an empty label is displayed.
- Cases Resolution Time By Priority – This widget plots a Line Chart of Resolved Cases which are grouped by their priority vs average time taken to resolve them.
Note!
- Charts are displayed on the Portal dashboard by enabling the checkbox.
- These graphs are designed for metrics that are connected to Contact’s Tickets.
- Recent Cases Record Widget: Show this widget on the dashboard to exhibit the latest 5 cases with Title, Status, Description and link to open them in Portal.
- Portal Shortcuts Widget: With the portal shortcuts, you can upload a document, create a new case, and keep tabs on the running cases right from the dashboard.
- Recent Documents Record Widget: To view the 5 documents upon which work has done recently, enable this widget.
- Recent FAQ Record Widget: To enable 5 latest FAQs on the main screen, turn this widget on in the Portal Home Layout in Vtiger 7.
Access and Permissions for Modules and Fields
The Customer Portal is highly customizable. List of modules to be shown or hidden on the dashboard is polishable. If you want to revoke access to a specific module by users, simply disable it to hide from the main. Moreover, basically dragging and dropping the modules sort them according to the desired sequence. Also, Portal fields and privileges can be accessed by selecting a module.
- Module fields tab: To grant users the access to a module field, use the Add Fields button under the specific module to add the fields that display on the Portal page. Permissions for the module field can be switched from Read only to Read and write.
Note!
- When “Read and write” permission is granted to a field, it will be available for users in List view, Detail view, and Edit view on the dashboard.
Revoking the edit access by just enabling “Read only” to a field will hide it from the Edit view.
- Permissions for the Mandatory fields can also be changed from Read and write to Read-only mode. (Create New or Edit option is available only for Cases, Assets, and Tickets module.)
- Mandatory custom fields added in the layout editor for a module should be manually selected in the Customer Portal settings in order to manage their permissions.
- Records visibility: With Vtiger 7’s Customer Portal, endless options are available to configure the dashboard view for users. With Records visibility, you can manage if the cases and records shown on a customer’s home-screen are linked to both the user and the organization or those just relevant to him/her.
- Related Information: Updates about History, Comments, Project task, etc., for specific module can be toggled on or off.
- Record Permission: To give users the authority to create or edit a record, simply select your preference in the Record Permission tab.
Note! The Edit Record Permission option is available only for Cases and Assets module