

vTiger CRM Tips/Tricks
How to Create Description Type Field/One Column Layout in vTiger?
August 30, 2013
Article
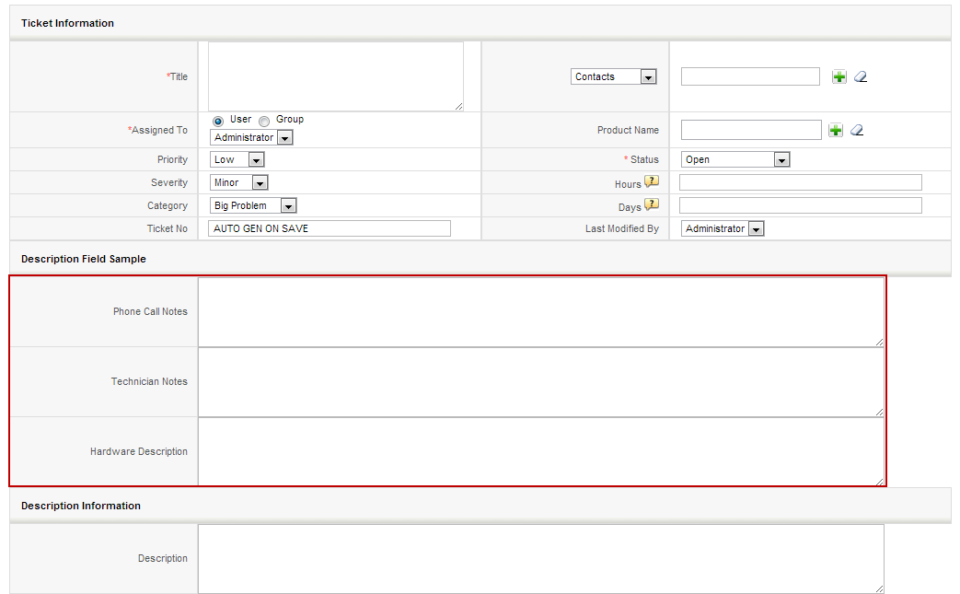
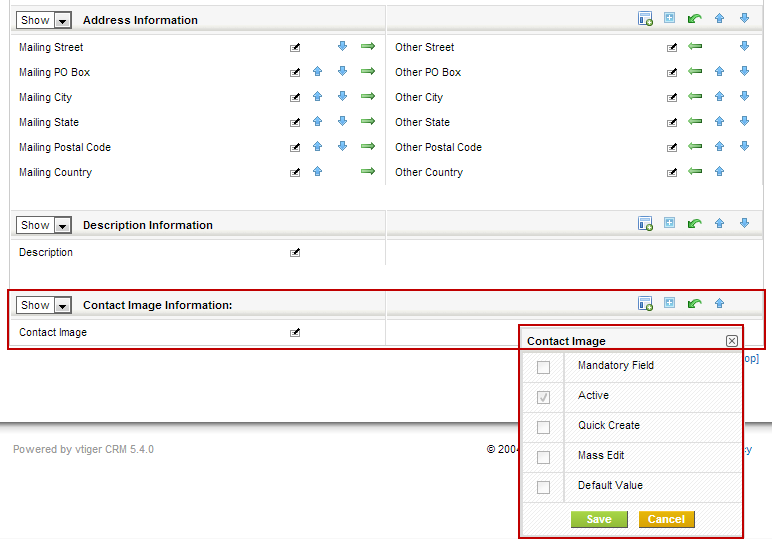
By Default vTiger does not allow to create “Description Type” fields using the “Field Layout Editor“. The “Description Type” vTiger field is a field which takes up the whole row in the block and no other field can be added next to it. In order to add the “Description Type” field in vTiger, you will have to: Create a “Text Area” Custom field. It’s just a custom field but the type is “Text Area” Next, you will need to modify the database. If you don’t feel comfortable doing that, please contact us and we’ll help you out with it. Connect to your vTiger MySQL Database Open table “vtiger_field“ Find the fields you just created set “uitype” to “19“ Save the changes and refresh the record screen. You will notice that the custom fields are now stretching through out the entire block. Note, you can also accomplish “One Column Layout” view
How to Change vTiger Global Search Result Columns/Fields?
August 30, 2013
Article
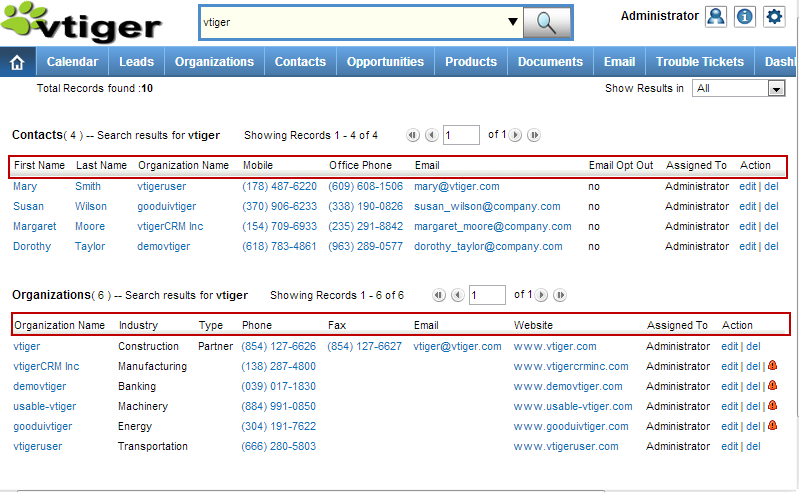
Out of the box vTiger does not have an option to change the Global Search Result Columns/Fields in the User Interface, however there’s a way around. Basically – you need to create a vTiger filter and specify the columns you want to see. Note, the filter does not have to be set as default, but has to be public. In addition, in order for it to work, you will have to create filters for all the modules you want to use in the search, in other words, the filter you create will be used to display search results, and if the filter does not exist, it will not show any results, so again each module that you want included in the search should the the filter created. The filter name should be the same for all modules. Once you have the filters created, the next step is to specify which
How to Clean Up vTiger Login Page
August 30, 2013

Article
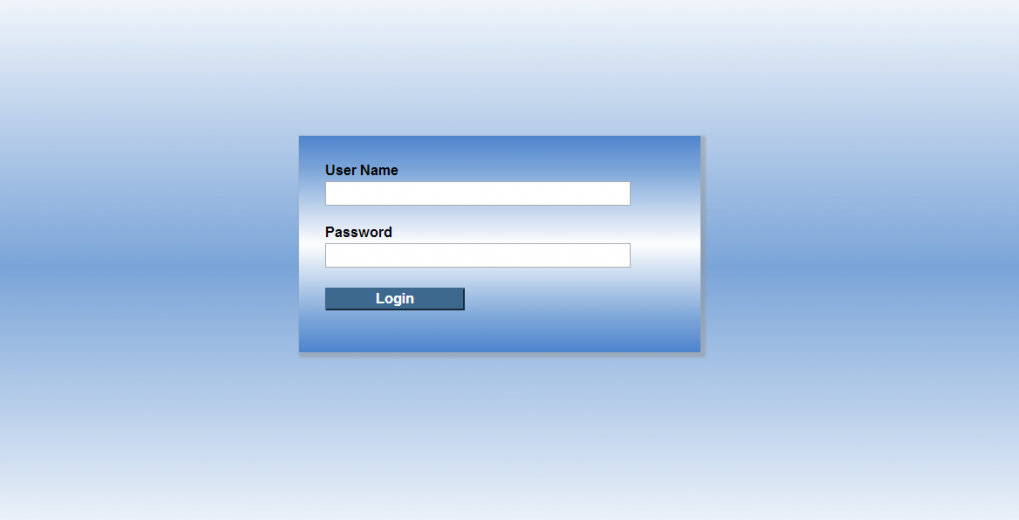
Default vTiger Login Page has a lot of elements which are just advertisements or links to their website. As a business you usually would not want to see something like that. There’s an easy fix to remove all of those elements. You can either follow the instructions below and do it yourself or just download the cleaned up login page. Instructions: Go to “vtigercrm/Smarty/templates/” Open Login.tpl Go to Line 22, it should be blank, add <!– Go to Line 64, it should be blank, add –> Go to Line 67, there should be “<div>Powered by vtiger CRM – {$VTIGER_VERSION}</div>“, add <!– and –> around it: <!– <div>Powered by vtiger CRM – {$VTIGER_VERSION}</div> –> Go to Line 91, there should be “<div> class=”importantLinks”>”, add <!– in front of it: <!– <div> class=”importantLinks> Go to Line 97, there should be “<div>”, add –> at the end of it: <div> –> Go to
How to Change Listview Columns for any Module in vTiger?
August 30, 2013
Article
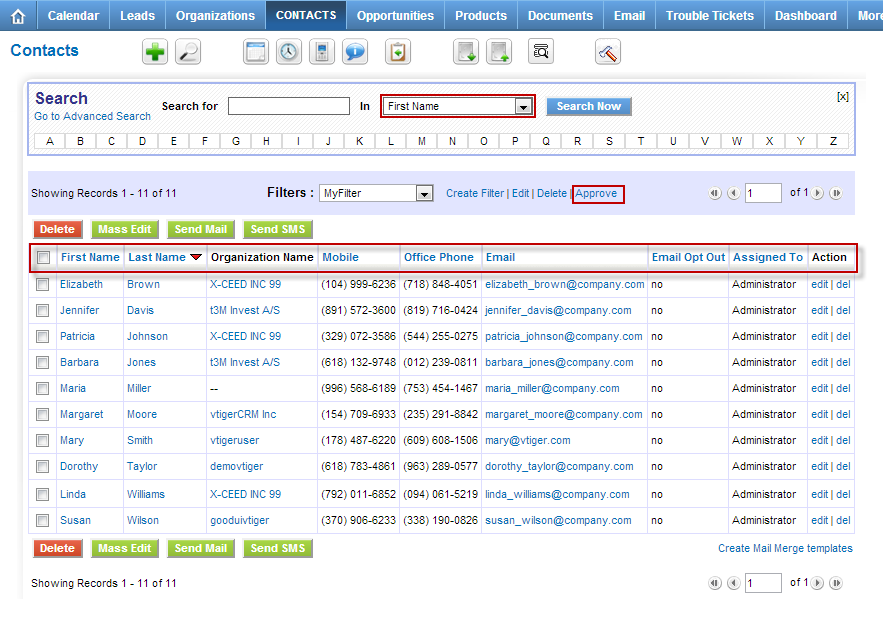
By Default vTiger has a filter “All” which contains the commonly used fields, however sometimes those fields are not enough and it would be nice to include other fields into “All” filter. Unfortunately, you can not edit “All” filter using the user interface, however there’s a work around. In order to specify the columns we always want to see, we will have to create a custom filter and set it as public & default. I will explain how to do that for Contact module – you can follow the same procedure for any standard or custom vTiger module. Go to Contact List Click “Create Filter” Enter “View Name” which is a filter name Check “Set as Default” – when checked – it will always open this filter as default Check “Set as Public” – filter will be public and other user will be able to use it as well Choose
How to Change Field Labels in vTiger?
August 28, 2013

Article
Unfortunately vTiger does not have an option to change the field labels using the user interface. However, there are few ways to do it. Let’s say we want to modify the field label for Account field “Rating”. The first and the easiest method is to modify the vTiger language file and replace the existing field labels with new ones. Go to “/vtigercrm/modules/Accounts/language/“ Open “en_us.lang.php” with your favorite text editor Find the word “Rating” and replace it with the new label. Save the file and refresh the Contact screen – the new label should show up. The second method requires knowledge of MySQL database structure, so if you are not familiar with tables and field, you are better of going with method one or three. Connect to your vTiger database Find table ‘vtiger_field‘ Run the query ‘select * from vtiger_field where fieldlabel=’Rating’;‘ Edit the row and change the fieldlabel value to
How to Change Document Maximum Upload Size in vTiger?
August 28, 2013
Article
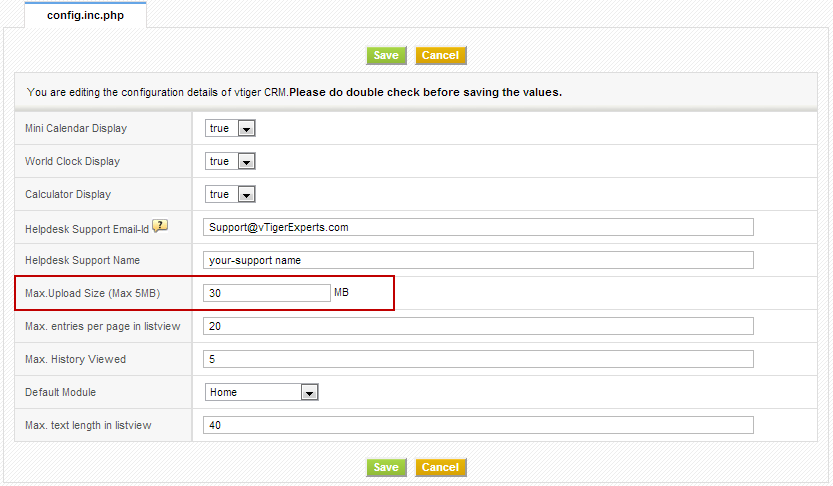
Out of the box vTiger has a limit of 3MB for the file upload when creating and uploading an external document to vTiger. In order to increase the file limit, you have to set it in vTiger Configuration Editor as well as in you servers’ php.ini file. vTiger Configuration Editor: Mouse over the “gear” icon on the right upper corner Click “CRM Settings” Under “Other Settings” section, hit “Configuration Editor” Find “Max. Upload Size (Max XMB)” and set it to 30MB(you can set it to higher number if needed). Save the Configuration Editor by clicking “Save”. Server Configuration – php.ini. If you are on shared hosting, most likely you will not have access to php.ini – you should contact your hosting provider to adjust the values. However, if you do have access, follow the instructions below: Open php.ini with your favorite text editor Find “post_max_size = XXMB” and change it
How to Organize Navigation Bar in vTiger?
August 26, 2013
Article
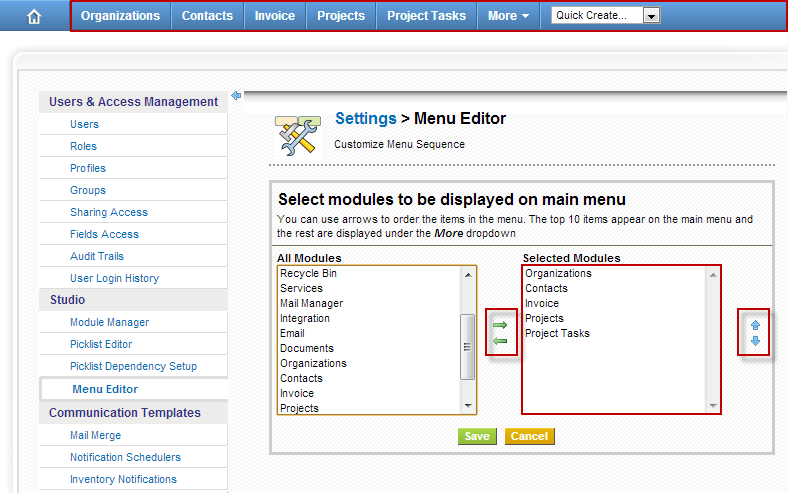
vTigerCRM has a nice feature which allows users to arrange the navigation bar menu items. It’s helpful when you have many modules enabled, but not all of them are used on a daily basis. To add or remove menu items from the vTiger navigation bar follow the instructions below: Mouse over the “gear” icon on the right upper corner Click “CRM Settings” Under “Studio” section, hit “vTiger Menu Editor” “Selected Modules” are the modules which will show up on the main navigation bar. Use the arrows to add,remove and order the modules.
How To Disable Modules In vTiger?
August 26, 2013
Article
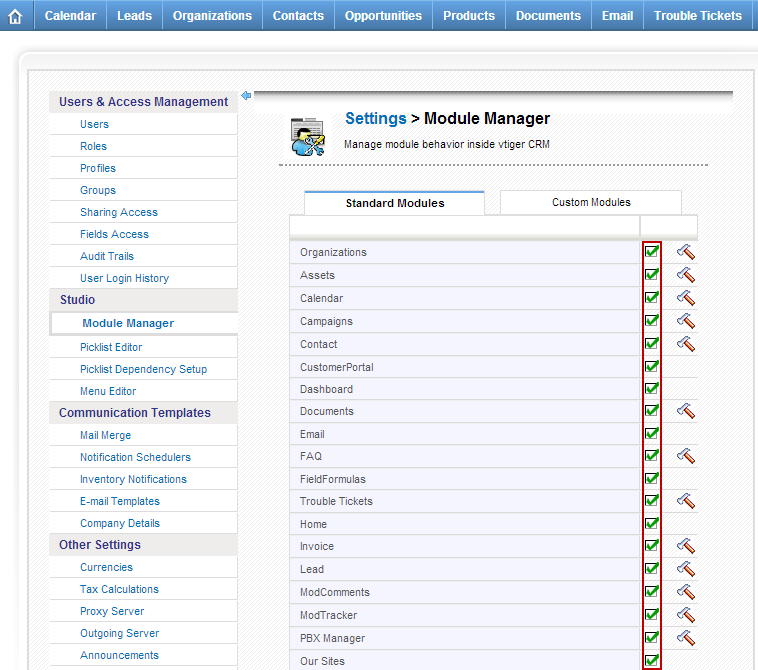
Out of the box vTiger comes with a lot of enabled modules. In most cases you will not be using all the modules and those can take up a valuable space on your screen. You can either use the “vTiger Menu Editor” and remove them from the navigation bar, or if you are certain that you do not need them – just follow the instructions below and disable the unnecessary vTiger modules. Note, the modules can be re-enabled at any time. Mouse over the “gear” icon on the right upper corner Click “CRM Settings” Under “Studio” section, hit “Module Manager” Mouse over the check-box – it will say “Disable Module” Click on the check-box and it will change to red X.