

February
Timesheets Extension For VTiger Is Now Available
February 26, 2018

Article
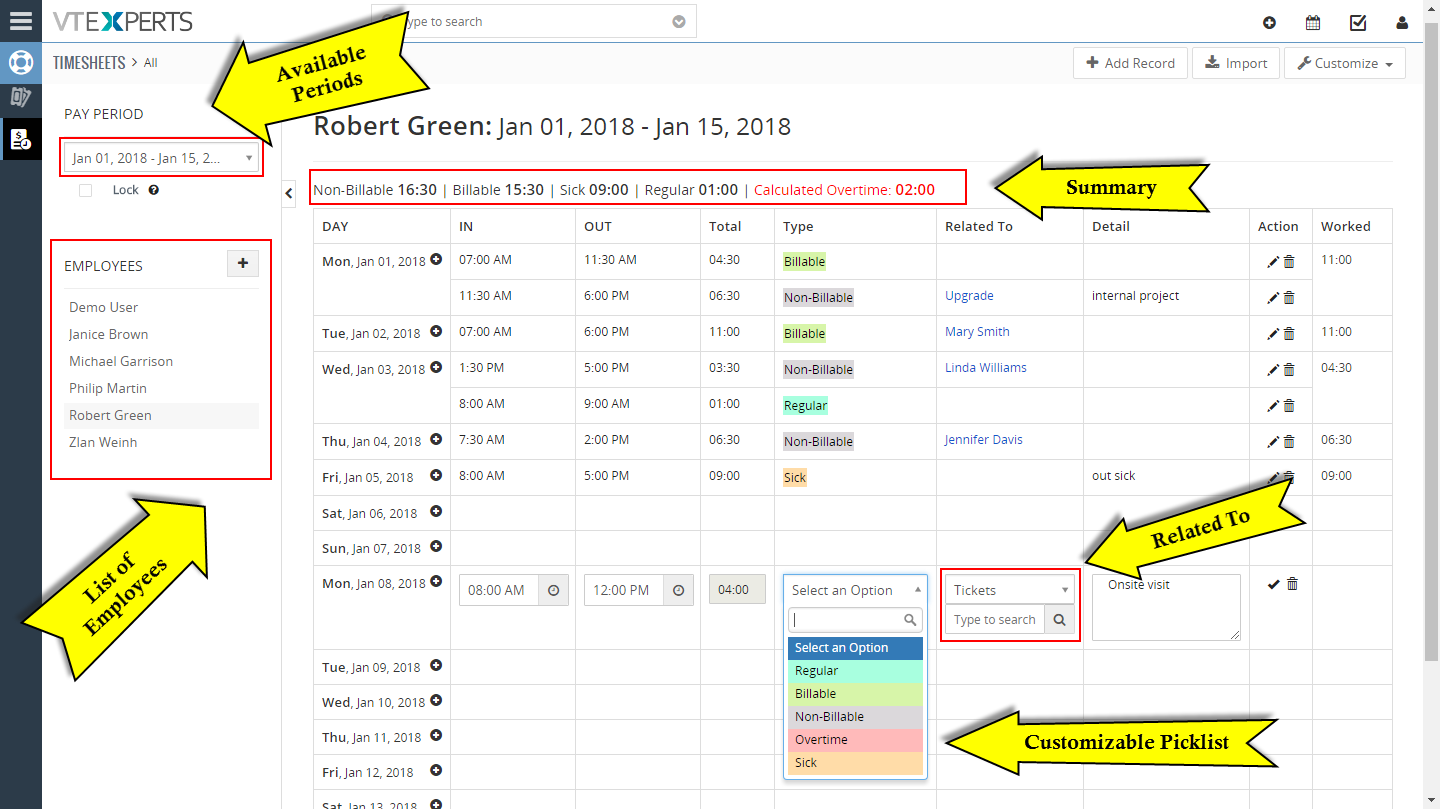
There were lot of requests for this extension in the past year. As most of our extensions are focused to “keep it all under one hood – CRM” (Email Marketing/Campaign for VTiger is the best example), keeping track of workers’ timings was very problematic before, not to mention bringing it to the CRM for billing, records, configuring workflows, and reporting. That’s the reason we developed this record-keeping extension Timesheets for VTiger that allows users to log the time spent in details as well as system admins to keep tabs on them. Timesheets is an extension for VTiger designed to elegantly track employees’ (users) time, with ability to visualize it. It supports custom periods, where you can adjust the length of the period to fit your business. In addition, periods can be locked to prevent any further modifications. It’s simplistic design, makes it extremely easy to log the time and specify
VTiger 7.1 GA/Stable Release Date Confirmed [First Week of March]
February 23, 2018

Article
VTiger developers put in a lot of effort (with help from the community) in the past 2 months and make significant improvements to VTiger 7.1 code base. There were nearly 300 issues/bugs, few minor enchantments as well as new customer portal. The release of VTiger 7.1 GA/Stable is scheduled for 1st week of March, 2018. The latest code is already available in git, however we recommend to wait until final-repackaged version. Here’s what vtiger rep had to say. (for official vtiger announcement – click here) Dear members, Getting ready with a weekly wrap is now becoming interesting activity and I’m glad to see it being received with appreciation – which is a huge motivation. This week focus was more on addressing an blocker issues and those that trickled during early validation. Happy to see not many fell into this – which is a good signal for release. But most of
Create Custom Buttons In VTiger 7
February 22, 2018

Article
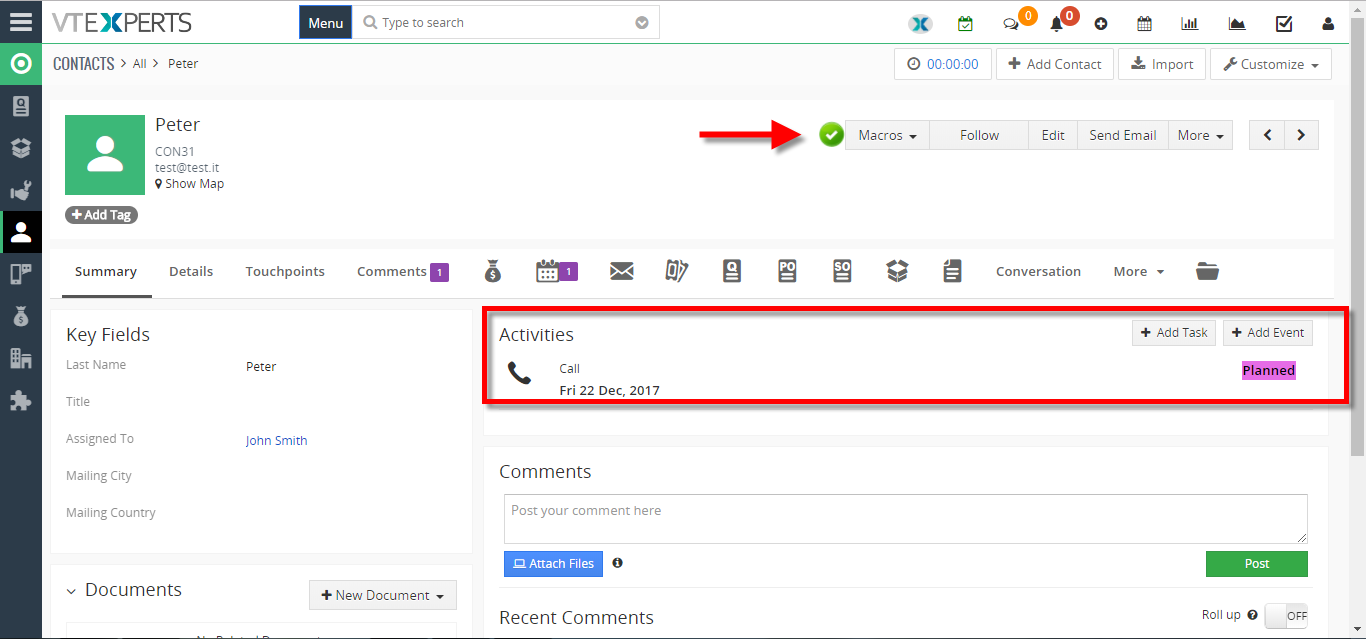
Macros extension is designed to cut down the time needed for manual task such as Follow Ups, Scheduling calls etc. It provides users with the function to create predefined actions (workflows) and trigger them from the record Detail/Summary View with just a single click. How to Create Custom Buttons Go to the “Menu” and select “CRM Settings“. Under “Other Settings” select “Macros“. Click on the “+ New Workflow“. Add a workflow name, select a module for the workflow. Then Click on the “Add action” button to select an action for when this macro will be clicked. Put in the details of that action and click on the “Save” button. Here you can see the “Macro Button” and it will execute the action with a single click (For this example it will create an activity for a call) For further help, contact us on help@vtexperts.com. We’ll
View User Activity (New/Updated Records, Comments) For The Day In VTiger 7
February 21, 2018

Article
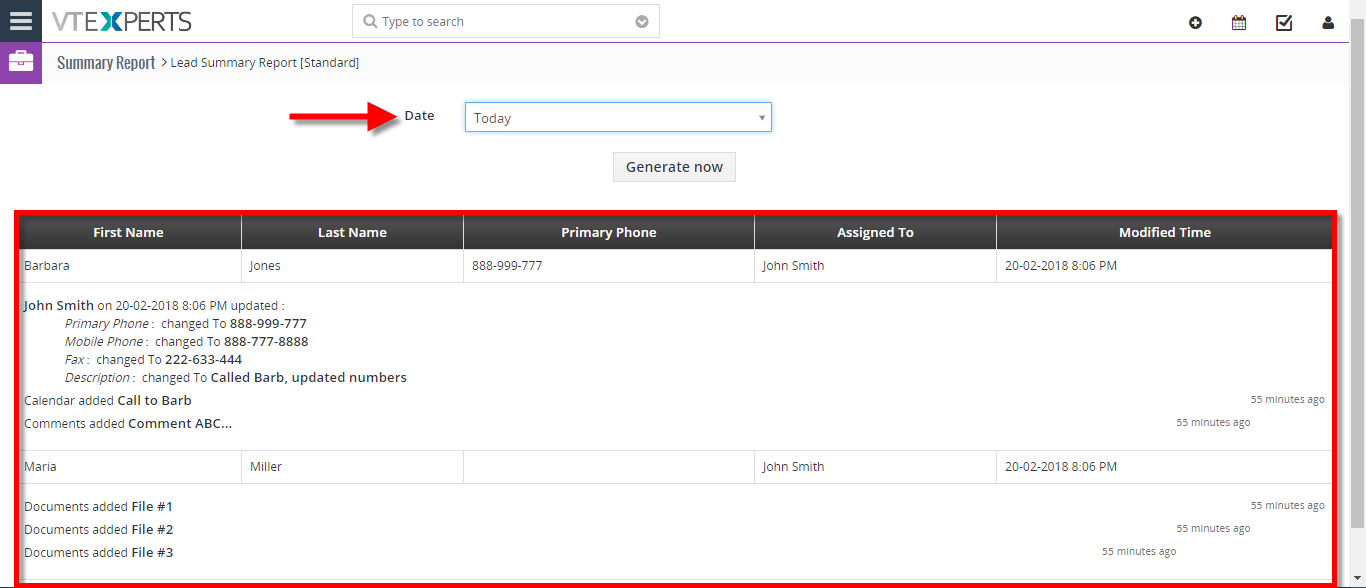
User Summary Report extension is designed to allow the system admin to see activity on certain records or list of records. It allows to monitor every created or updated record. How to View User Activity for the Day Go to the “Menu“. Click on the “Projects” and select “Summary Reports“. Click on a “Summary Report“. Here We can see the information such and First name, Last name, Address etc. Down below we can see the Updates made today. For further help, contact us on help@vtexperts.com. We’ll be glad to be of service.
Configure Custom Colors On Calendar Tiles In VTiger 7
February 20, 2018

Article
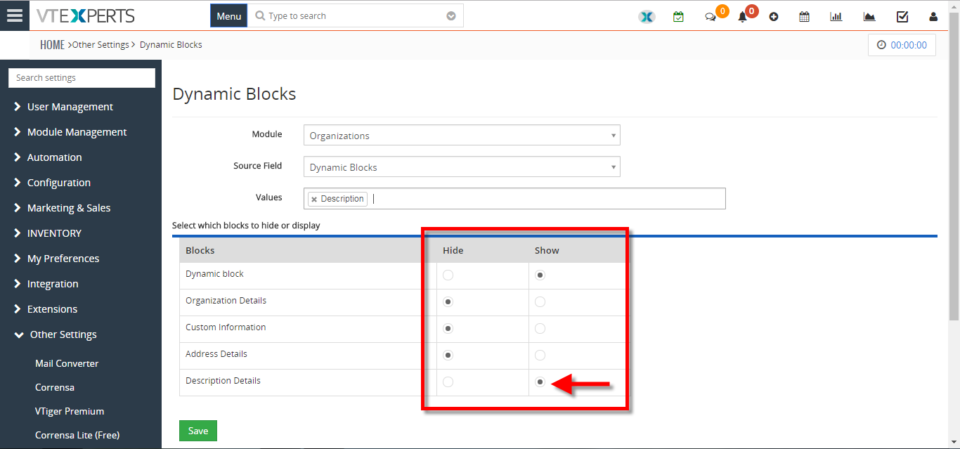
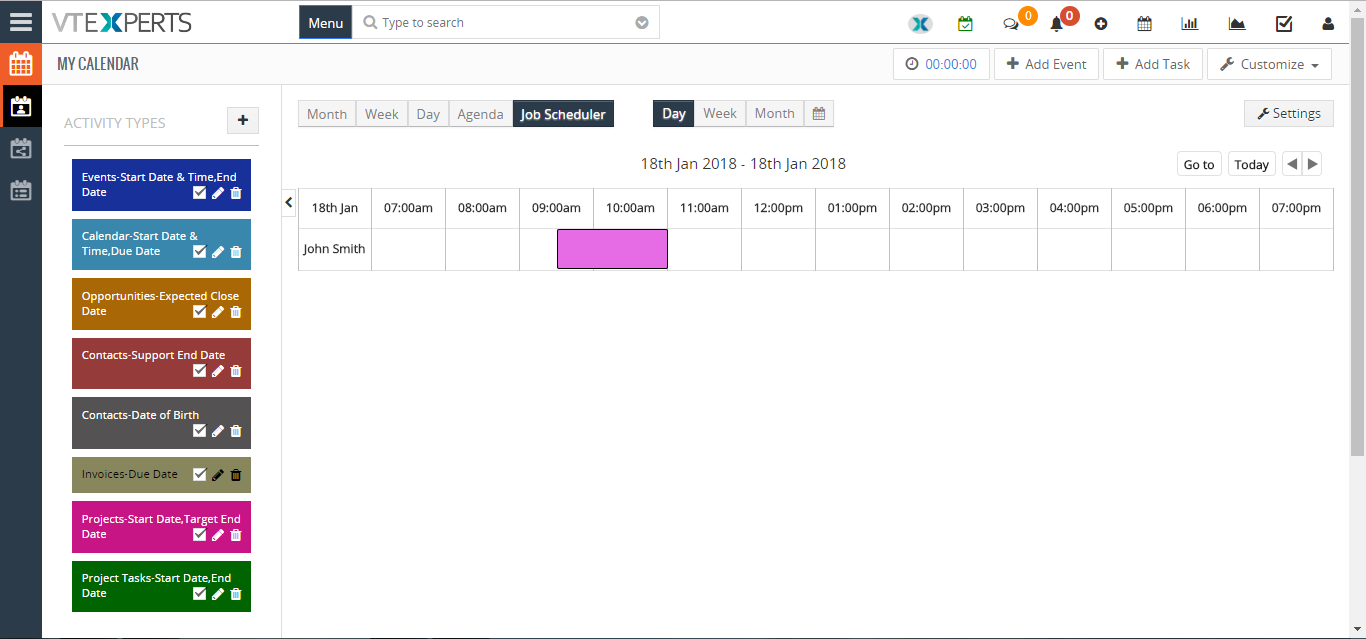
In Vtiger 7, User can pick the colors per user or Per status by using our VTiger Job Scheduler/Calendar extension which is a must-have for organizations that rely on calendar. How to Configure Custom Colors on Calendar Tiles Click on the “Calendar” icon on the top right corner of the screen. Click on the “Settings” button. Select “Yes” in the “Use Status Colors” option. Go to the “Picklists Values“. Select “Module” and click on the “Edit” icon. Than select the “Color” for picklist. Click on the “+ Add Value” button to add a status value. Add “Item Value” and select the “Color“. Create Event and select a “Status“. Here it will show the “Color tiles“. For further help, contact us on help@vtexperts.com. We’ll glad to be of service.
Customize Text On Calendar Tiles In VTiger 7
February 15, 2018
Article
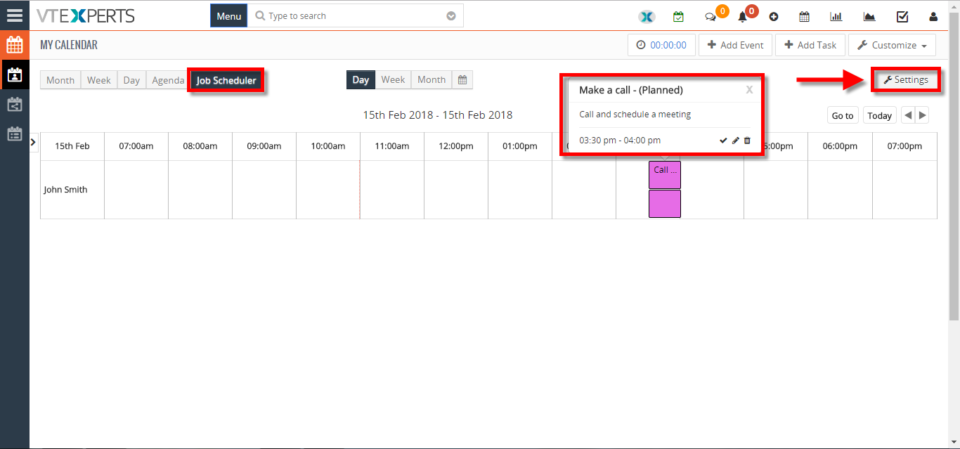
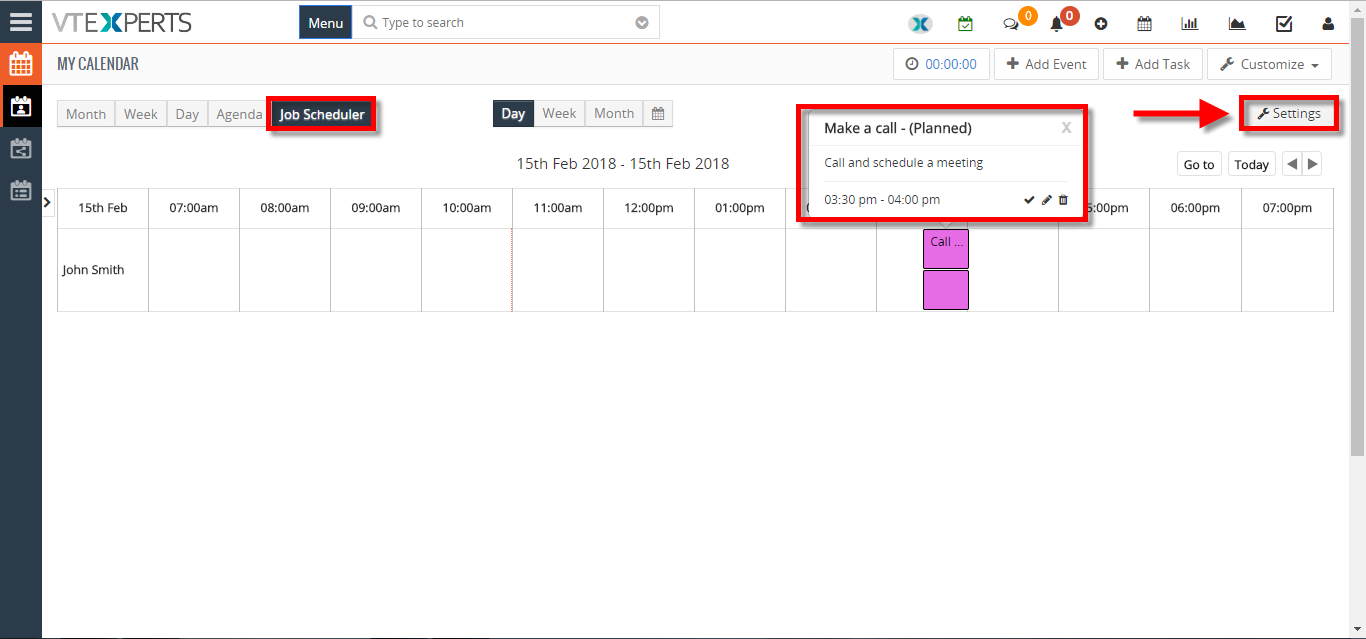
We enhanced standard VTiger calendar by adding a Job/Work Scheduler view. This allows users to see events assigned to each user without them overlapping onto other users/hours. Tile/Box text is configurable + unique colors can be assigned based on status (also configured by user). How to customize text on calendar tiles Click on the “Calendar” icon on the top right corner of the screen Select “Job Scheduler” and and click on the “Settings” button. Click on “Click here to configure tile & hover text“. Click on the “Edit” button. Here you can put any text or select form the fields that are related to this activity or task. For further help, contact us on help@vtexperts.com. We’ll be glad to be of service.
Create Product/Service Bundles In VTiger 7
February 14, 2018
Article
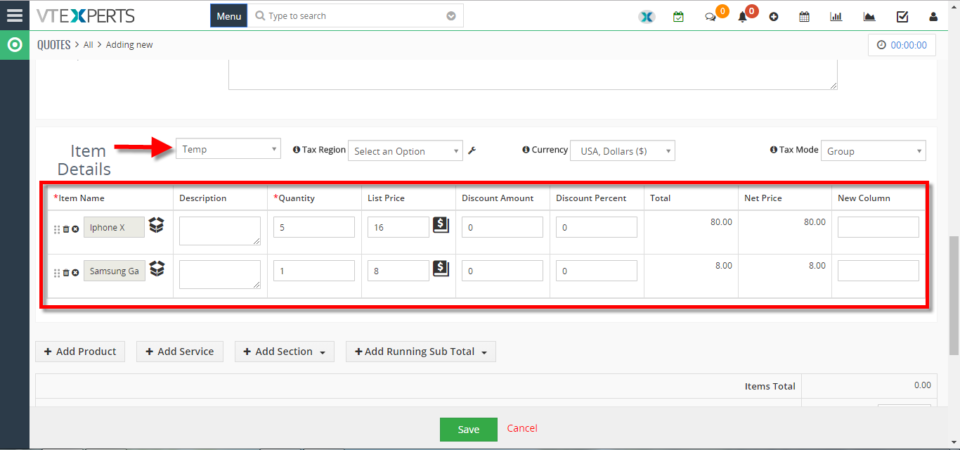
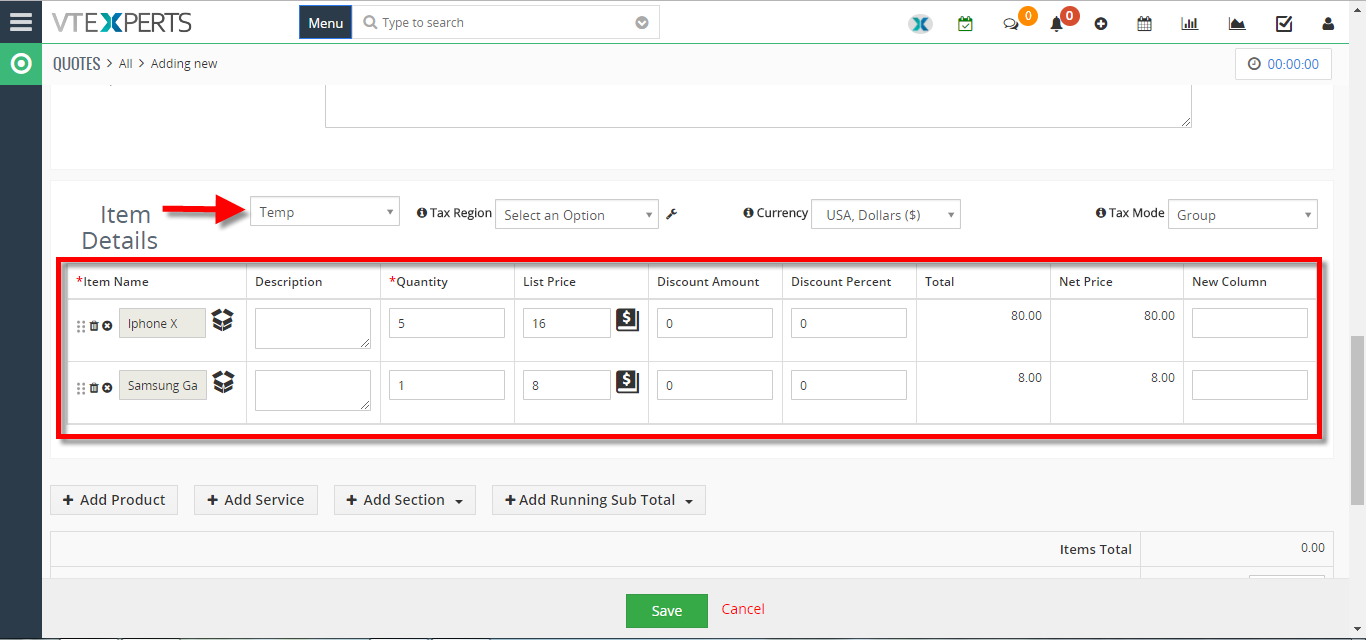
Quote/Invoice/Order Templates extension allows you to define products/services which can be reused on the quote/invoice/order at any time. If you often find yourself creating the same quotes/invoices/orders or adding the same set of items over and over again, this will be a huge time saver for you. How to Create Product/Service Bundles Go to the “Menu” and select “Product and Service Templates“. Click on the “+Add Template” button to create a new Template. Add “Template Name” and select “Module“. Now add “Products and Services” and click on the save button. Here you can see while creating a quote you can add “Product/Service Bundles“. For further help, contact us on help@vtexperts.com. We’ll be glad to be of service.

View Your Sales/Opportunity Forecast By Sales Rep In VTiger 7
February 8, 2018
Article
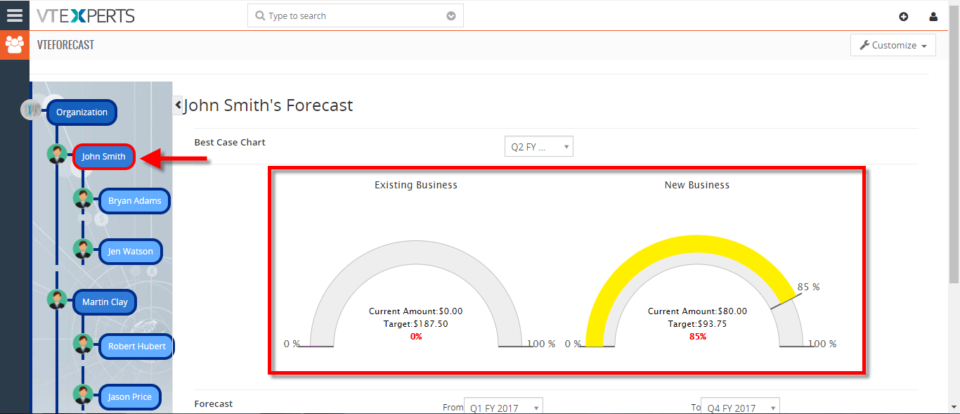
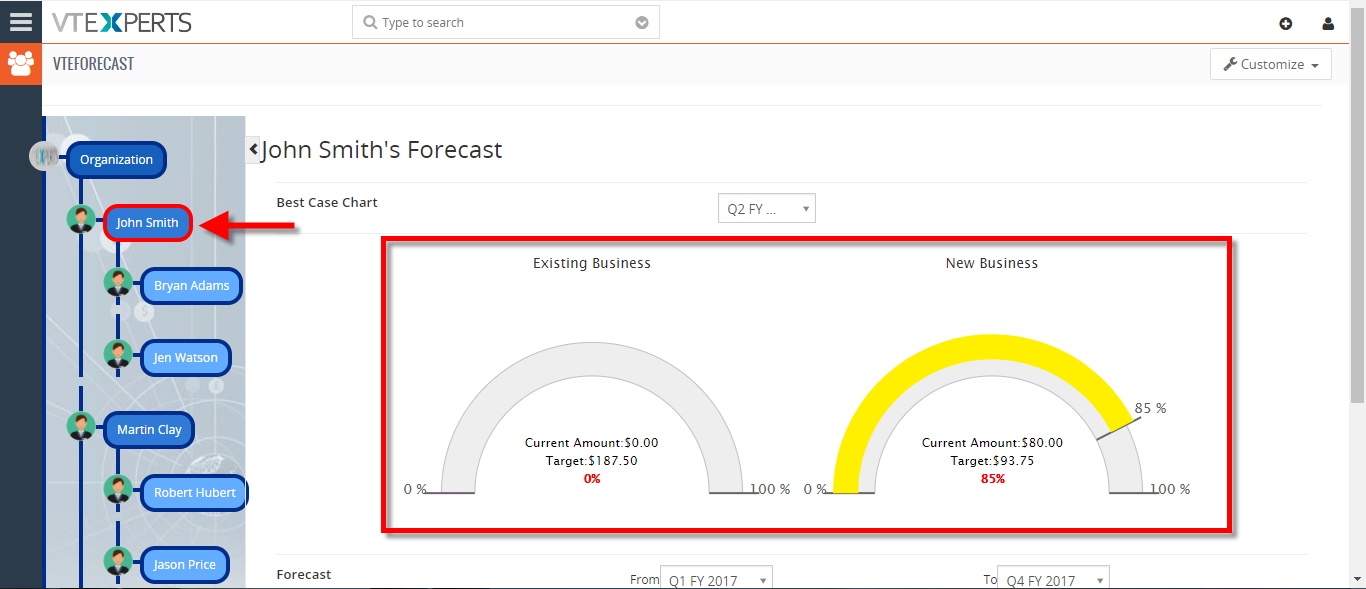
Sales Forecast for VTiger Extension was designed to help manage and predict Organization’s current and future Opportunities. It includes ability to view the entire company’s Opportunities as well as drill down to each Team or User. How to View Your Sales/Opportunity Forecast by Sales Rep Go to the “Menu” and select “CRM Settings“. Under “Other Settings” select “VTE Forecast“. Then click on the “View Forecast” button. You can view the Forecast for the entire organization or you can view it by sales team and the Sales Rep. For further help, contact us on help@vtexperts.com. We’ll be glad to be of service.
Add Tooltips Information Icons To Record Views In VTiger 7
February 6, 2018
Article
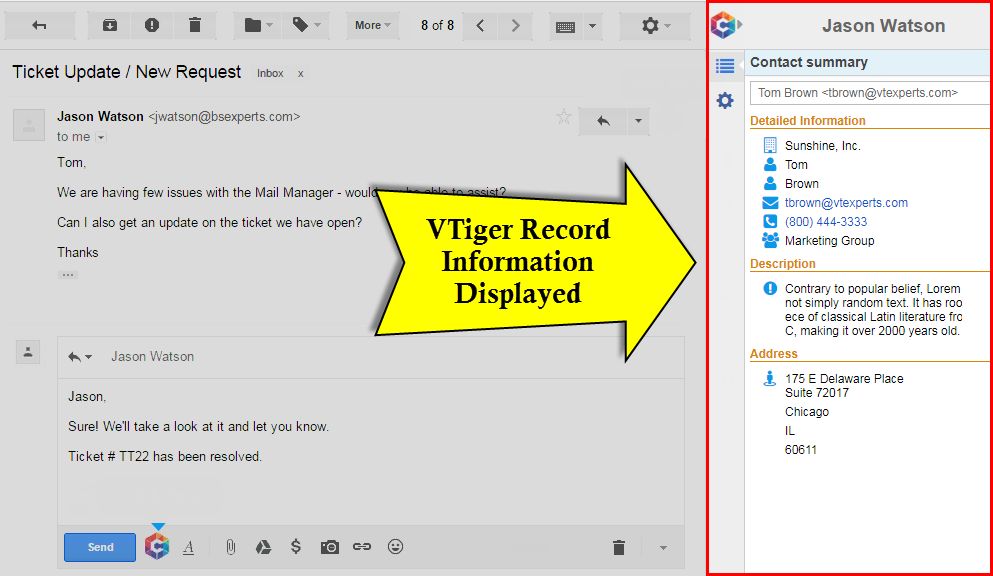
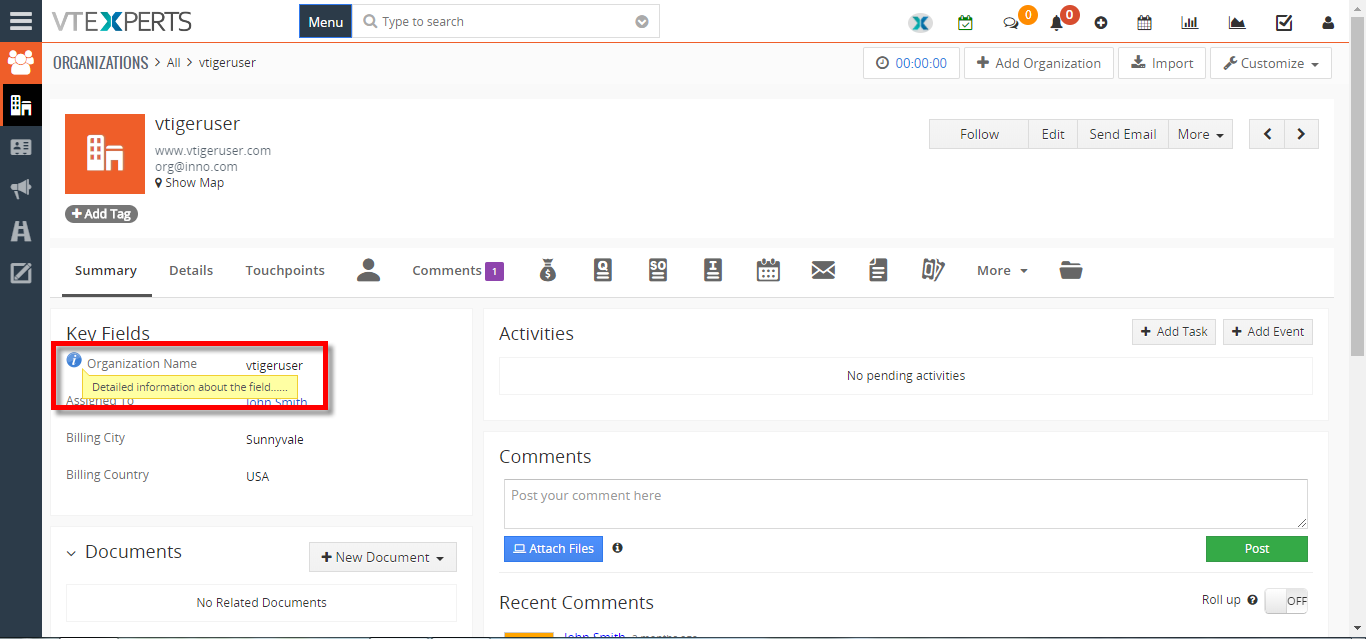
Field Tooltip Manager extension for VTiger is designed to enable and display helpful field tooltips on VTiger record views. How to Add Tooltips Information Icons Go to the “Menu” and select “CRM Settings“. Under “Other Settings” select “Tooltip Manager“. Select the “Module” and the “Field Name“. You can select a different “Icon” or upload a new one. Define the Tooltip content in the Rich Text Area. Here you can see the Tooltip Icon and the Tooltip in the record. For further help, contact us on help@vtexperts.com. We’ll be glad to be of service.
Transfer/Auto Fill Phone Number From Organization To A New Contact In VTiger 7
February 2, 2018
Article
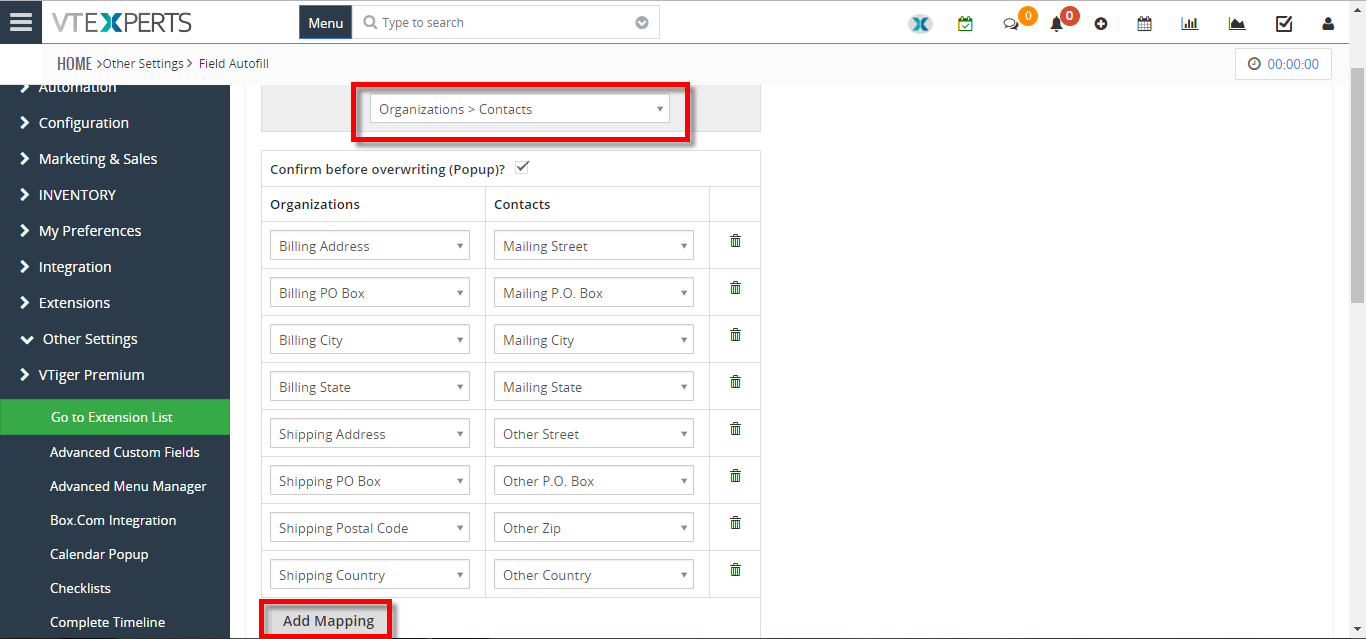
In Vtiger 7, User can avoid repetitive data entry when creating related records by using our Field Autofill extension. User can create a contact from within Organization and not have to re-enter Office Phone, Fax, Address, etc.. How to Transfer/Auto Fill Phone Number from Organization to a New Contact Go to the “Menu” and select “CRM Settings“. Under “Other Settings” select “Filed autofill“. Select the modules you want to automatically transfer data, for this example we’ll be using Organization to Contact and click on the “Add Mapping” button. Select the records from which you want the data to transfer to, for this example we are using Primary Phone to Office Phone. When creating a contact select an “Organization” and a dialog box will popup asking for to auto fill the fields with the selected organization data according to your configuration, by clicking on the “Yes” button it will automatically fill the fields.
Advanced Comments In VTiger Supports Rich Text Comments